Appointment booking allows you to set up private meetings and give students the opportunity to sign up for specific time slots. You can choose the times appointments are available, their duration, and the time between appointments. Students will be able to view available slots and reserve times. Once an appointment has been reserved, it will no longer be available.
NOTE: Available slots are available to all students in all your courses. If you want a specific set of appointments to be used by students in only one course, you will need to make that clear in your course.
Set Up Appointment Slots
- Click on [Collaboration] and select [Webex].
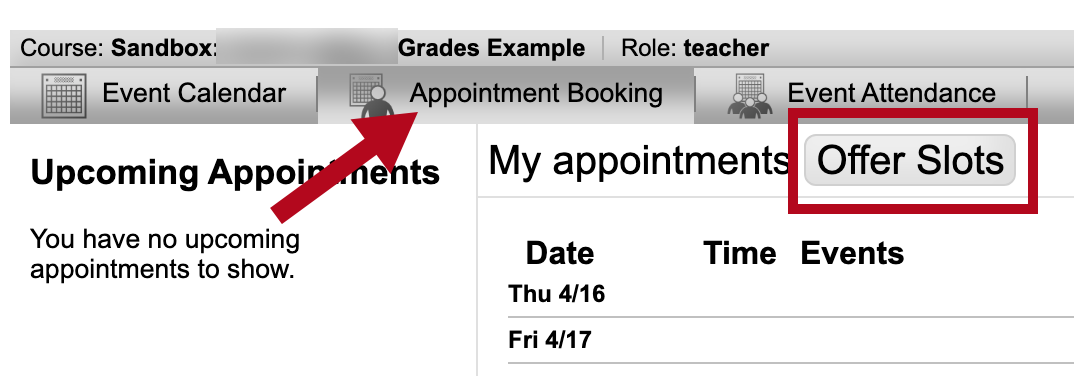
- Click on the [Appointment Booking] tab in your Webex calendar and then click [Offer Slots].
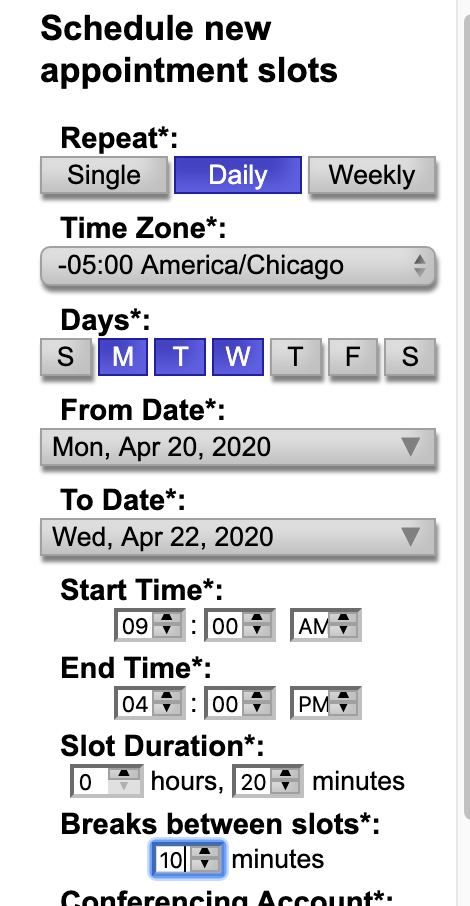
- Set up the options for your appointment slots. Pay close attention to all the options to make sure the slots are exactly when you want them to be.
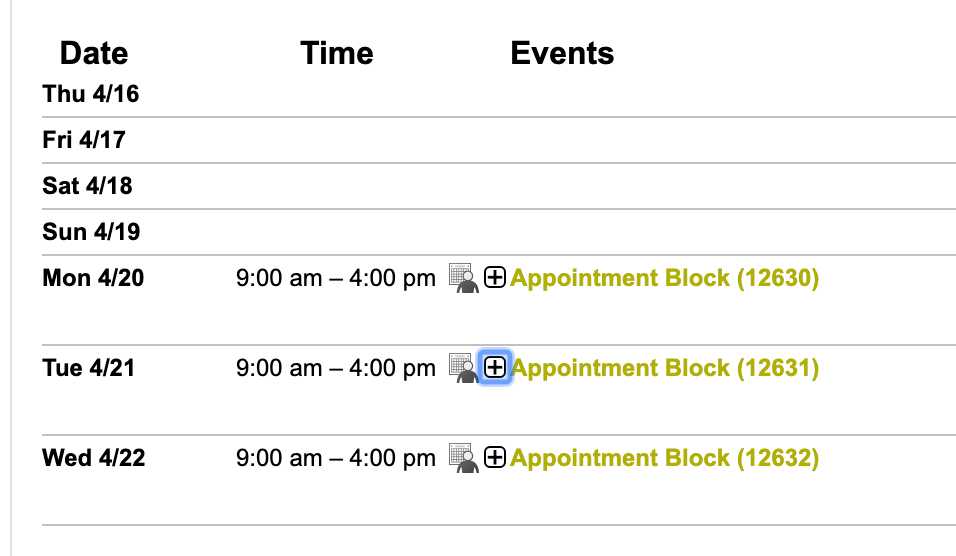
- Each time period for which you have created slots will show up as a block off time on your calendar.


Student Booking
- When your students log on, they should go to the Navbar and click [Collaboration] → [Webex].
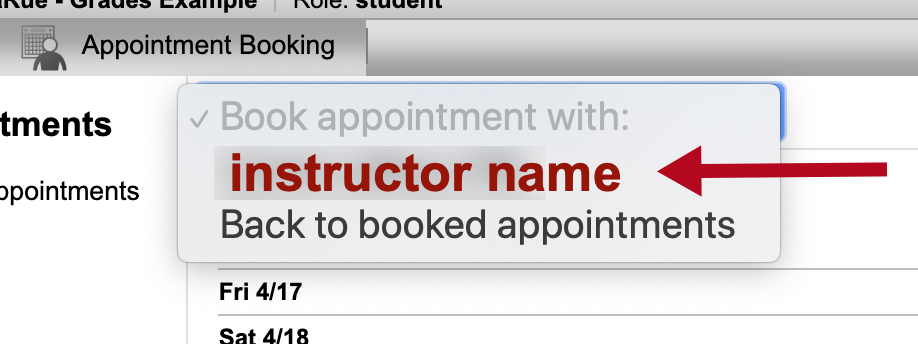
- They will choose your name from the [Book appointment with] dropdown menu.
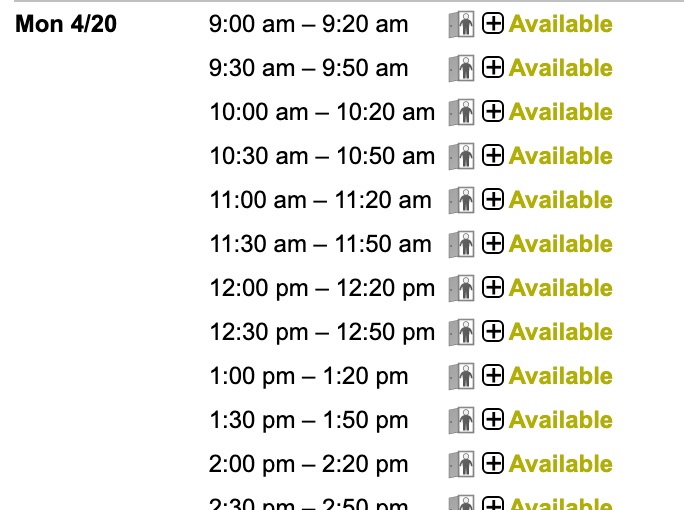
- The students will see a list of all available appointments.
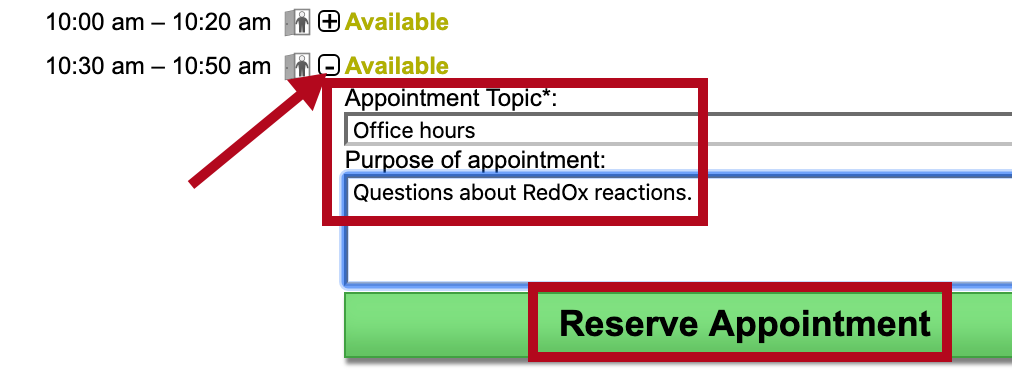
- Students will click the small [+] sign next to the appointment they want to reserve, which will open up a window to type in the name of the appointment and a description. Once those are filled out, they will click [Reserve Appointment].
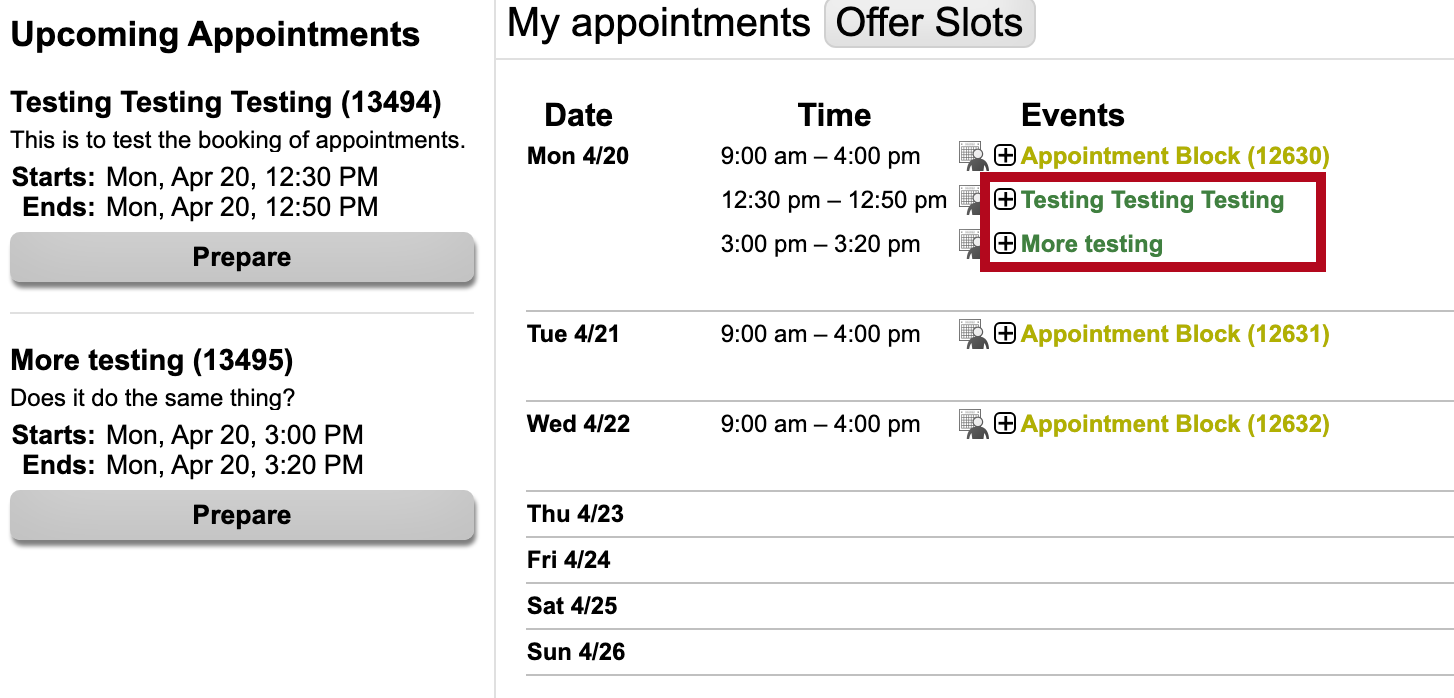
- Students will see any appointments that they have reserved in their Upcoming Appointments list in the left hand column.
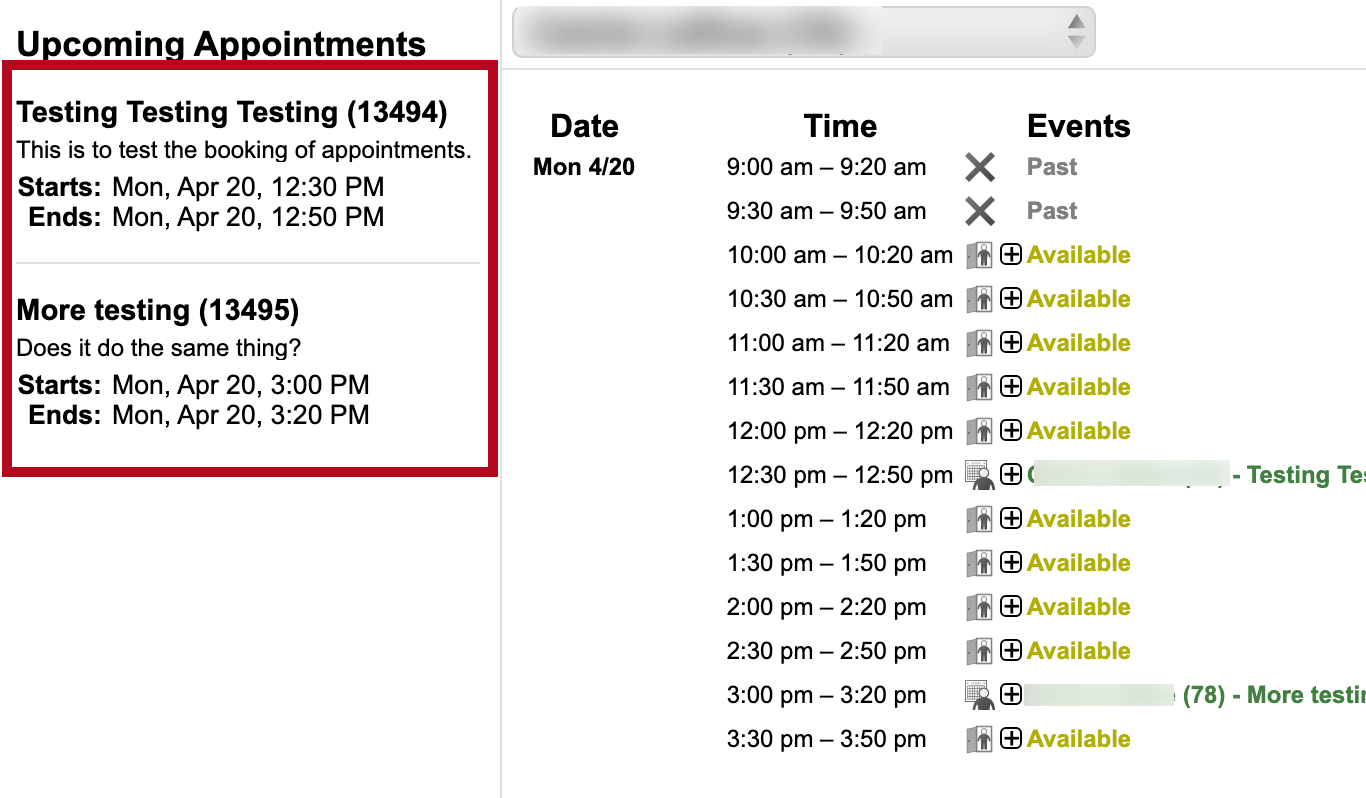
- Once students make an appointment, you will see it on your screen listed underneath your availability slots and under your Upcoming Appointments.
- When it is time for a student's appointment, start and host the meeting as usual. The student will see a [Join] button once the appropriate time has arrived.


Email Notifications
To setup email reminders for your Webex appointments, click on [Account Settings] next to your account name on the upper right corner. Then click on the [Email] tab from the left column to get to the Email Settings page.
