If you need assistance with Simple Syllabus, you can email support@simplesyllabus.com, or help@simplehighered.com, or visit the Simple Syllabus Support Center. Please note that you will need to create an account on Simple Higher Ed to access their Faculty support articles.
Simple Syllabus is Lone Star College’s official tool for creating and sharing course syllabi. It is integrated into D2L Brightspace and comes with pre-filled campus policies and course information. You can then add your own course-specific content, including the schedule, grading breakdown, and classroom policies. Once approved by your Syllabi Approver, your syllabus is immediately available to students in D2L and archived for future reference. This tool helps ensure a quick and a consistent syllabus process for all courses across all campuses. You can also access your syllabus from the Simple Syllabus Dashboard at lonestar.simplesyllabus.com.
- For more information on using the Simple Syllabus Dashboard, see Using the Simple Syllabus Dashboard.
- If you are a Syllabi Approver and need information on the approval process in the dashboard, refer to Using the Simple Syllabus Dashboard (For Approvers).
- For details on syncing between Simple Syllabus and D2L, see Simple Syllabus: Syncing Tentative Course Schedule with D2L.
- For additional training videos and resources, see Simple Syllabus Training and Resources.
Simple Syllabus Approval Workflow
This diagram outlines the Simple Syllabus approval workflow and approval scope by role. Approval permissions are hierarchical, with VPs able to approve all syllabi for their campus, followed by Deans, Chairs/Leads, and Faculty, each limited to their assigned divisions, departments, or courses.

Accessing the Syllabus Editor
To begin editing your syllabus, you’ll first need to access Simple Syllabus from within your D2L course. The tool is integrated directly into each official course shell and can be launched right from the course homepage.
NOTE: Simple Syllabus is only available in official course shells. It will not function in sandbox courses or community/group environments. To access and use the tool, you must be working within a live course section assigned through iStar.
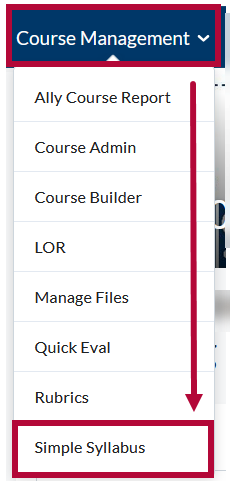
From your Course Homepage, navigate to [Course Management] → [Simple Syllabus]. This will open the Syllabus Editor for that course.
Editing Your Syllabus
In this section, you will learn how to update and customize the different parts of your syllabus. You can modify editable sections, add additional details, and review pre-filled content that cannot be changed. This ensures your syllabus is accurate, complete, and aligned with institutional requirements.
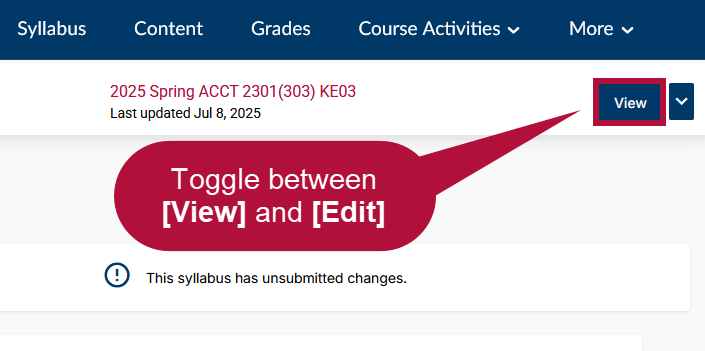
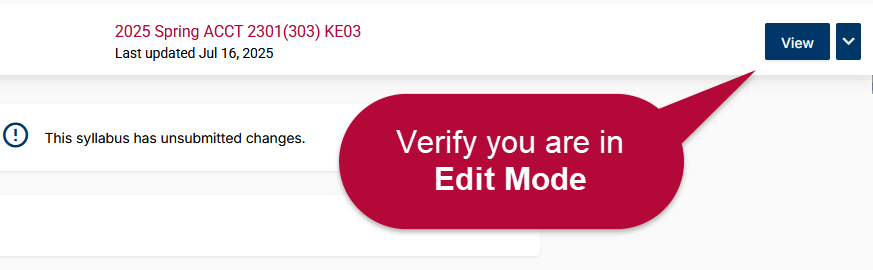
From the Syllabus Editor page, start by checking the [blue button] in the upper right corner of the screen:
- If the button shows [Edit], you are currently in View Mode. Click [Edit] to switch to Edit Mode.
- If the button shows [View], you are already in Edit Mode and can begin making changes.
NOTE: The [View] / [Edit] button label indicates the mode it will take you to, not your current mode.

You will see a structured template divided into several sections. This section will explain each part in detail below to help you understand what information to provide and how to complete your syllabus accurately.
NOTE: All optional components will have a slider located above each text box. You can use this slider to toggle the visibility of the component ON or OFF.
As you customize your syllabus by reviewing and adding content to each section below, you will notice that some information is already pre-filled. This data is automatically provided by Lone Star College to save you time. If any content requires changes, please reach out to your system admin or the Simple Syllabus Support team for assistance.
Course Information
Some information is automatically pulled from iStar and Kuali and cannot be edited. Such as in this example, the Course Name, Course Information, and the Description, Prerequisite(s) under the Course Overview section cannot be edited.

Optionally, you can add additional information in the text box below. Use the [slider] in the upper left corner of the text box to show or hide this component.

Instructor Information
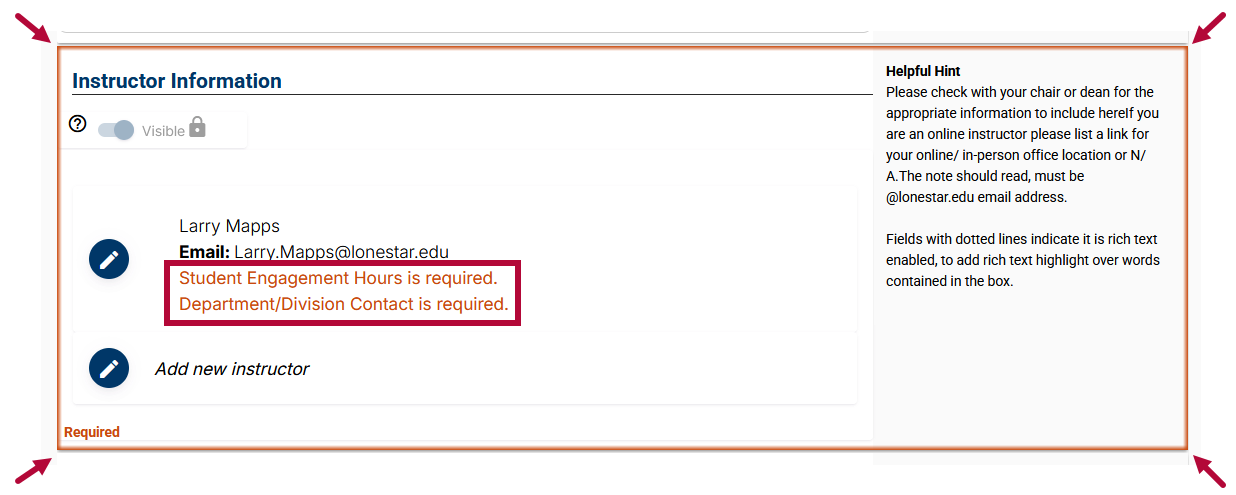
As you navigate the syllabus template, you may notice certain sections highlighted in orange. These areas require your input and must be completed before the syllabus can be published. Use the [pencil] icons on the left to edit each section as needed.
Example: The Instructor Information section below will appear in orange until you provide your contact details, office hours, or other required information.
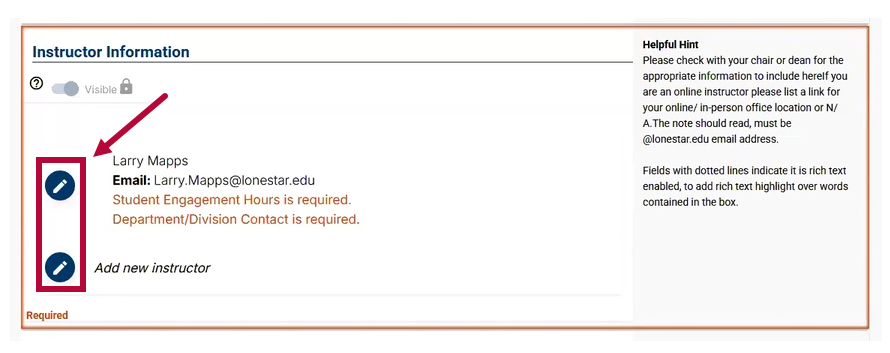
Required fields within each section are marked with a red asterisk.

Course Overview
This section provides a summary of your course, including the description, prerequisites, and key details students need to understand the scope and objectives of the class. The Description and Prerequisite(s) sections will have content automatically pulled from iStar.

Required Text(s) and Materials
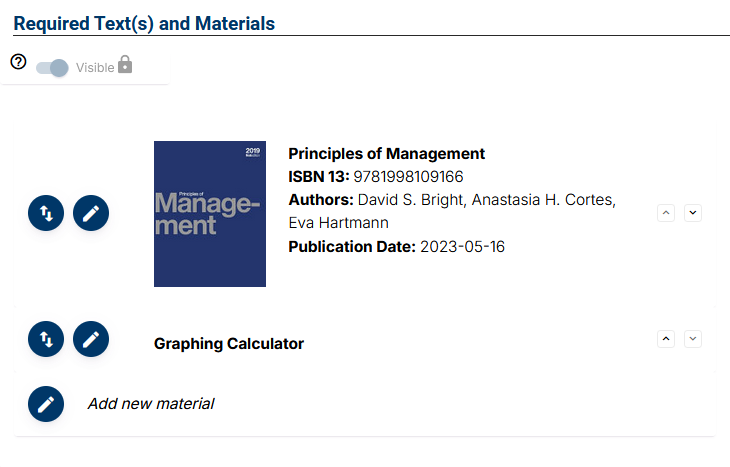
Here you will list all textbooks, readings, and other materials that students are expected to purchase or access for successful participation in the course. You can search for any book you need by using the search field and entering details such as the ISBN, title, author, or other keywords.
Simple Syllabus can connect to major bookstores such as Google, Amazon, and Barnes & Noble to help you locate book information quickly. However, VitalSource, which powers the LSC Virtual Bookstore, does not share book data with Simple Syllabus. Any titles from this provider will need to be entered manually.
Technology Requirements
Use this section to outline any hardware, software, or online tools that students must have to complete coursework and participate in class activities. The image below shows sample text. The box will be empty by default.

Important Course Dates
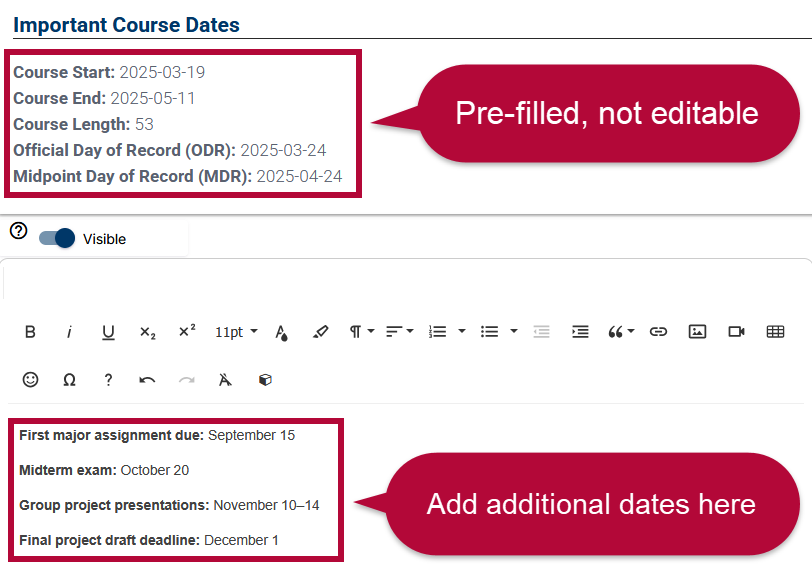
The top section is pre-filled with details pulled from iStar and cannot be edited within Simple Syllabus. Pre-filled dates include the Course Start, Course End, Course Length, the Official Day of Record (ODR), and the Midpoint Day of Record (MDR). You can add additional dates in the textbox below if needed.
NOTE: This information is particularly important for students receiving financial aid, as eligibility and disbursement often depend on maintaining enrollment through the Official Day of Record (ODR) and Midpoint Day of Record (MDR) deadlines.
Final Exam or Final Project Date
Provide the scheduled date and time for the final exam or project, along with any relevant details students need to prepare for this culminating assessment. This text box will be empty by default.

Grade Determination
This section allows you to explain exactly how students’ final grades will be calculated, including the weighting of assignments, exams, participation, and any other graded components. A template is provided for this section that you can customize to reflect your specific grading policy.

Instructor and Course Policies
Use this area to share your expectations for conduct, communication, attendance, late work, and any other policies specific to your course. This text box will be empty by default.

Lone Star College Policies
This section includes standardized institutional policies that apply to all courses, such as academic integrity, accessibility, and emergency procedures. This section is pre-filled and cannot be edited.

Student Support Services
This section provides information about the academic and personal support resources available to students, including tutoring, counseling, and technology assistance. If your students are experiencing challenges, please remind them that the college offers many resources to support their success. The table in this section lists the support services available to students. Additional resources can be found on the Student Resources page. This section is pre-filled and cannot be edited.

Tentative Course Schedule
The optional Tentative Course Schedule section allows instructors to outline a week-by-week or date-based plan for their course. This section is fully customizable and can include quizzes, assignments, and discussions to help students stay on track. This section does not pull dates or data from Content in D2L or from third-party tools such as McGraw-Hill or Pearson. If you do not plan to use this section, make sure to set its visibility to [Invisible] so students will not see it.
Unlike the Important Course Dates section mentioned earlier, which automatically lists institutional deadlines, the Tentative Course Schedule is customizable and centers on your instructional plan.
NOTE: You can update this section anytime during the term by editing dates in the original graded activities in D2L (such as quizzes, assignments, and discussions). Avoid editing synced items directly in the Tentative Course Schedule. Doing so will break the sync that allows the syllabus to pull updated information from your course activities. For more details, please refer to the Simple Syllabus: Syncing Tentative Course Schedule with D2L article.
To enable this section, scroll down to the Tentative Course Schedule section in Edit Syllabus and toggle the visibility switch to [Visible].

Accessibility Checker
Simple Syllabus includes a built-in Accessibility Checker to help ensure that your content is readable and accessible to all students, including those who use assistive technologies.
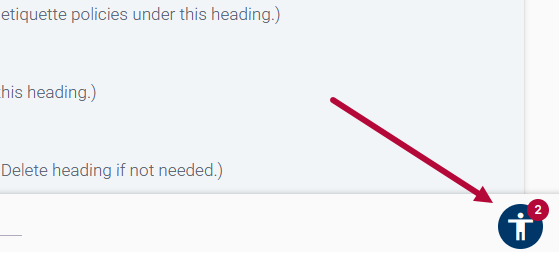
- While editing a section, click the [Accessibility Checker] icon (the universal accessibility symbol) located in the bottom-right corner of the editor to scan for accessibility issues.
In the example image below, the red number 2 displayed on the [Accessibility Checker] icon indicates that two accessibility issues have been detected in the section you’re editing. Clicking the icon will show a list of these issues with guidance on how to fix them.
- Click the [Accessibility Checker] icon to scan your content for common issues such as:
- Unformatted or improper lists
- Missing table captions or headers
- Non-sequential heading levels
- Low color contrast
- Missing alt text for images
- Empty heading fields
- Headings that are too long (over 120 characters)

For more details, see the Accessibility Checker article from Simple Syllabus. Please note that you will need to create an account on Simple Higher Ed to access their support articles.
Previewing and Submitting Your Syllabus
The [Preview] and [Submit] options in Simple Syllabus allow you to review your syllabus before making it available to students. Previewing ensures all required sections are complete and appear as intended, while submitting finalizes your syllabus for student access.
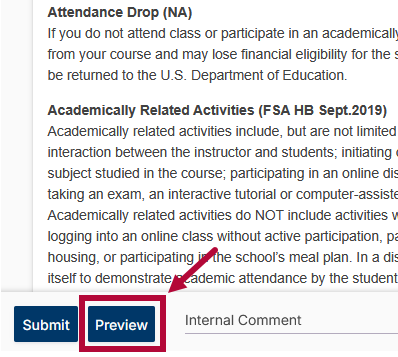
- On the Syllabus Editor page, click [Preview] in the bottom-left corner of the page.
- Review all sections for accuracy and completion. Any required sections that are incomplete will be highlighted in orange or display an orange alert message.
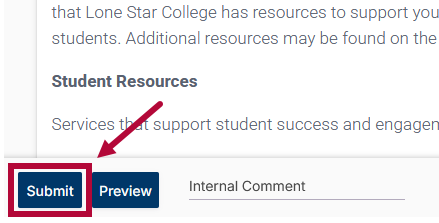
- When finished, click [Submit] to make your syllabus visible to students.
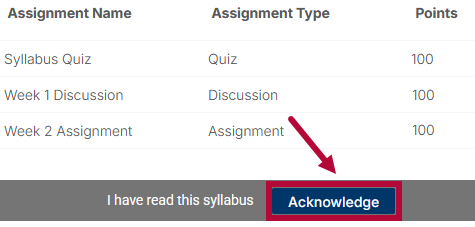
- Students will see an [Acknowledge] button towards the bottom of the page, which they must click to confirm they have reviewed the syllabus in full. This button will only appear once the student scrolls to the bottom of the syllabus.


Updating a Published Syllabus
You can update a syllabus after it has been published. Once the revised syllabus is approved by your approver, the new version will replace the previous one.
- From the Course Homepage, navigate to your syllabus via [Course Management] → [Simple Syllabus].

- Verify that you are in Edit Mode. If not, click [Edit] in the top-right corner.
NOTE: Recall from the Editing Your Syllabus section that the [View] / [Edit] button label indicates the mode it will take you to, not your current mode.
- Make your changes as needed. When finished, click [Submit] again to update. Students who have opted to receive notifications or updates to the D2L course will automatically be notified of any updates.


Saving or Printing Your Syllabus
After your syllabus is completed and published in Simple Syllabus, you can download or print a copy at any time for your records.
- Navigate to your Syllabus via [Course Management] → [Simple Syllabus].

- If you are not already on View Mode, click [View] in the top-right corner.

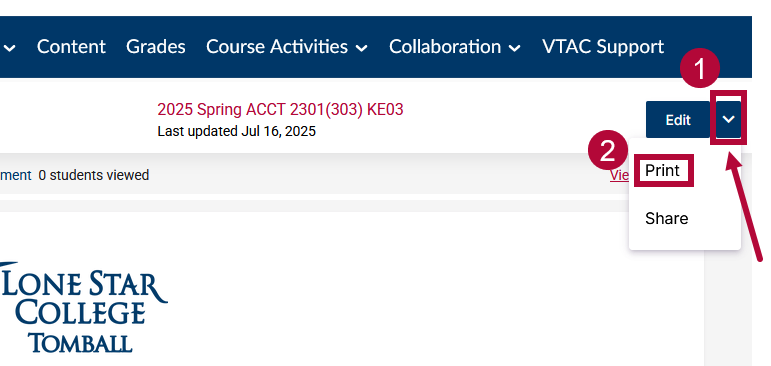
- Once you are in View Mode, click the dropdown arrow next to the [Edit] button in the upper right corner of the screen. From the dropdown menu, select [Print].
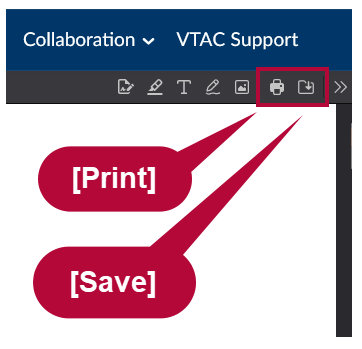
- You will find the [Print] and [Save] options located on the far right of the toolbar above the syllabus content.


Importing Content From Another Syllabus
Simple Syllabus allows you to reuse content from a previously created syllabus to save time and maintain consistency across courses. You can import content from your own past syllabi or from syllabi created by other instructors. After importing, review and update the details to ensure they are accurate for the current term.
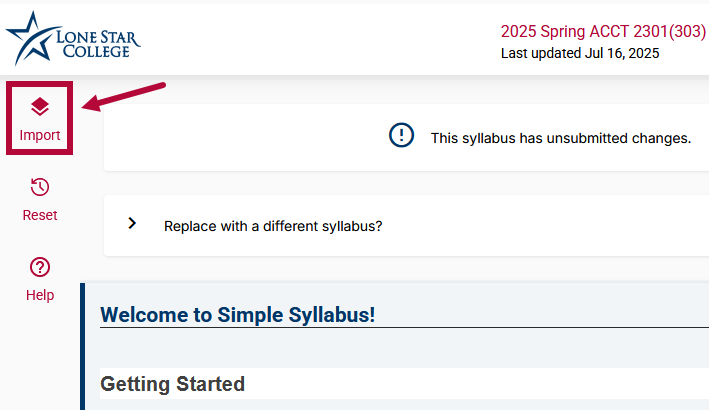
- Open the syllabus you want to import content into and ensure you are on the Edit Syllabus page. The button in the upper-right corner should display [View], which confirms you are currently in Edit Mode.
- Click [Import] in the top-left corner.


Select Source
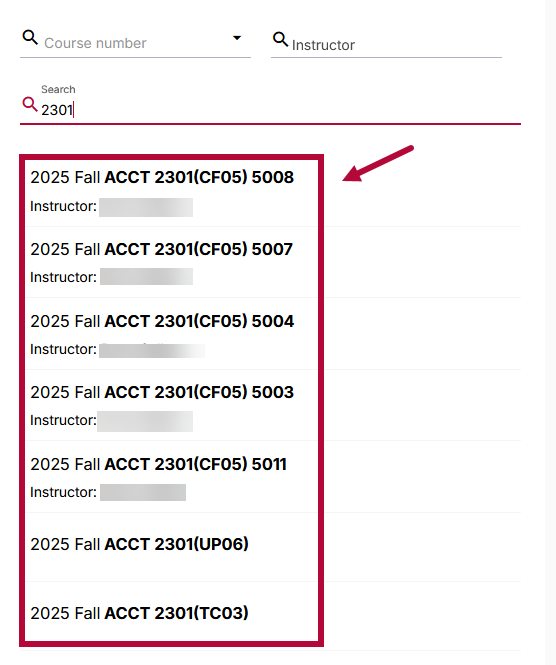
- Search for another syllabus using any of the following criteria:
Term, Subject, Course number, Instructor, or keywords.
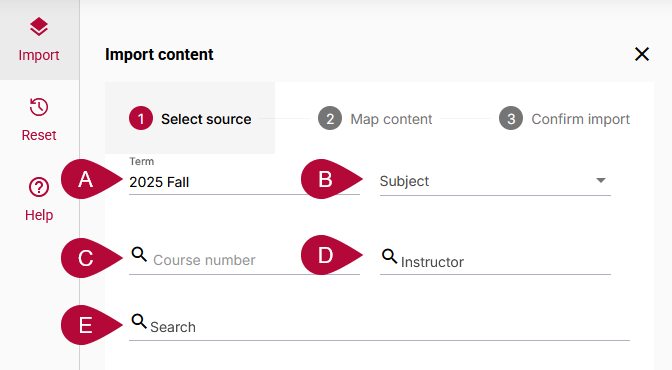
- From the results that appear in the [dropdown menu], select the course you want to copy the syllabus from.


Map Content
At this step, you have two options:
- To Copy All Content: Imports the entire syllabus as-is.
To copy all content, select [Finalize].
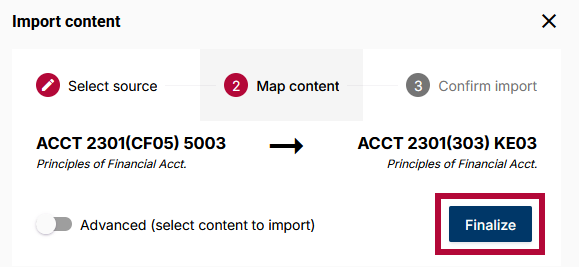
-
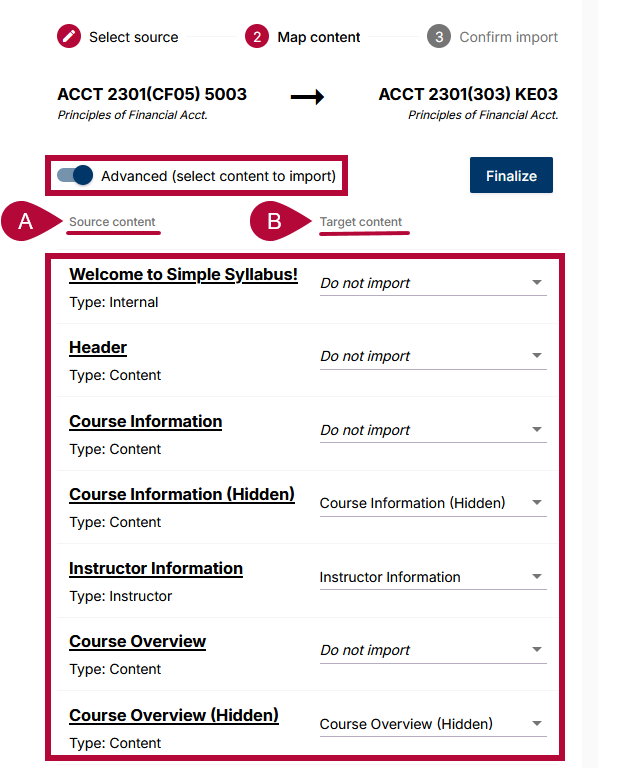
To Copy Select Components: Allows you to choose which sections to import. Toggle [Advanced (select content to import)] to display two columns:
A) Source Content - From the syllabus you are importing.
B) Target Content - Your current syllabus broken down by sections.
From here, you can choose which sections to include or exclude. Use the dropdown menu next to each option, and select [Do not import] for any items you wish to exclude.


Confirm Report
On the final step, review the content you selected to ensure everything is correct. When ready, click [Start import of the following content] to complete the process.

FAQ: Simple Syllabus
- Can I use Simple Syllabus in sandbox or development shells?
- No, only official course shells are supported
- No, only official course shells are supported
- What if my course shell is missing in Simple Syllabus?
- Verify you are working in an official course shell. If the issue persists, please contact VTAC Support.
- Verify you are working in an official course shell. If the issue persists, please contact VTAC Support.
- When will the syllabus template for the next semester be available?
- You will have access as soon as your course sections appear in D2L.
- You will have access as soon as your course sections appear in D2L.
- There is incorrect course information on my syllabus. How do I fix it?
- Information is pulled from iStar. Update iStar, and the syllabus will refresh automatically.
- Information is pulled from iStar. Update iStar, and the syllabus will refresh automatically.
- Do we still need to upload a copy of our syllabus to the iStar portal?
- No, you are no longer required to upload a PDF version to iStar after publishing in Simple Syllabus.
- No, you are no longer required to upload a PDF version to iStar after publishing in Simple Syllabus.
- If I am teaching a merged course, can I copy content from one syllabus to another?
- Courses that need to be merged should be merged before you begin building your syllabi. Each section within a merged course requires its own syllabus record, so every merged section must have a completed syllabus in Simple Syllabus.
NOTE: If you are using the auto-synced Tentative Course Schedule it will only work in the primary section's syllabus; the secondary section's syllabus would have to use the manual Tentative Course Schedule.
- Courses that need to be merged should be merged before you begin building your syllabi. Each section within a merged course requires its own syllabus record, so every merged section must have a completed syllabus in Simple Syllabus.
- Can we insert a table for Learning Outcomes?
- Most outcomes will import automatically, but you can format them as needed.
- Most outcomes will import automatically, but you can format them as needed.
- Are adjunct instructors required to list engagement hours?
- Adjunct faculty are not assigned formal engagement hours but are expected to be accessible to students. In the required field, they can include a statement such as: “While I do not hold regular office hours, I am available by appointment. Please email me with your availability to set up a meeting.”
- Adjunct faculty are not assigned formal engagement hours but are expected to be accessible to students. In the required field, they can include a statement such as: “While I do not hold regular office hours, I am available by appointment. Please email me with your availability to set up a meeting.”
- Can faculty attach a PDF copy of the syllabus to the Acknowledge Syllabus assignment?
- While technically possible, this is not recommended. Simple Syllabus tracks valuable engagement data, including whether students have viewed the syllabus and clicked [Acknowledge]. Uploading the syllabus elsewhere may result in the loss of these insights, which are visible to faculty through the dashboard.
- While technically possible, this is not recommended. Simple Syllabus tracks valuable engagement data, including whether students have viewed the syllabus and clicked [Acknowledge]. Uploading the syllabus elsewhere may result in the loss of these insights, which are visible to faculty through the dashboard.
- Will activities from third-party tools (e.g., McGraw-Hill, Pearson) appear in the Tentative Course Schedule?
- No. Activities or assessments from third-party integrations such as McGraw-Hill Connect, Pearson, or other publisher tools do not sync with Simple Syllabus as these tools are external to D2L.
- No. Activities or assessments from third-party integrations such as McGraw-Hill Connect, Pearson, or other publisher tools do not sync with Simple Syllabus as these tools are external to D2L.
- What is the default font used for text in Simple Syllabus?
- The default font is Roboto. If Roboto is not installed on the user’s system, it will default to Helvetica Neue, and then to a plain sans-serif font.
FAQ: Simple Syllabus and Course Merges
- If I merge multiple course sections in D2L, do I still need to complete a syllabus via Simple Syllabus for each lecture section?
- Yes. A separate syllabus must be filled out for each merged section, even if the courses are merged in D2L. This includes lab sections that are merged as secondary course shells under a Primary Course Offering. See the Using Simple Syllabus for Merged Courses article for more info.
- Yes. A separate syllabus must be filled out for each merged section, even if the courses are merged in D2L. This includes lab sections that are merged as secondary course shells under a Primary Course Offering. See the Using Simple Syllabus for Merged Courses article for more info.
- If I merge my courses after creating a syllabus in Simple Syllabus, will I lose the syllabus content I’ve already entered?
- No, you will not lose your syllabus content. Syllabi in Simple Syllabus are tied to sections, not to the Brightspace course shell. When courses are merged in D2L, the individual sections still exist, so the syllabi assigned to those sections remain intact.
- No, you will not lose your syllabus content. Syllabi in Simple Syllabus are tied to sections, not to the Brightspace course shell. When courses are merged in D2L, the individual sections still exist, so the syllabi assigned to those sections remain intact.
- Do I need to copy and paste my syllabus content into a Word document as a backup before merging?
- While your syllabus will remain intact, creating a backup is always a good precaution. If you have significant edits, saving a local copy can provide peace of mind.
- While your syllabus will remain intact, creating a backup is always a good precaution. If you have significant edits, saving a local copy can provide peace of mind.
- What happens to the Tentative Course Schedule after merging?
- The Tentative Course Schedule syncs only with the primary course shell in Brightspace. If you have a secondary section, its Tentative Course Schedule will not automatically sync. Faculty will need to update this portion manually if your syllabus is in a secondary section.
- The Tentative Course Schedule syncs only with the primary course shell in Brightspace. If you have a secondary section, its Tentative Course Schedule will not automatically sync. Faculty will need to update this portion manually if your syllabus is in a secondary section.
- If a student is in a secondary section and clicks the Syllabus link in the Navbar, will they see the correct syllabus?
- Yes. Students will be directed to the syllabus assigned to their section, even after the course merge. They will not need to navigate through the dashboard manually.
Additional Resources and Support
- For additional assistance, you can contact Simple Syllabus Customer Support by emailing support@simplesyllabus.com, or help@simplehighered.com, or by visiting the Simple Syllabus Support Center, where you will find guides, video tutorials, and answers to common questions.
Please note that you will need to create an account on Simple Higher Ed to access their Faculty support articles.
- For a more in-depth walkthrough, including video tutorials and recordings of past training sessions, please refer to the Simple Syllabus Start Training article on VTAC.