The first section of the right panel is the Availability Dates & Conditions section. Expand it by clicking on [Availability Dates & Conditions].

The Availability Dates & Conditions section of the right panel consists of five subsections.
- Start Date / End Date
- Release Conditions
- Special Access
- Password
Start Date & End Date
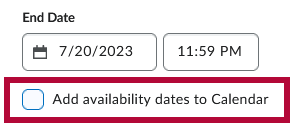
By clicking on the [Start Date] and [End Date] fields, you can specify a date/time on when your quiz ends or a date range in which your quiz is available to students.

Quiz dates can also be added to your Course Calendar by checking the [Add availability dates to Calendar] checkbox, located below the [End Date] fields.

NOTE: Start Dates, Due Dates, and End Dates, all have their own separate events in the course calendar.
An important distinction between Due Dates and End Dates:
- The Due Date is the date after which quiz submissions will be flagged late.
- The End Date is the date after which the students will be unable to access the quiz.

In this example, the 24 hours between 7/19 11:59 PM and 7/20 11:59 PM can be seen as a Grace Period in which students can still submit their quiz, although it would be flagged as late. After the End Date, students will no longer be able to access the quiz.
Release Conditions
By setting up Release Conditions, students will not be able to access or view the quiz unless they meet the Release Conditions.
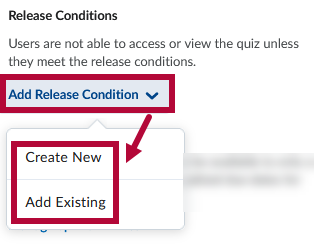
- Click on [Add Release Condition] to toggle the options to [Create New] or [Add Existing].

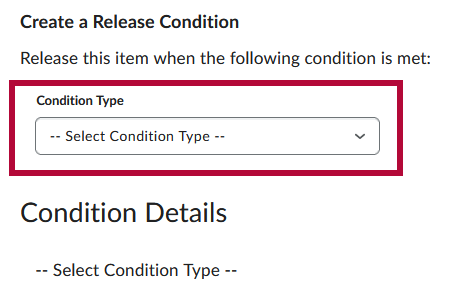
- Clicking on [Create New] will open the Create a Release Condition window.

NOTE: Please refer to the list of Release Condition Types and Best Practices for Release Conditions for more details on how to setup and configure Release Conditions.
Special Access
[Manage Special Access] allows quizzes to be available to only a select group of students or individualized due dates for certain students. Please refer to the article on Granting Students Special Access in a Quiz for more details.

Password
To access a quiz, students must enter the same Password you input here.
NOTE: You can also enter a password in the LockDown Browser Dashboard. This could result in the student being required to enter two different passwords at two different times. Please be aware of that possibility.
IP Restrictions
Students can only access a quiz from the IP address ranges you specify here. Leave fields blank to allow multiple IP address access points. Click on [+ IP Range] to add an IP address range. You can add multiple IP address ranges.

To specify a range of accepted IP addresses, enter four sets of values ranging from 0 to 255 separated by a period in the IP Range Start and IP Range End fields, respectively. An example IP address would be [155.55.5.15]. The IP Range Start value must be lower than the IP Range End value.
To include an individual IP address, only specify the IP Range Start value.
NOTE: Please contact your local campus IT for assistance with IP Restrictions for in-person exams.


