You can record your Webex meeting for later review by your students and add the link to your D2L course. Webex recordings take some time generating, so you will not see them immediately on the Recordings section of the site.
Record a Meeting
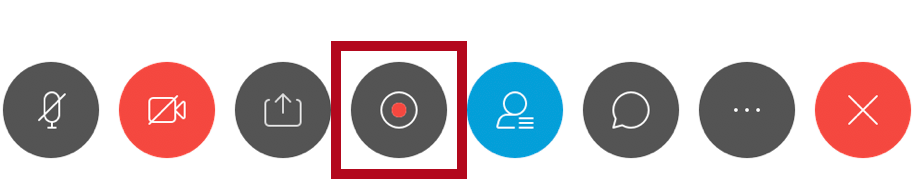
- Start your Webex meeting. Once the meeting has begun, you will see a Record button when you hover at the bottom of the screen.
- Click the Record button and you will see the recorder. Click on the red Record button.
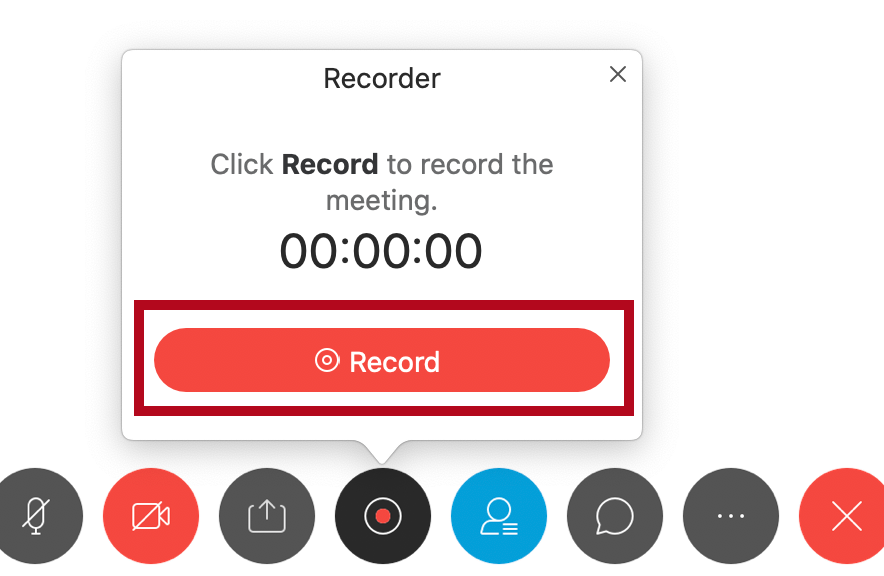 You may see the option to record your meeting either in the cloud or on the computer. You should choose Record in cloud.
- Once your recording has started, you will see two options - Pause and Stop.
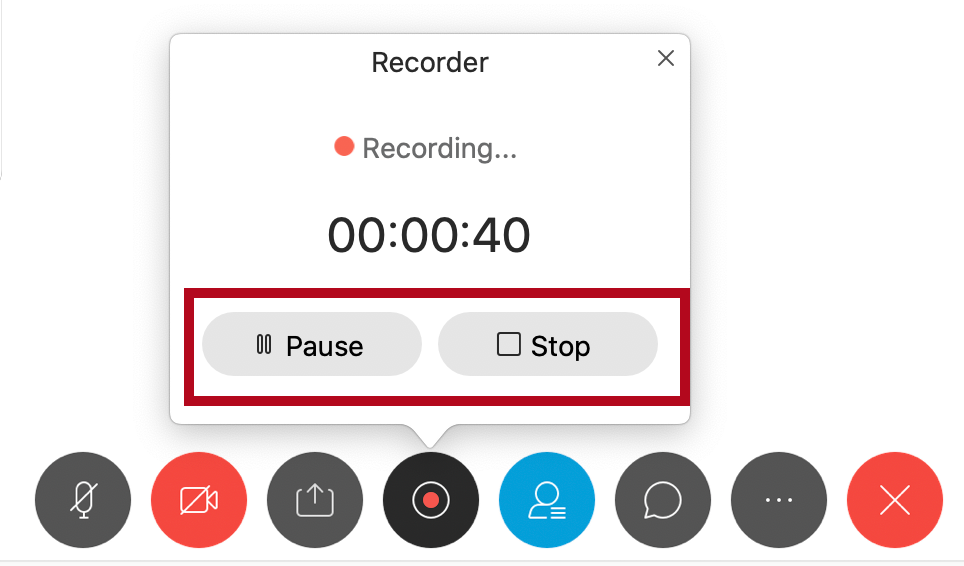
- If you click on the Pause button, you can resume your recording at any point in the meeting. This will result in one recording and one file.
- If you click the Stop button, you can't resume recording. You will have to start a new recording, resulting in two recordings and two files.
- If you are unsure, Pause your recording, then you can Stop if necessary without any detrimental effects.
- When you are done, click the Stop button.

 You may see the option to record your meeting either in the cloud or on the computer. You should choose Record in cloud.

At this point, the recording will be generated by the Webex service. This is not an instantaneous process and may take up to 24 hours - the longer the meeting the more time it will take. Once it has been generated, you can add a link to the recording in your D2L course.
Add a Recorded Webex Meeting to Your Course
- Go to lonestar.webex.com.
- Click the Sign In button in the top right corner and enter your LSC login credentials.
- Click on Recordings in the left-hand column.

- You will see a list of all the Webex recordings you have made.
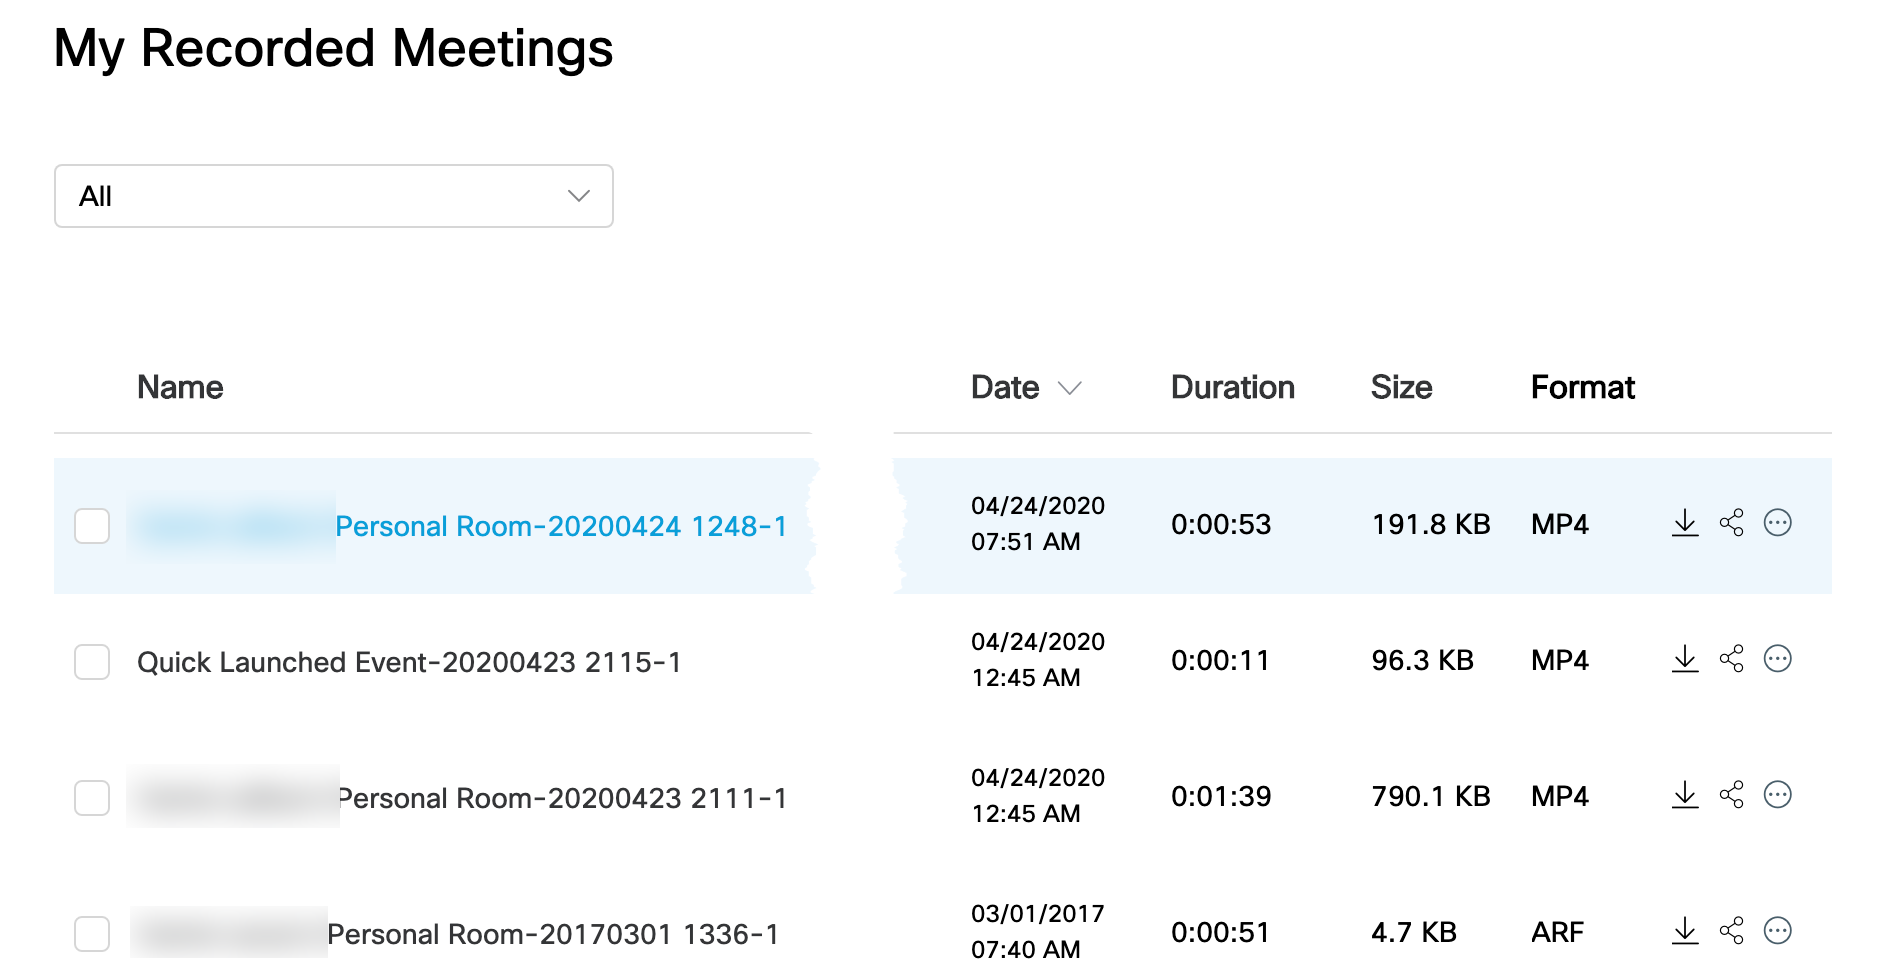
- Choose the meeting you want to share, and click the Share button.

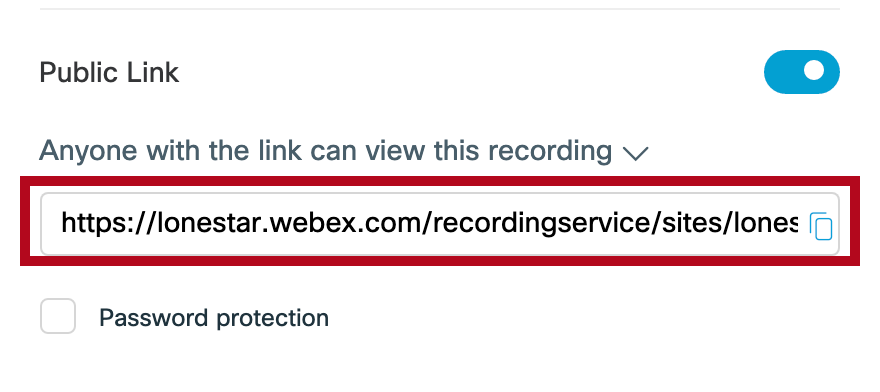
- You will see a Public Link. Copy that link.
- Log in to your D2L course and navigate to the module where you want to insert the recording.
- Click the New button and choose Create a Link.
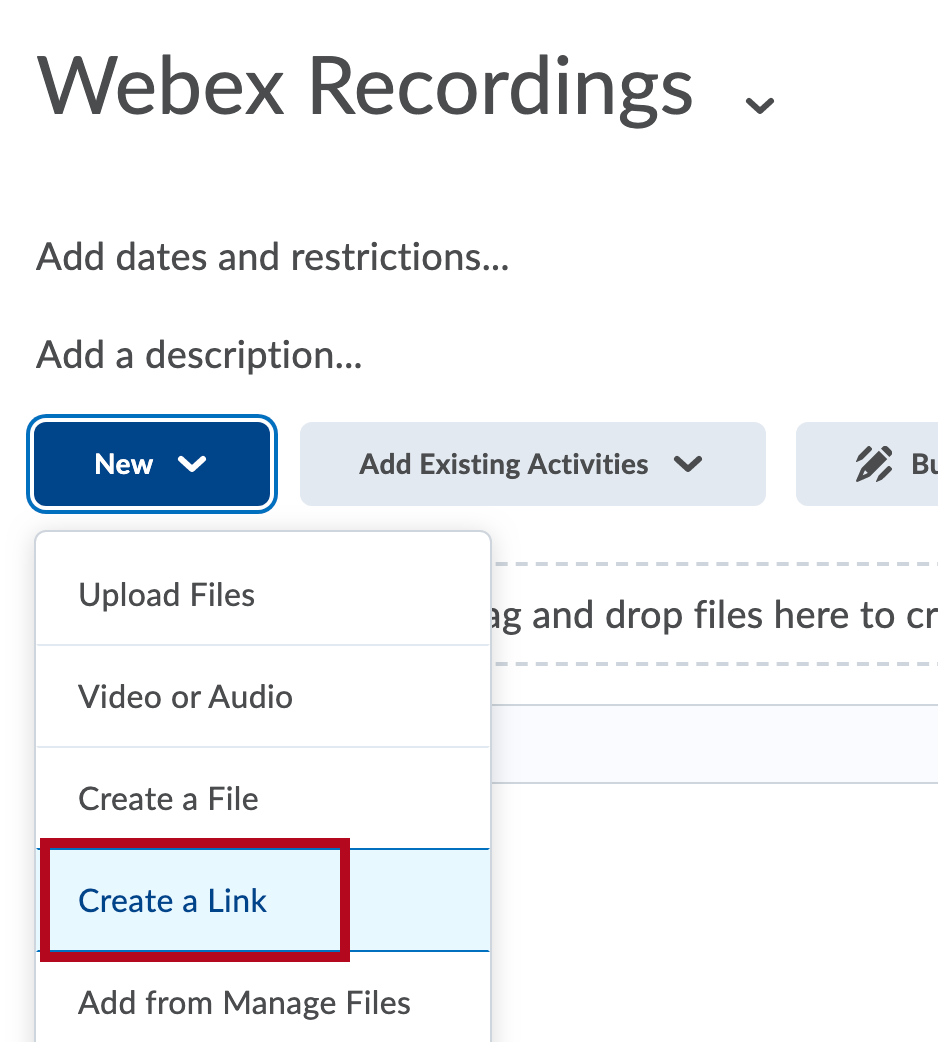
- Give your link a Title, paste in your URL, and check the box next to "Open as External Resource." Then click the Create button.

- When your students click on the link, they will be taken to your recorded Webex.


