Create categories in the gradebook to organize different types of items such as quizzes, discussions, or assignments. The gradebook must match your syllabus as closely as possible. Before creating Categories determine which type of grade book you need. See The Difference between a Weighted and Points Gradebooks and Add a Column in the Gradebook for a more complete understanding.
- From the navbar, click Grades, and then click Manage Grades from across the top.
- Click the blue New button, and then select Category.
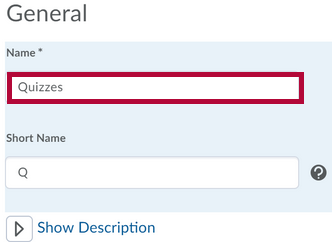
- In the Name field, enter a name for your category.
- (Optional) In the Short Name field, enter a short name that displays in the gradebook (students will never see the short name).
- (Optional) Click the Show Description link to add a description for the category.
- For a Weighted Gradebook:
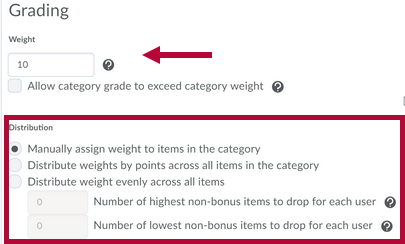
- In the Weight field, enter the weight (%) the category will contribute to the final grade. Grade items in the category contribute toward this weight.
- Select the [Allow category grade to exceed category weight] option to allow students' grades for the category to exceed 100%.
- Select the grading distribution for the category.
NOTE: If you want all the grade items within the category have equal weight, we advise you to choose the third option: [Distribute weights evenly across all items].
- For a Points Gradebook:
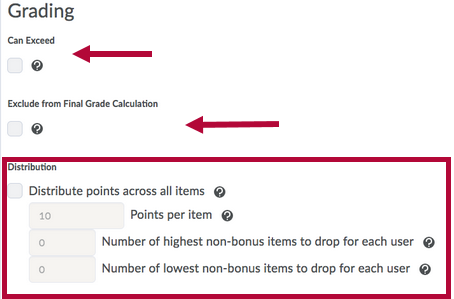
- Select the [Can Exceed] check box to allow students' grades for the category to exceed the maximum number of points available in the category.
- Select the [Exclude from Final Grade Calculation] check box in order to exclude the category from being calculated in the final grade.
- Select the [Distribute points across all items checkbox] if you want all the items in a category to have the same number of points.
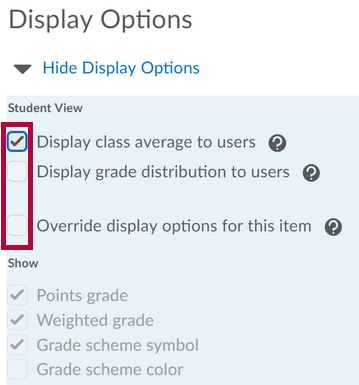
- For either type of gradebook, select the display options for the category.
- Select the [Restrictions] tab, and then select if the category will be visible for only a certain time frame.
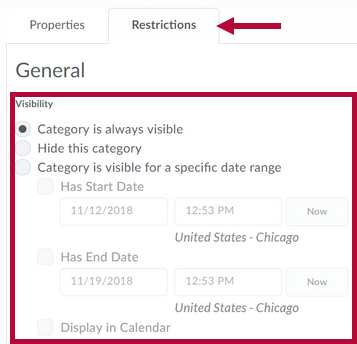
NOTE: If you select the [Hide this category] option, none of your students will be able to see that grade item, even if it has been released.
- Click [Save and Close].


Moving Grade Items to the New Category
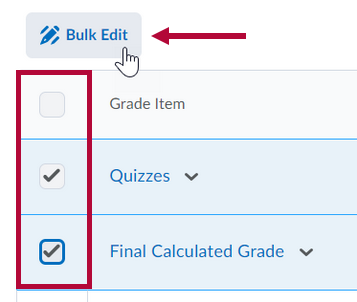
- From the Manage Grades view, select the [checkboxes] next to the grade item names, and then click the [Bulk Edit] icon.
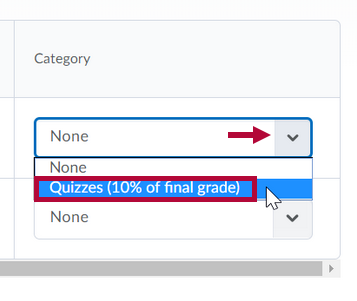
- Scroll to the Category heading.
- Use the drop-down list to select the category for the grade item.
- Click [Save]. The grade items now display in the assigned category.

