The direct link to LSC Zoom: https://lonestar-edu.zoom.us/
You can add a virtual meeting to your course using the Zoom integration in D2L. You can do this through the Collaboration drop-down menu. Or you can simply add a link to your Zoom Personal Meeting Room in any content module.
NOTE: Before you attempt to set up Zoom in your course, make sure you log into LSC Zoom first to ensure your Zoom profile is set up properly, using your LSC Employee Email Address. You can sign-in by clicking [Sign-in] using the same credentials you use to log into myLoneStar.
Please DO NOT use your personal Zoom credentials (Non-LSC) here.

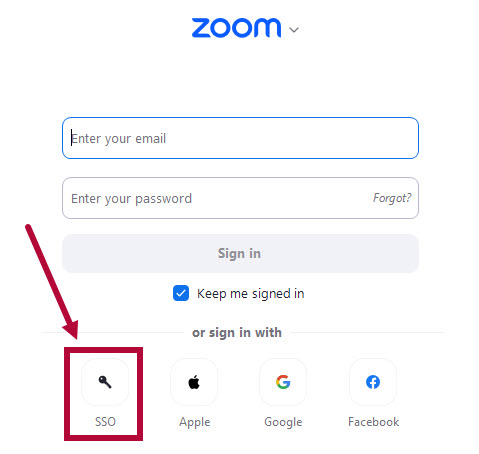
Sign-in with Zoom
- On the login window, click on [SSO] to sign in with Single Sign-On.
-
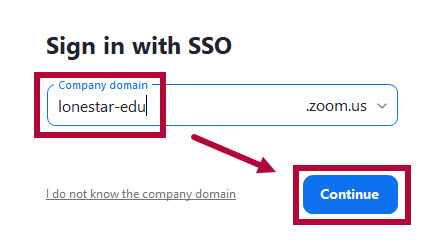
Type in lonestar-edu for the Company Domain. Click [Continue].


Schedule a Zoom Meeting
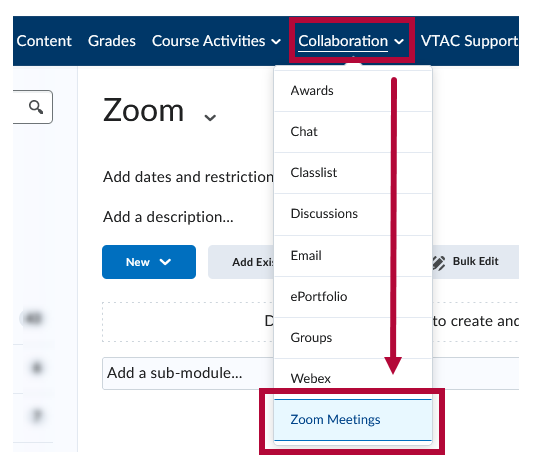
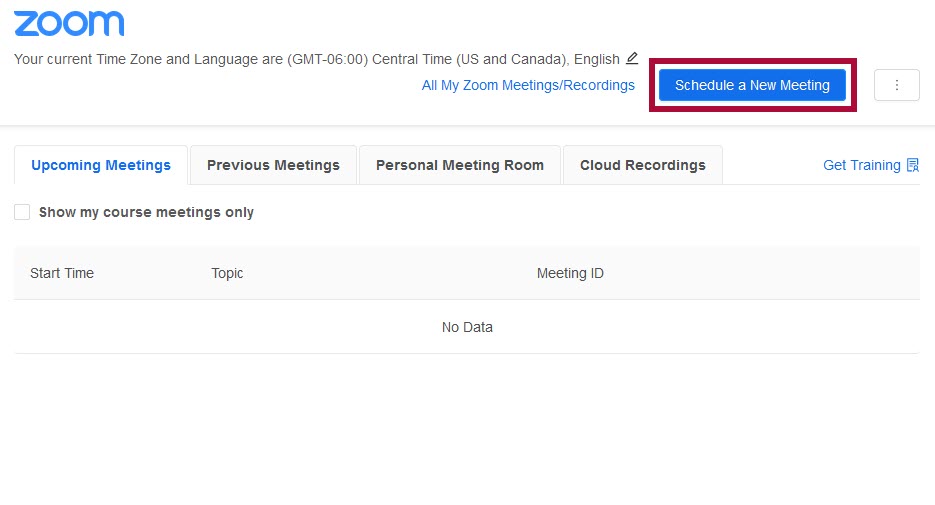
- From within a D2L course, click [Collaboration] on the Navbar and select [Zoom Meetings].
- On the Zoom pop-up window, click on [Schedule a New Meeting].
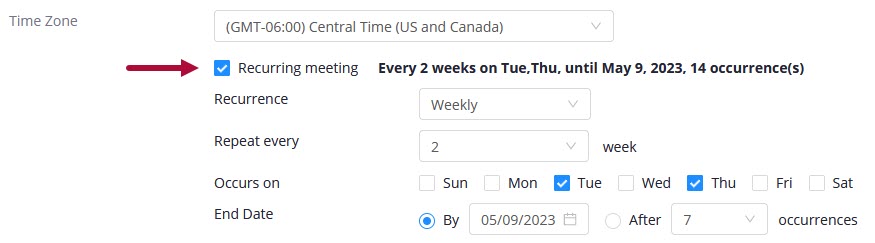
- On the Schedule a Meeting window, fill in the details of your meeting.
If its a recurring meeting, check the [Recurring meeting] box below for additional options.
- Continue configuring the options below as needed. Click [Save] when finished.
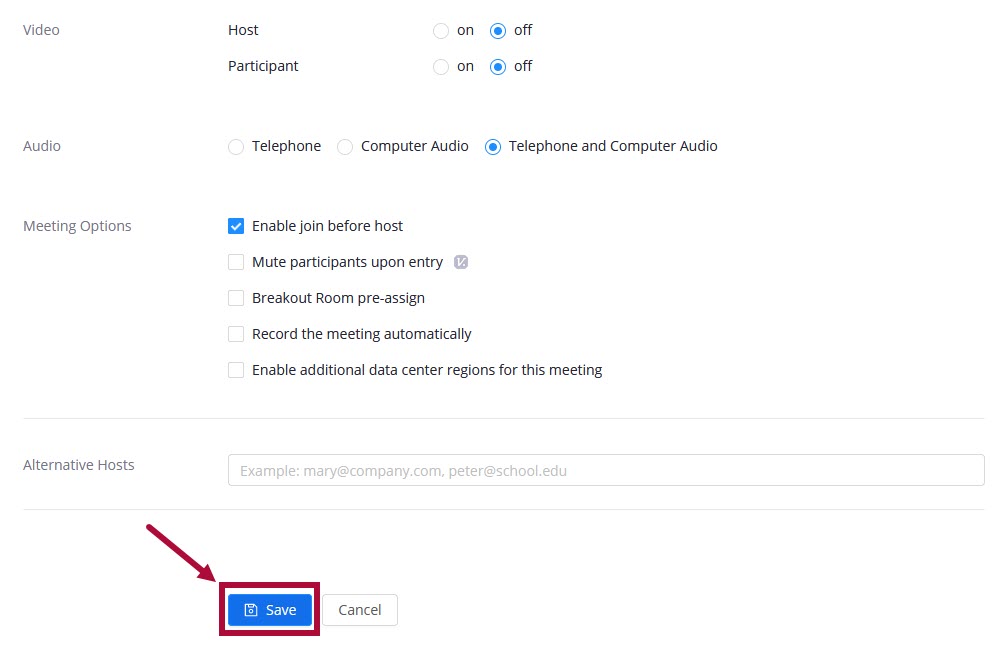


NOTE: When a Zoom meeting is created, updated, or deleted, the D2L Calendar will also be updated.

Add Zoom to Content using Add Existing Activities
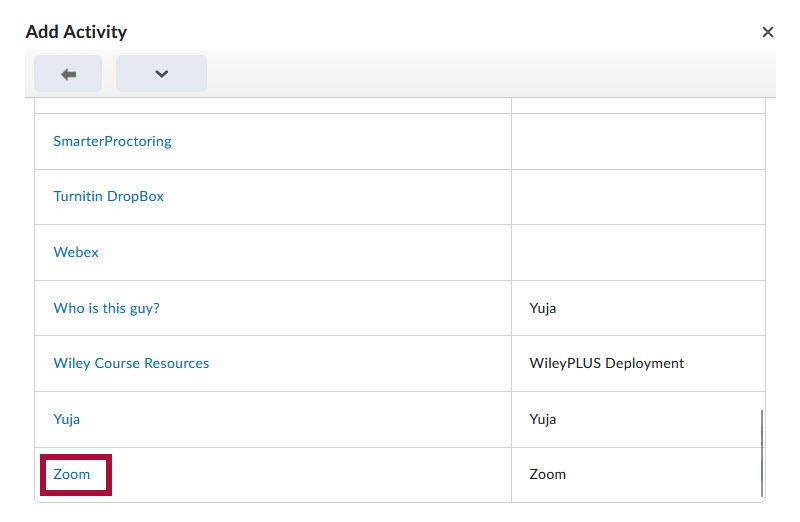
- From the content module you wish to add Zoom, navigate to [Add Existing Activities] -> [Third-party Integrations]
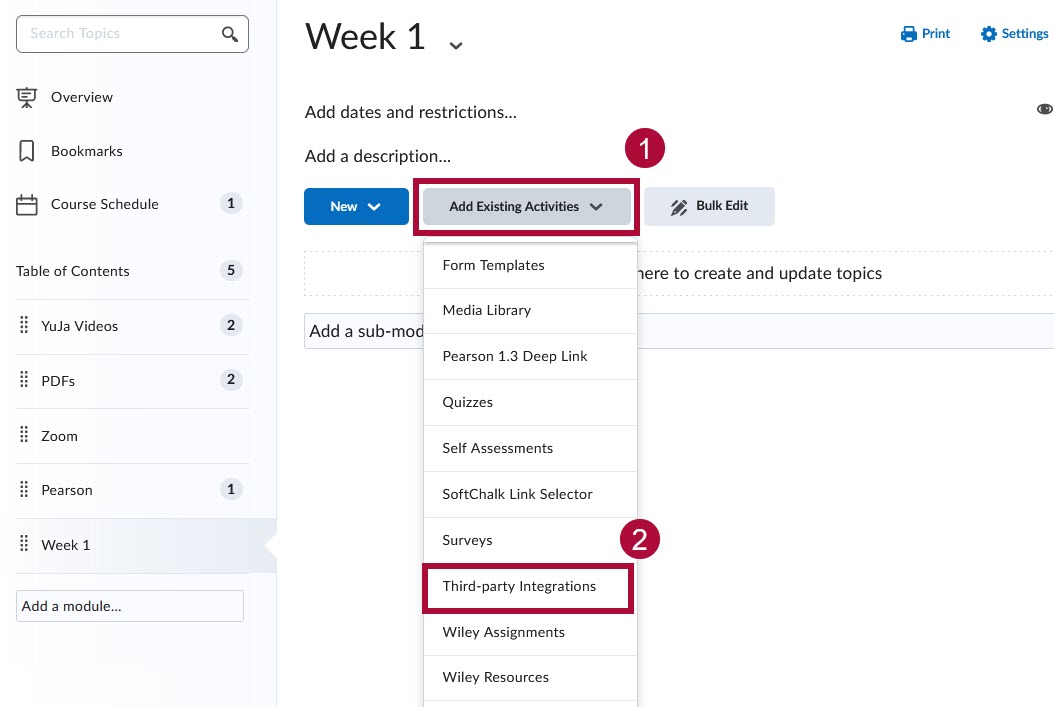
- On the Add Activity pop-up window. Scroll down and click [Zoom].
- Zoom should now be added to your content module. Clicking on Zoom will take you to the Zoom pop-up window. Please refer to the previous section on Schedule a Zoom Meeting.


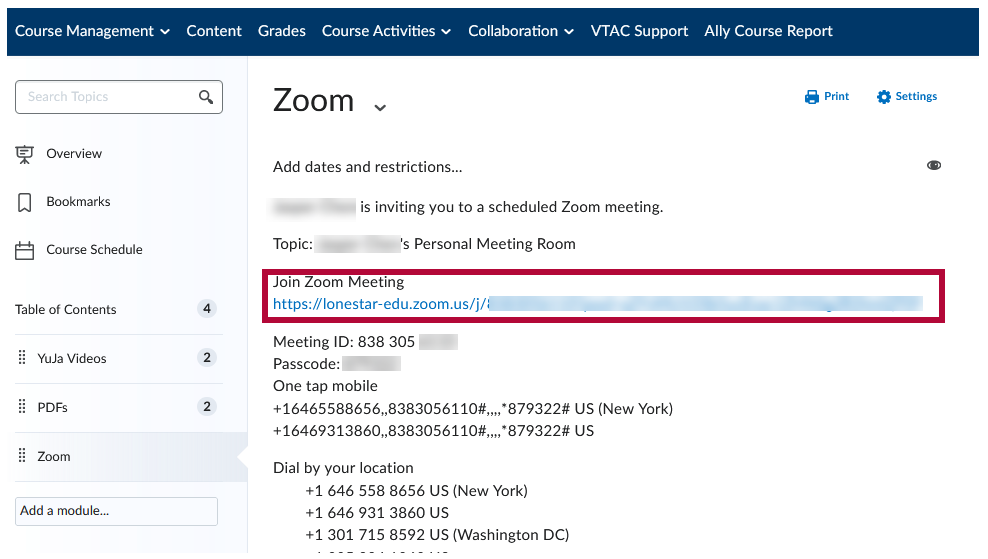
Add a Link to your Zoom Personal Meeting Room into a Content Module
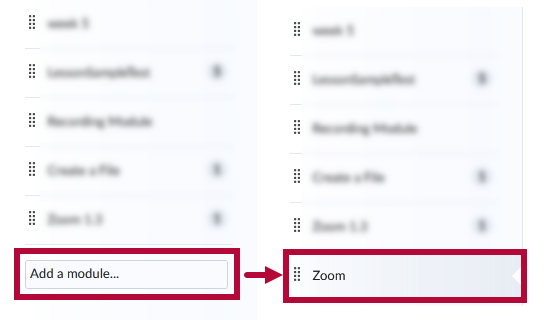
- Click [Add a module...] and give the module a name, such as [Zoom].
- Click [Collaboration] -> [Zoom Meetings].
NOTE: If you're getting an error screen that says "User does not exist", please be sure you create a Zoom account first using your LSC Employee Email Address. Refer to the instructions at Getting Started with LSC Zoom.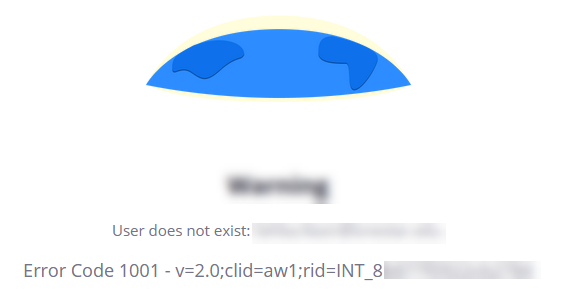
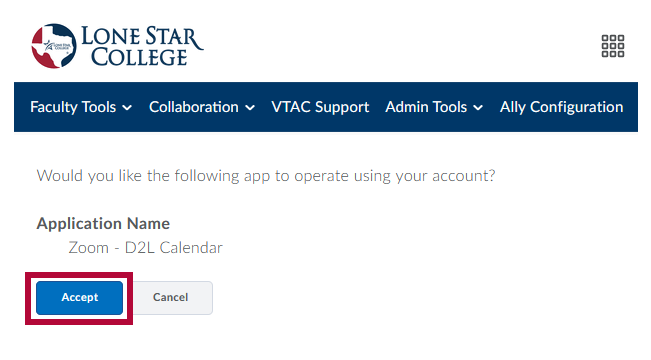
- Click [Accept] on the following screen. This screen will only appear when adding Zoom for the first time.
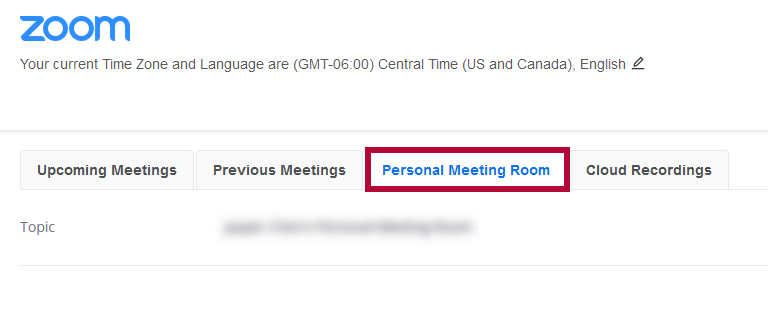
- Click [Personal Meeting Room].
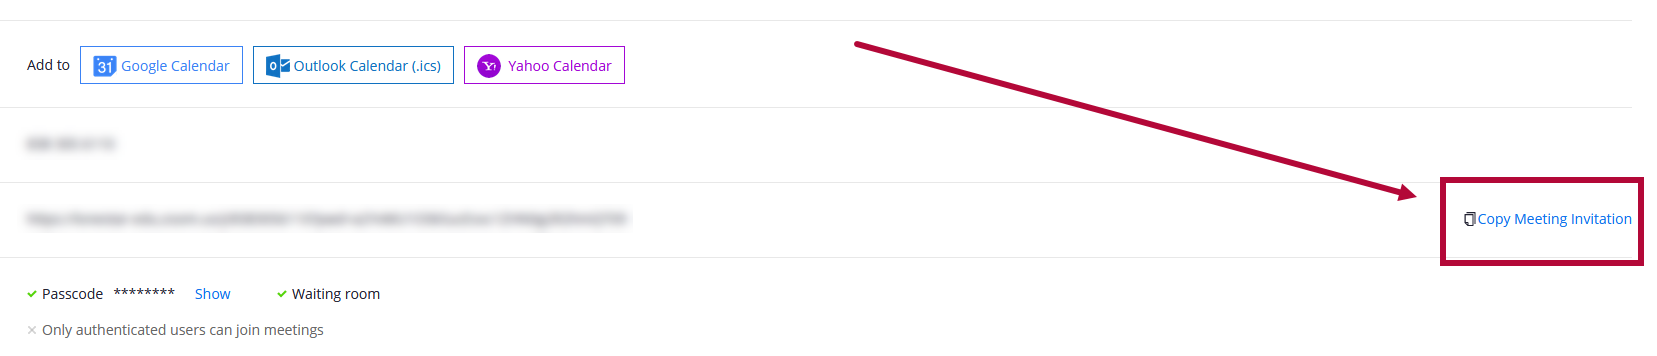
- Scroll down and click [Copy Meeting Invitation].
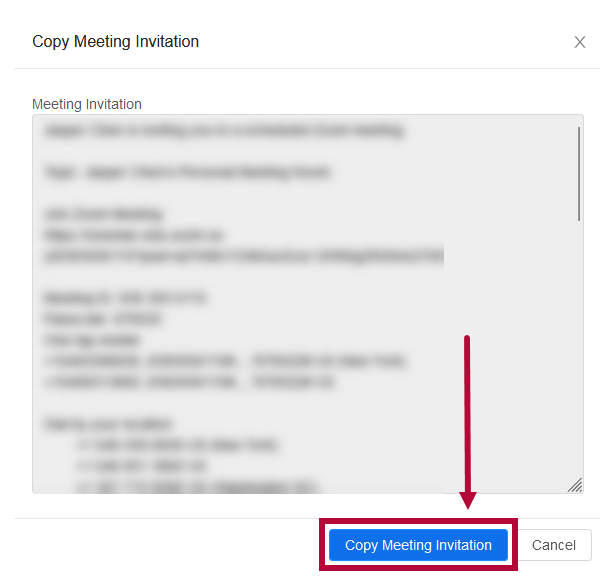
- Click [Copy Meeting Invitation].
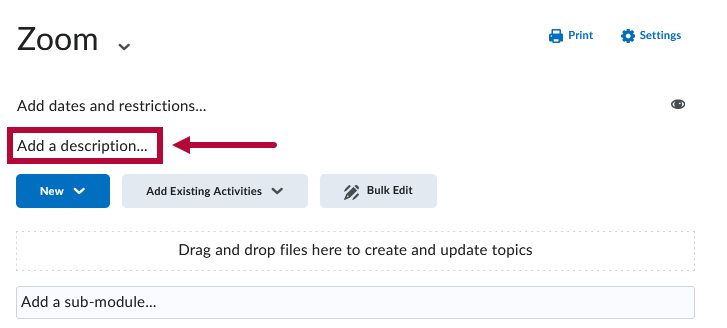
- Back on the Content page, click [Add a description...] then paste the copied meeting invitation text into the description of the module created in step 1.
- Your Zoom module should now have the full meeting info included, instruct your students to click on the [Join Zoom Meeting] link to join your Personal Meeting Room on Zoom. This Personal Meeting Room link is permanent and will always take students to your Personal Meeting Room on Zoom.