Online Services does not have access to your Peerceptiv Account. For integration issues or questions, please contact support@peerceptiv.com or otherwise refer to their Peerceptiv Knowledge Base.
Peerceptiv allows students to demonstrate knowledge of a subject through peer assessment, while building desirable soft skills such as critical thinking and teamwork. Students give and receive actionable feedback on assignments from classmates, allowing them to connect with their peers in a meaningful way on or away from campus. Peerceptiv generates valid and reliable grades-improving efficiency of instruction at any scale with a variety of possible assignment types in any subject matter.
Adding Peerceptiv to your Course
- Send an email to VTAC@lonestar.edu and include which courses you intend to use Peerceptiv.
- Once you have received confirmation that VTAC has added your courses, navigate to the Content Module → [Add Existing Activities] → [Third-party Integrations].
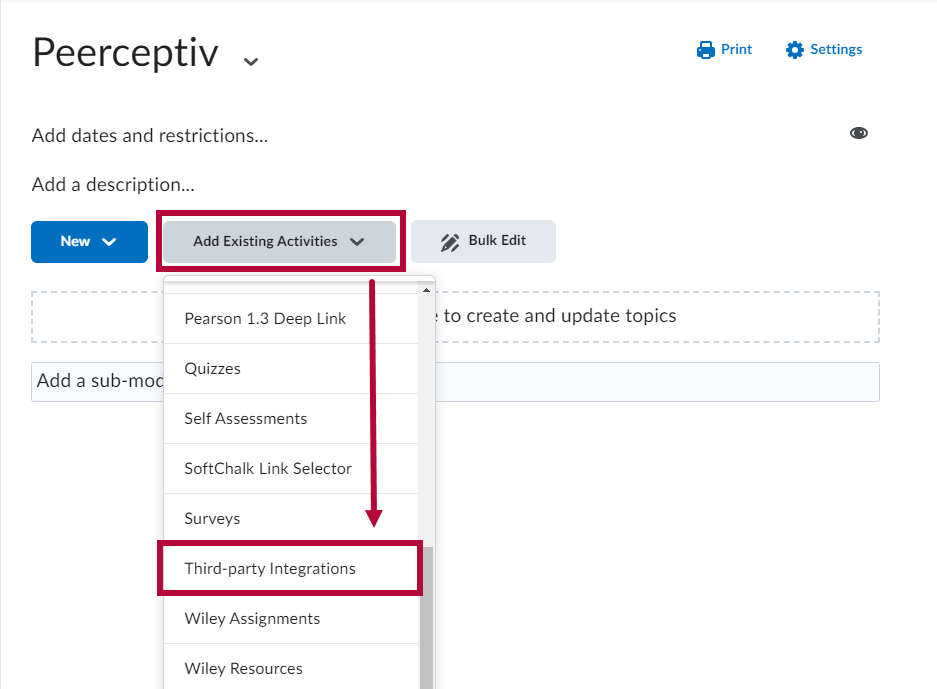
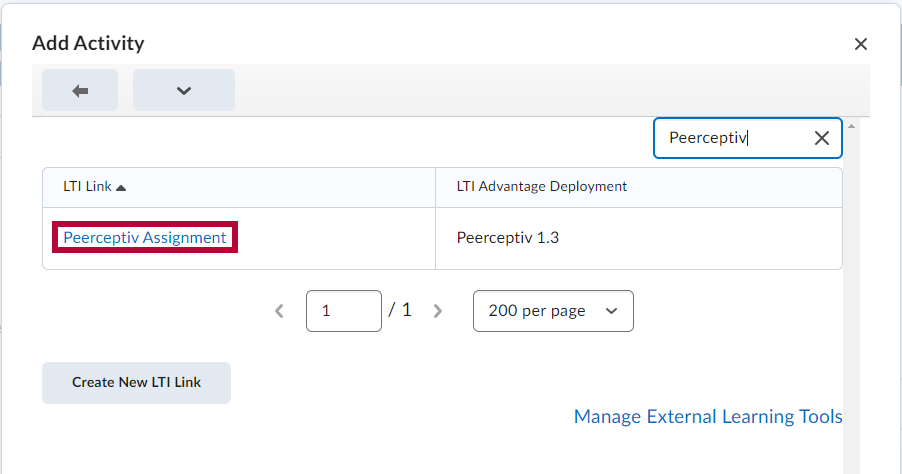
- Select [Peerceptiv Assignment].
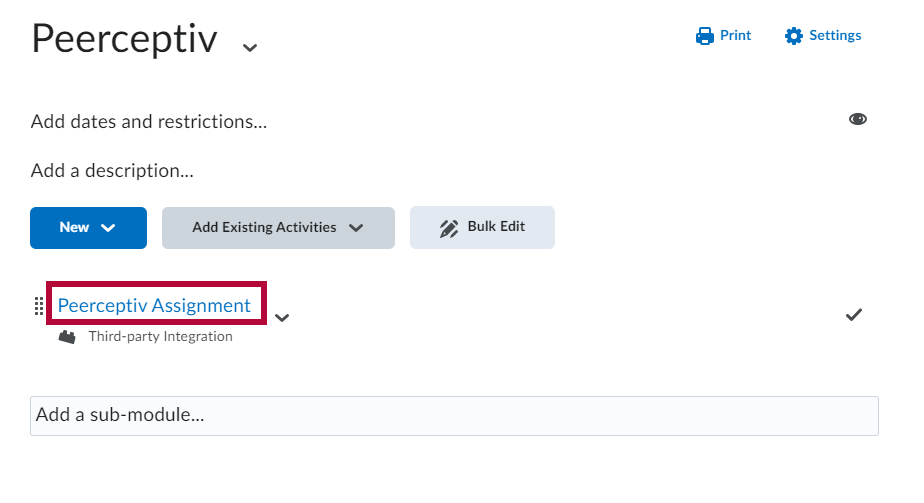
- Select [Peerceptiv Assignment] within your Content Module.
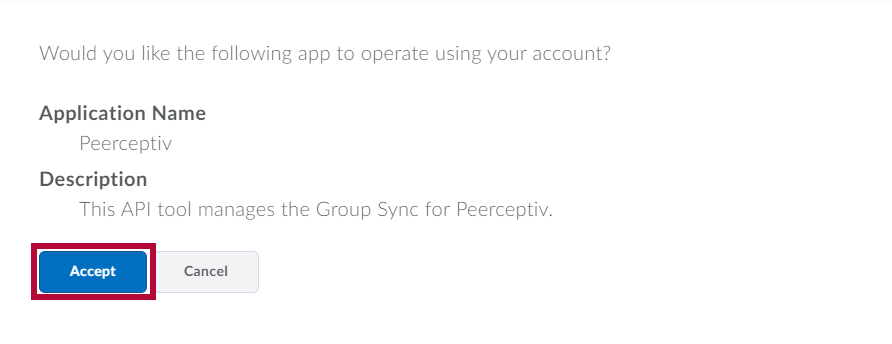
- Select [Accept] to Allow for Peerceptiv Group Sync within your D2L section.
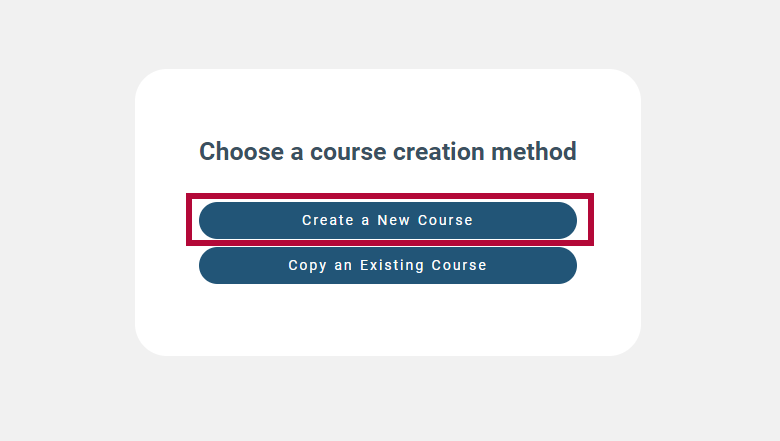
- Select [Create a New Course]
- Fill the required fields and select [Create].
NOTE: The Preview Box on the right will show what you and your students will see when accessing Peerceptiv.
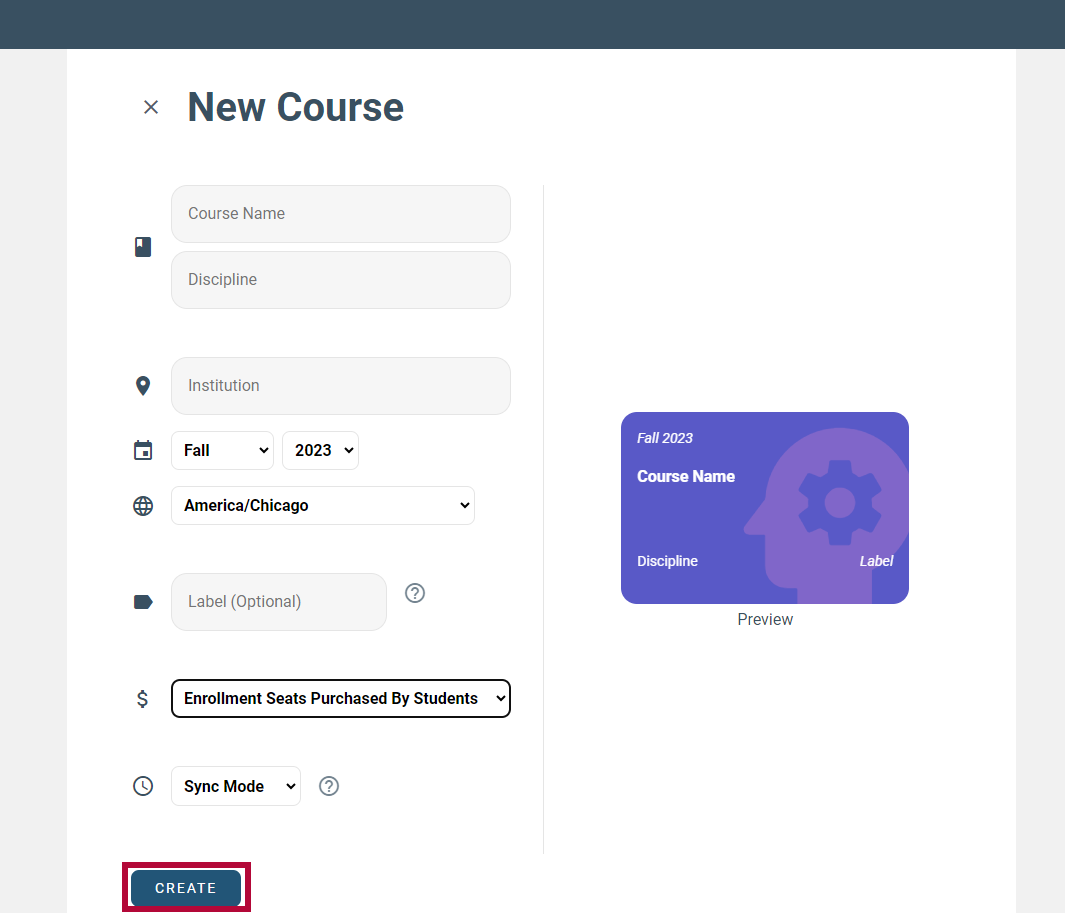
NOTE: Sync mode is recommended for most courses. For more information about the two modes, please refer to Sync Mode vs. Async Mode.
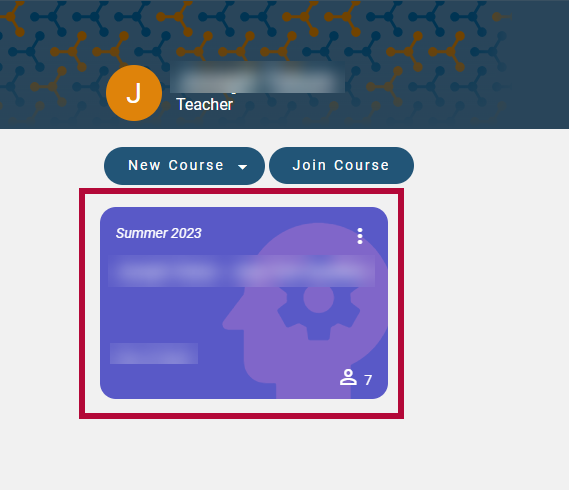
- Select your newly created course to begin using Peerceptiv.


Using Peerceptiv Group Sync
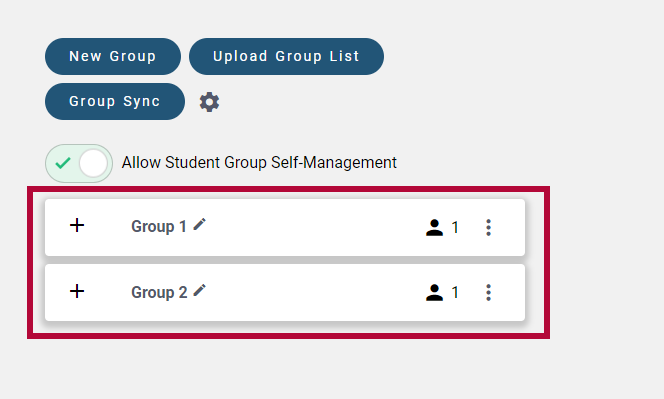
- Follow the Create Group article to create Groups in D2L.
NOTE: The Category Name chosen will be reflected on the Peerceptiv Group Sync tool.
- Follow the Enroll Students in Groups article to assign students into groups.
- Navigate to [Peerceptiv Assignment] within your Content Module.

- Select the Assignment you wish to use Group Sync with from your Assignment list.
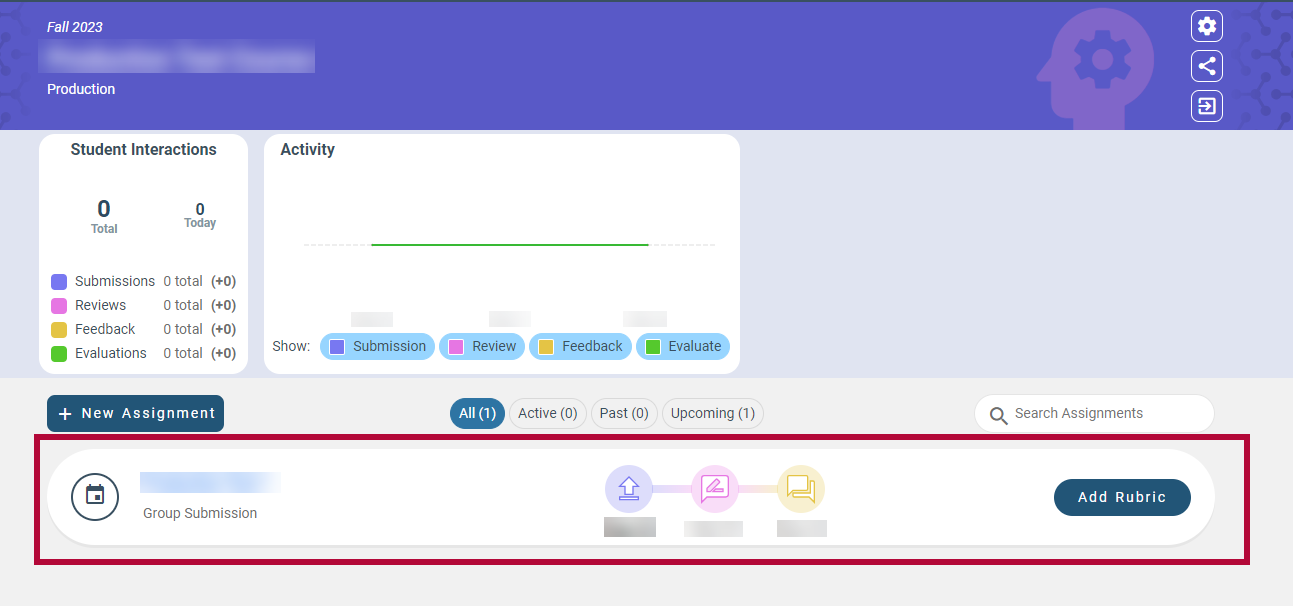
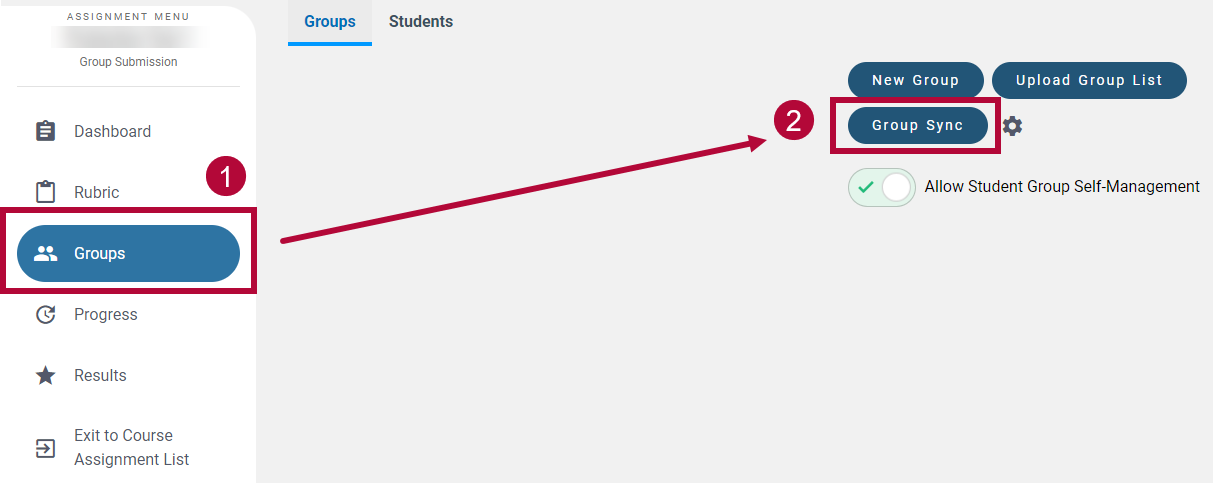
- Select [Groups] from the Assignment Menu, then select [Group Sync].
- Choose the Group Sync Category you wish to use and select [Sync].
NOTE: The items under Choose a Category will have the Category Name chosen in Step 1.
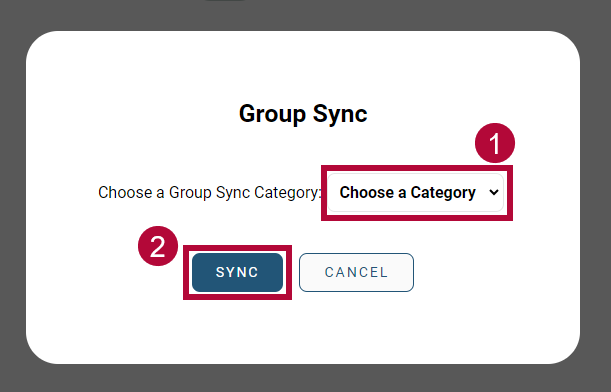
- Your D2L groups are now synced.