A checklist can contain important or required assignments, readings, or other items to complete. These items can guide students through each task they should complete for any given week, module, etc. Each checklist contains one or more categories, into which checklist items are organized. You must have checklist items for the checklist to show as completed on the content page.
Making a Checklist
- Click Course Management on the navbar and choose Course Admin.
- Under the Assessment category, click Checklists.

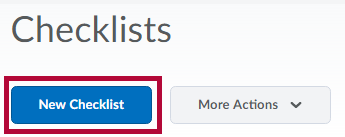
- On the Checklists page, click the New Checklist button.
- On the New Checklist page, enter the name of the new checklist in the Name field.
- You can enter an optional Description.
- Select Open this checklist in a new window when viewed if you want the checklist to open in a new window when students access it. By default, checklists open in the current window.
- Click the Save button to save the new checklist.
Making a Checklist Category
Every checklist must have at least one category. A category serves as a container for the actual list items.
- On the Checklists page, click on the checklist where you want to add the category.
- On the Edit Checklist page, click the New Category button.

- On the New Category page, enter a name.
- You can enter an optional Description for the new category.
- Click the Save button to save the new category or Save and New to save it and create another one.
Creating a Checklist Item
- On the Checklists page, click the checklist where you want to add items.
- On the Edit Checklist page, click the New Item button.

- On the New Item page, do one of the following:
- Select a category for the item in the Category drop-down list.
- Click the New Category link to add a new category. In the New Category pop-up, enter a Name and optional Description for the new category and click Save.NOTE: Each item you create must belong to a category.
- Enter a Name for the new item. A description is optional.
- Set a due date by selecting the Due Date check box and selecting the appropriate date and time from the drop-down lists.
- Select Display in Calendar to make the item visible in the calendar for students.
- Click the Save button to save the new item or Save and New to save it and create another one.
Edit or Copy an existing Checklist
- On the Checklists page, use the drop down menu on the checklist you want to edit or copy. In our example we will copy a checklist so we may make changes while keeping the same checklist format.
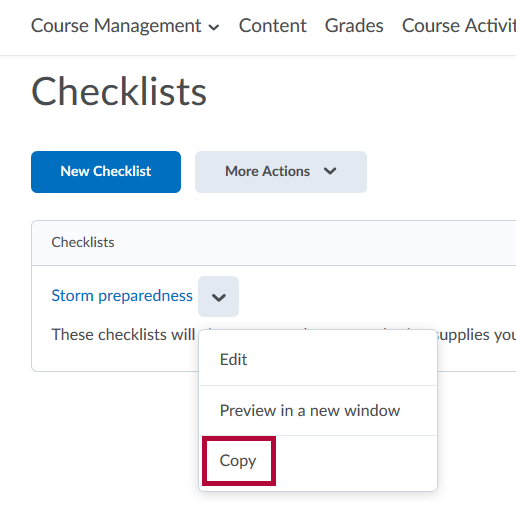
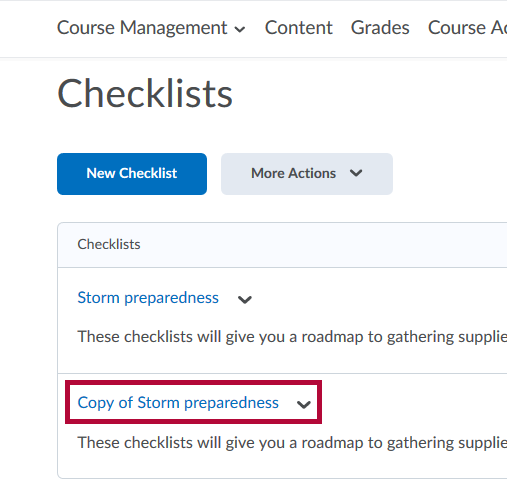
- Once you click COPY, the checklist is duplicated and given a name indicating it is a copy. To make changes to this copy, simply click its name and edit the fields as you would any other checklist.
- You may also copy categories and items in an existing checklist. This is an easy way to add categories and fields to an existing checklist without making them from scratch. Click on the title of the checklist you wish to copy categories and fields within. You will see a screen similar to this one.
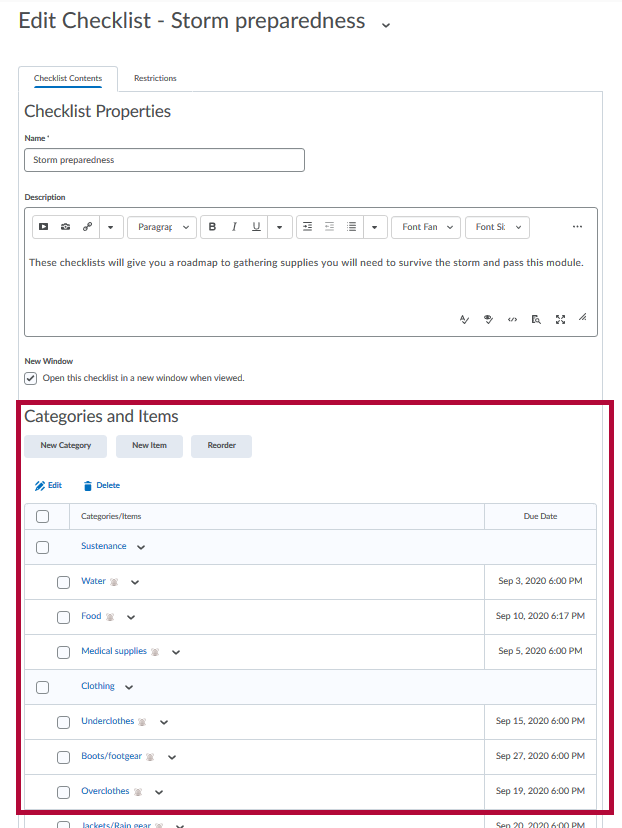
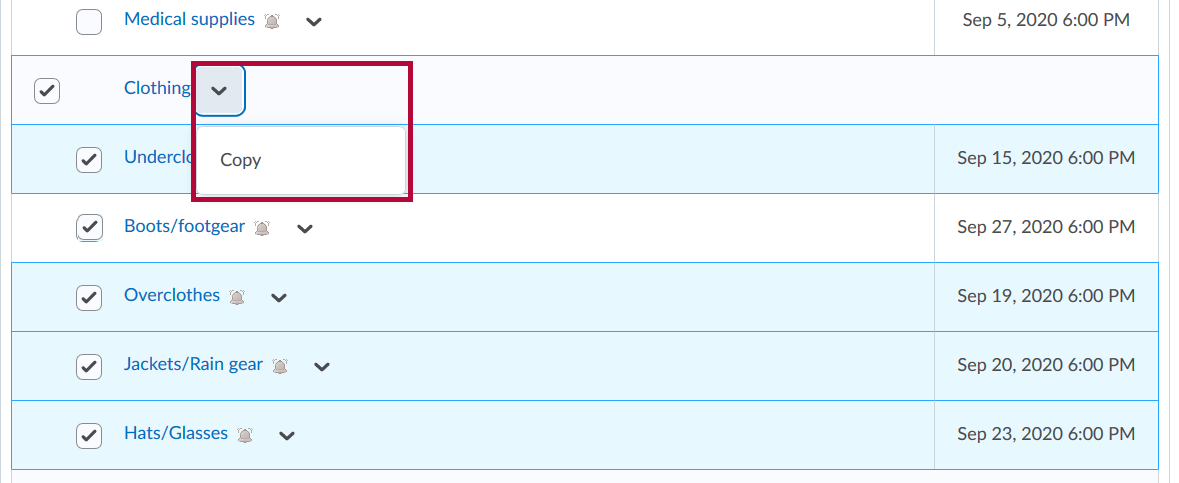
- Scroll down to Categories and Items and checkmark the category or the individual items to copy within the checklist. In our example we will copy the Clothing category and its 5 items to the bottom of the checklist. Place your checkmarks and click COPY on the drop down menu of the category or item.
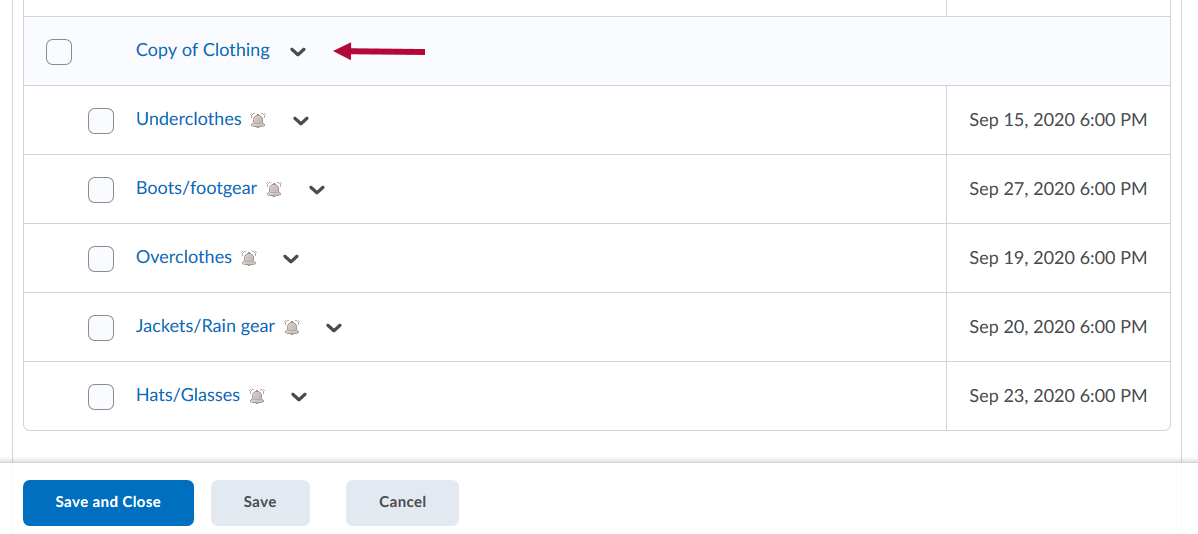
- The copied portion of the checklist appears at the bottom, ready for you to edit it and customize it as you desire. Click Save and Close when you are finished.
Adding a Checklist to a Module
For students to be able to view a checklist, the checklist must be added to a module or submodule.
- Within the course, navigate to the module where the checklist is to be located.
- Click the Add Existing Activities button, and then choose Checklist.

- In the menu, select an already created checklist, or click the Create New Checklist button.
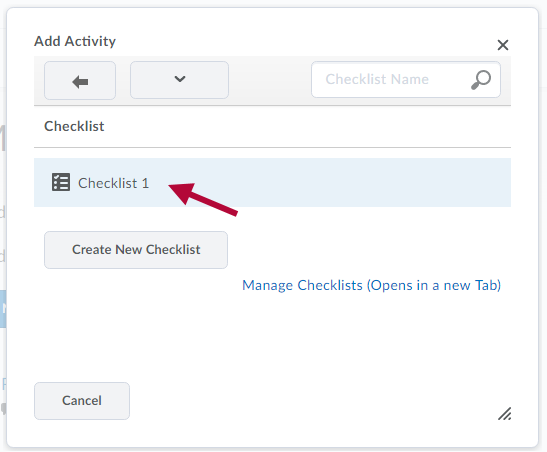
- If choosing Create New Checklist, enter the name for the new checklist then click Create and Insert.
- You will need to follow the steps for Making a Checklist Category and Creating a Checklist Item to finish creating the checklist you created.
- The checklist will be added to the module at the bottom.


