Generate a recording that captures both your voice and the activity on your iPad screen by following the instructions below.
Add Screen Recording to Ipad “Control Center"
- Select [Settings] from your iPad's home screen.
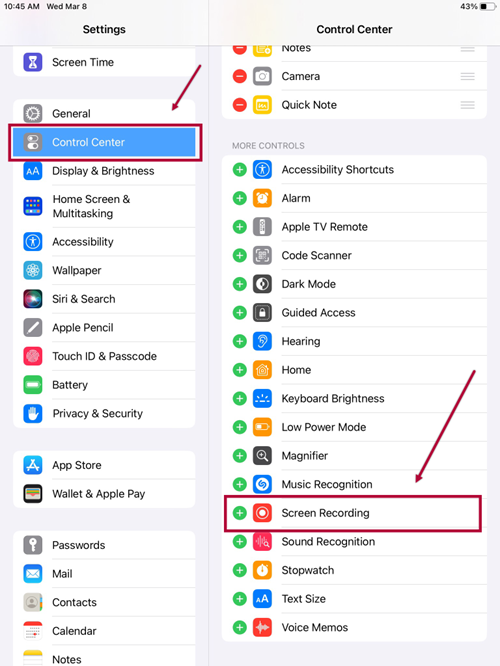
- Select [Control Center] located on the left side of your screen. If [Screen Recording] is already turned on, you will find it listed under the Included Controls tab.
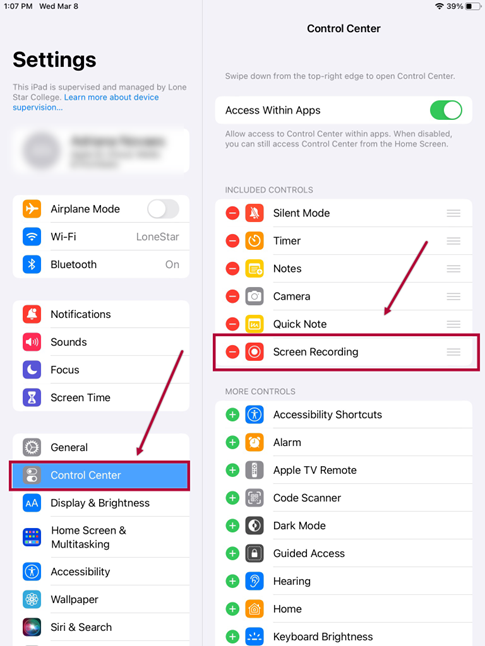
- If you don't see it in the Included Controls tab, you can find it in the More Controls tab. To enable it, just tap on the [+] sign. Afterward, you can exit the iPad Settings by pressing the [Home] button.


Create the Screen Recording
- Launch the desired application. In this instance, we'll use PowerPoint.
NOTE: Microsoft Whiteboard is also a viable option.

- Select a presentation.
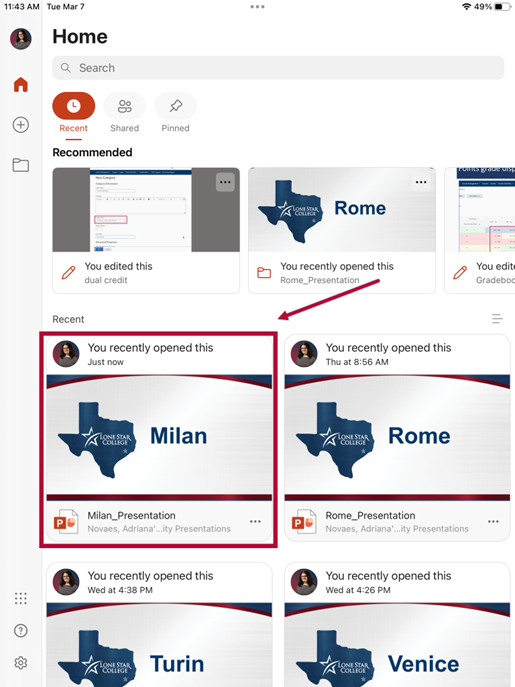
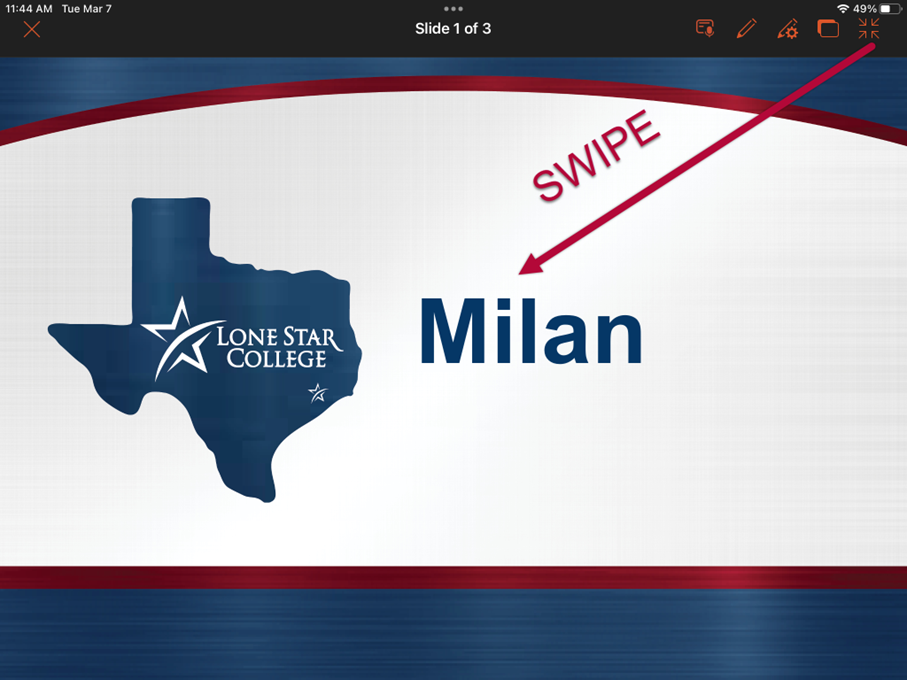
- Select [Slide Show].

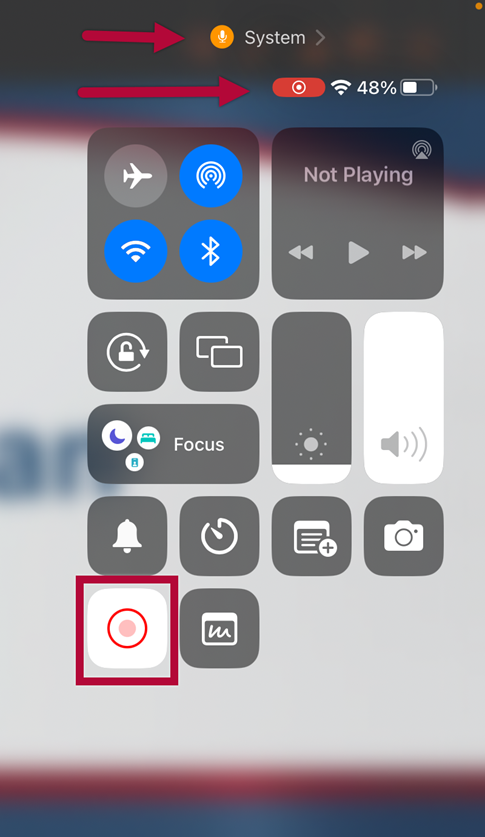
- Have the finger lightly pressed on the Battery/WiFi icon in the Upper-Right Corner and Swipe Down or diagonally towards the middle, that should pull down the Control Panel.
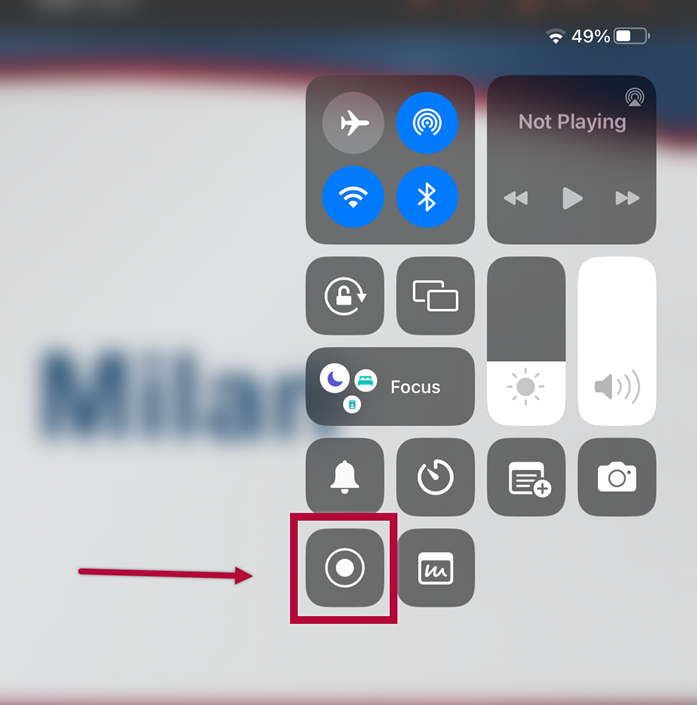
- Tap the [Record] icon.
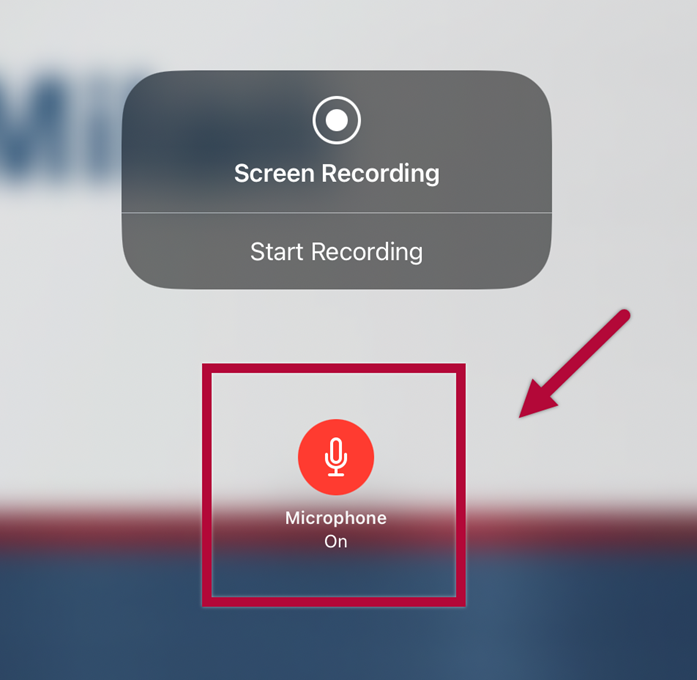
- Make sure the microphone is turned on. Then, tap [Start Recording]. Swipe upwards to collapse the panel.
- Once finished, swipe again to the upper right and tap the [Flashing red button] to stop your recording.


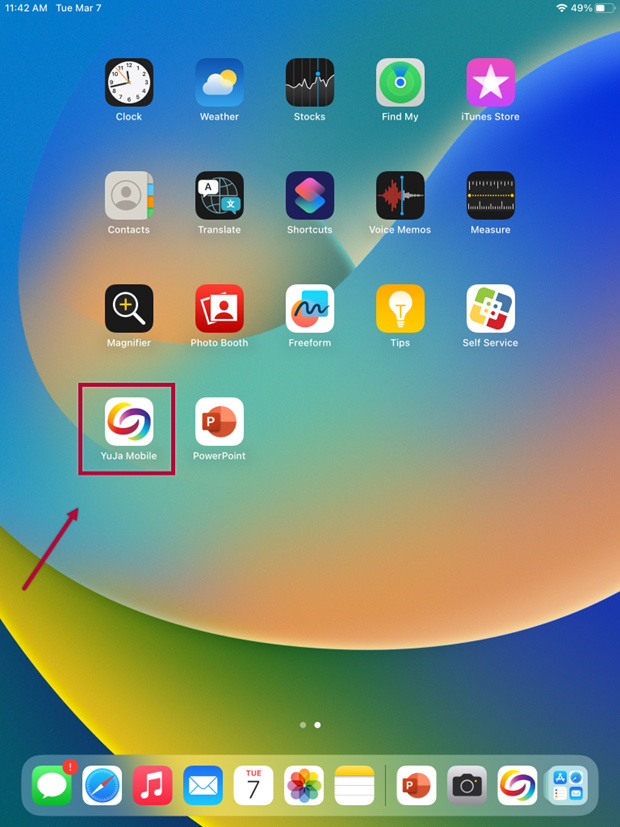
Yuja Upload
- Choose the [YuJa Mobile] application. (For instructions on how to install the Yuja Mobile app for iOS read this article).
-
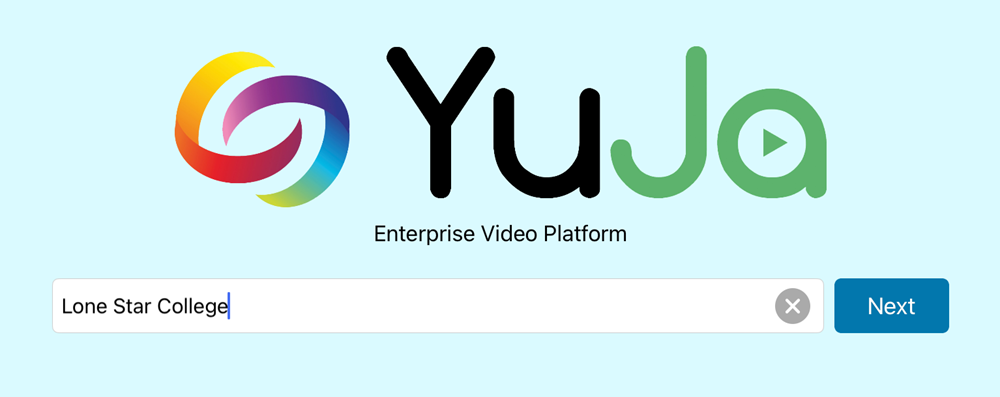
In the Institution selection box, type Lone Star College.
-
Select [Lone Star College Single-Sign-On] and sign in with your Lone Star College credentials (LSC email and password)

-
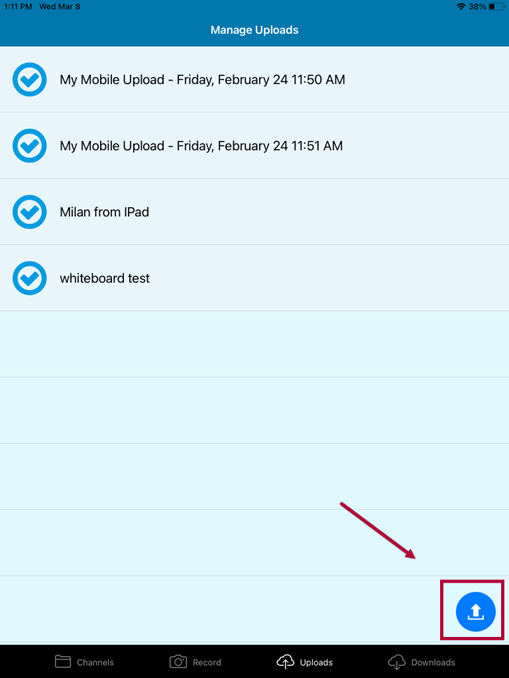
Click on the [Upload] option located on the black ribbon at the bottom of the screen.

-
Within the Manage Upload page, select the [blue upload icon] located in the bottom right corner.
-
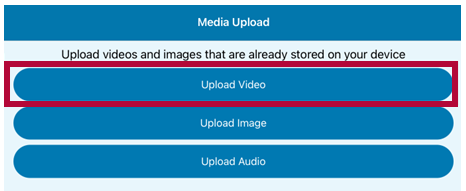
Select [Upload Video].
-
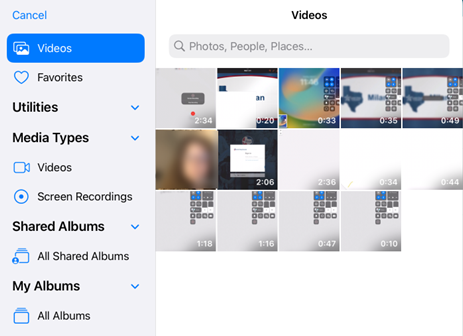
Select the video you recently recorded.
-
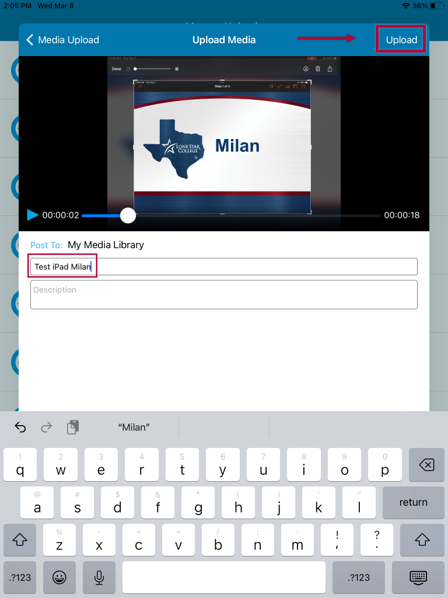
Enter a name for your video in the provided box.
-
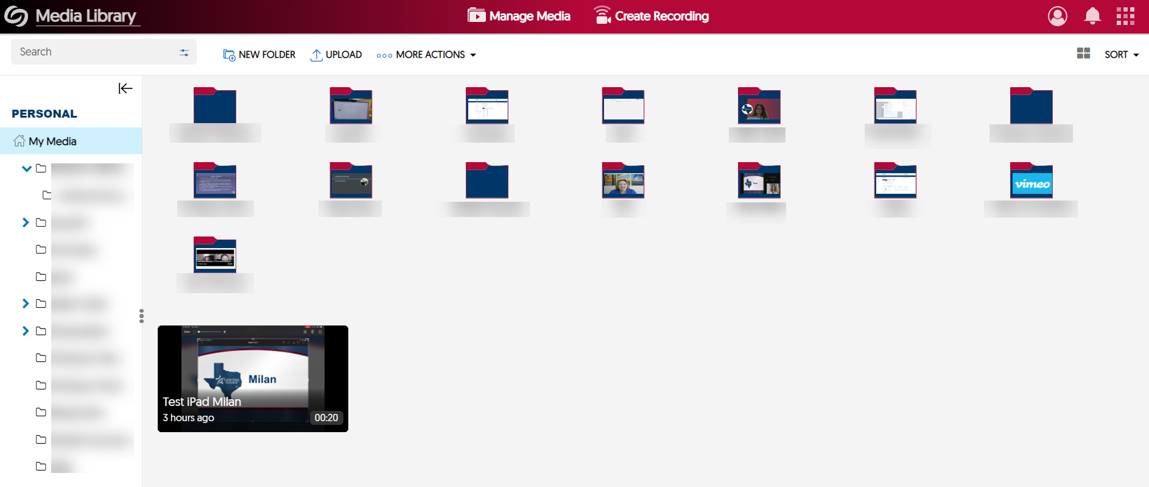
The video you recorded will be located in your Yuja library under the [My Media] folder.