Creating clickable PDFs in an announcement, or within any D2L WYSIWYG Editor (What You See is What You Get) enables faculty to provide students with easy access to link resources directly from course materials. This guide outlines how to make PDFs with embedded links that can be opened in D2L for a more streamlined experience. In this example, we'll upload a PDF into the WYSIWYG Editor as an announcement and make it clickable.
Generate a URL Link for the PDF
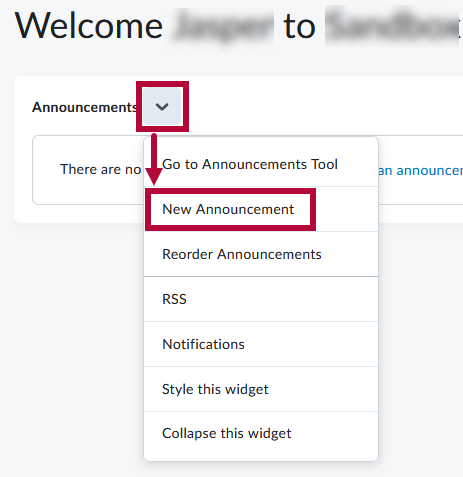
- Navigate to the module where you want this PDF to be displayed. In this case, we are going to create an announcement. Click on [New Announcement] under Announcements.
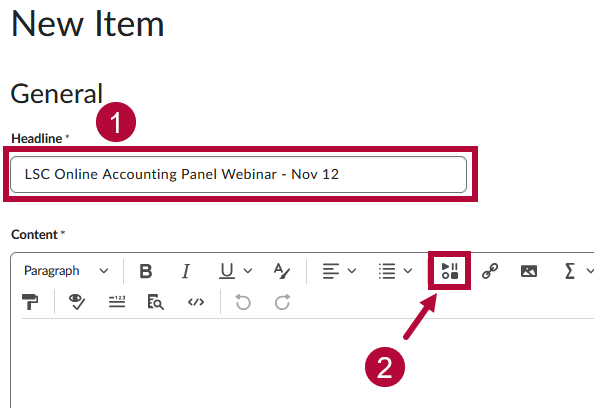
- Title your announcement, then click on the [Insert Stuff] icon.
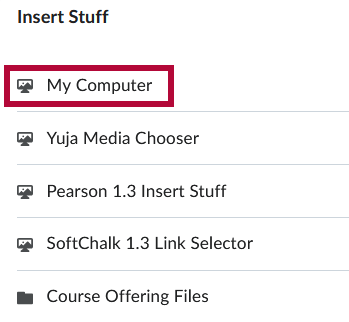
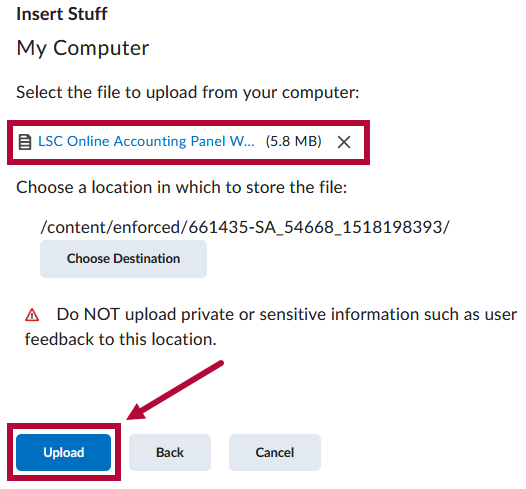
- Locate the PDF's location. In this example, the PDF is located under [My Computer].
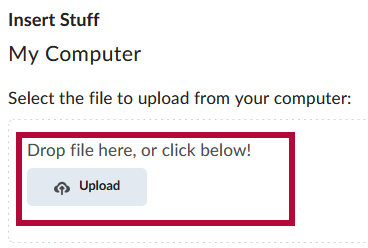
- Use your mouse to Click & Drag your PDF file into the dotted box, or click [Upload] to select your PDF file.
- After the file is confirmed to be uploaded, select [Upload] at the bottom.
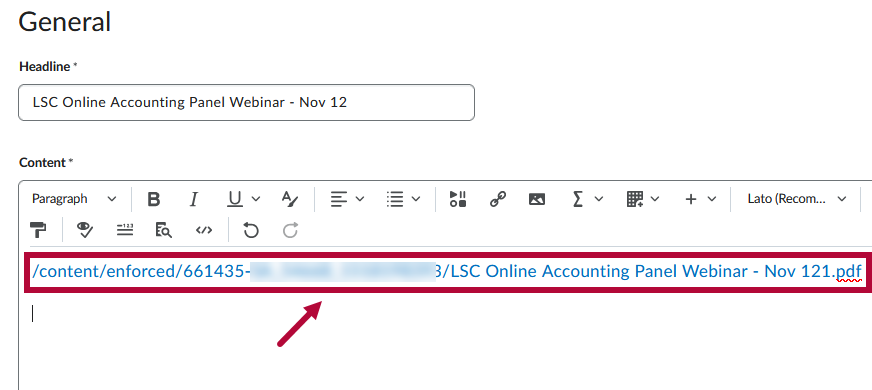
- Type in the Link Text field if you wish, click on [New Window] then [Insert].

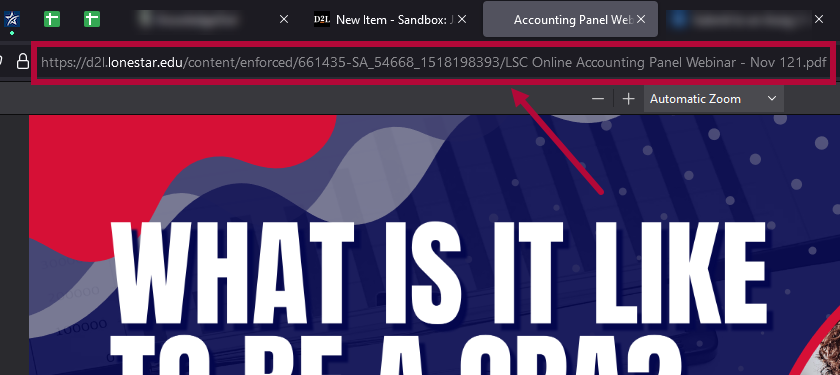
- Click on the newly inserted [Link] — this will open a new tab in your browser.
- Make a note of the URL Link in the URL bar — you will need this for the next section.


Insert the PDF Image as a PNG
- Use a tool such as Windows' Snipping Tool to capture an image of the PDF. Save this cropped section as a PNG file and insert it into the WYSIWYG Editor.
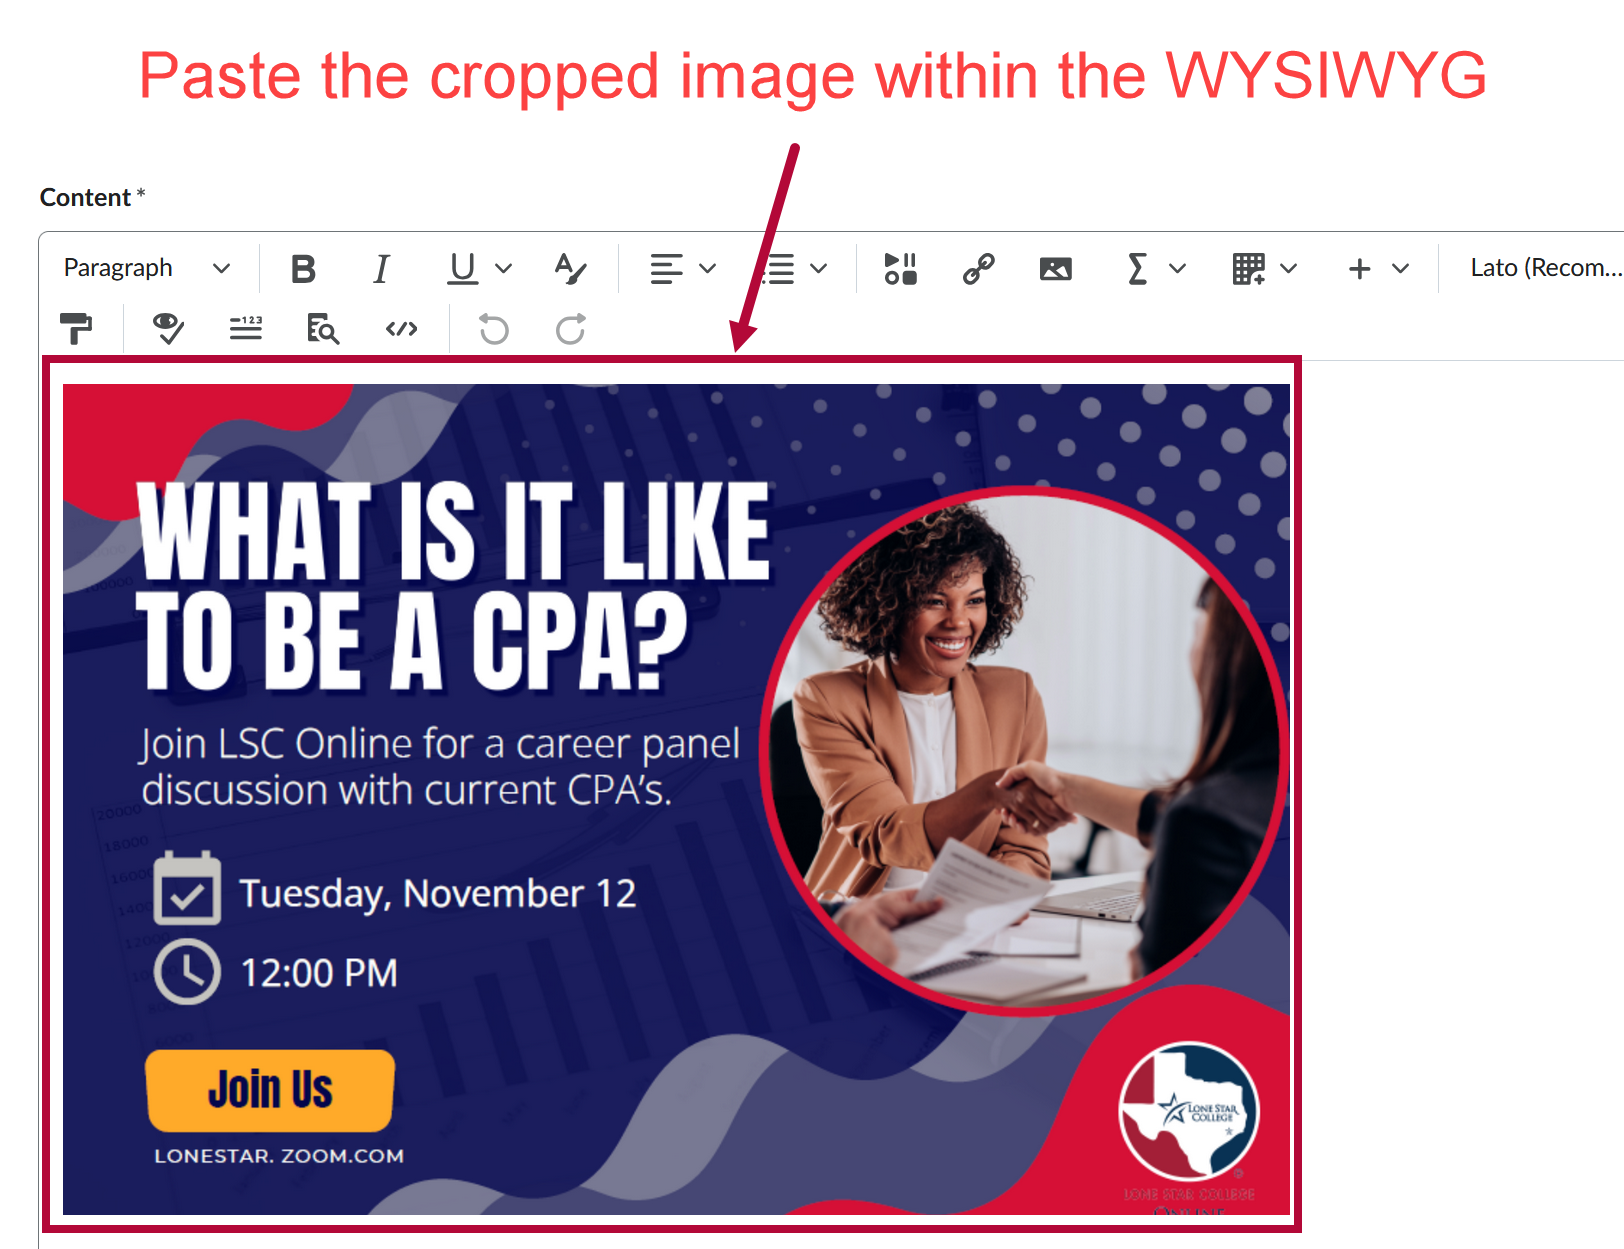
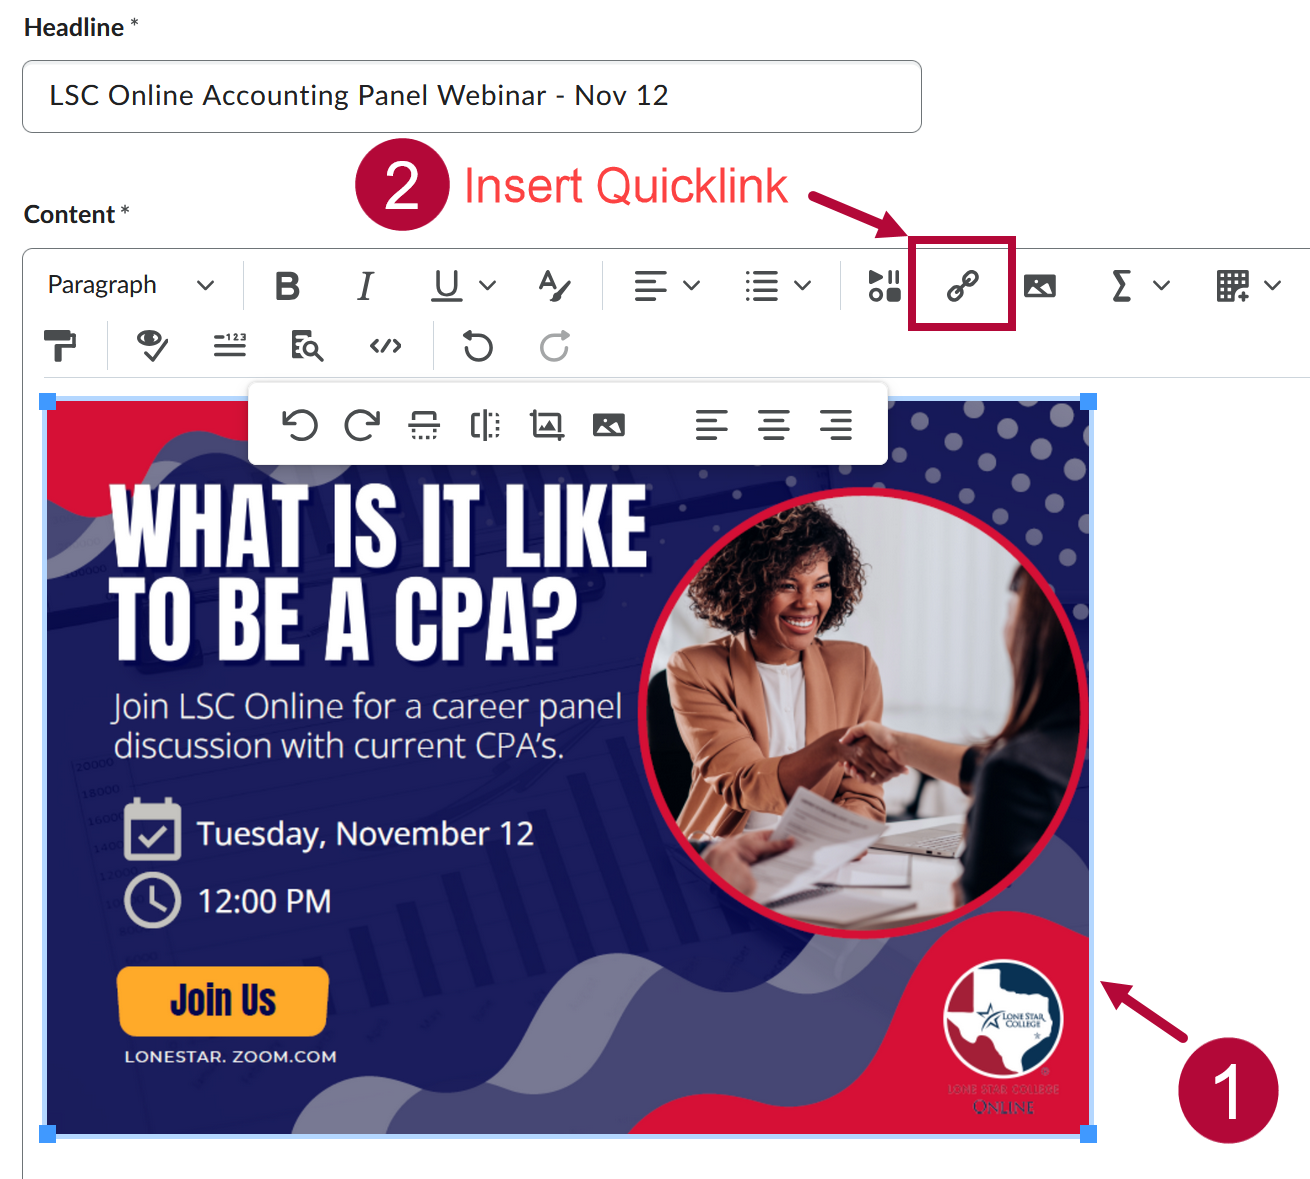
- Click on the [PNG image] to select it, then click [Insert Quicklink] from the toolbar above.
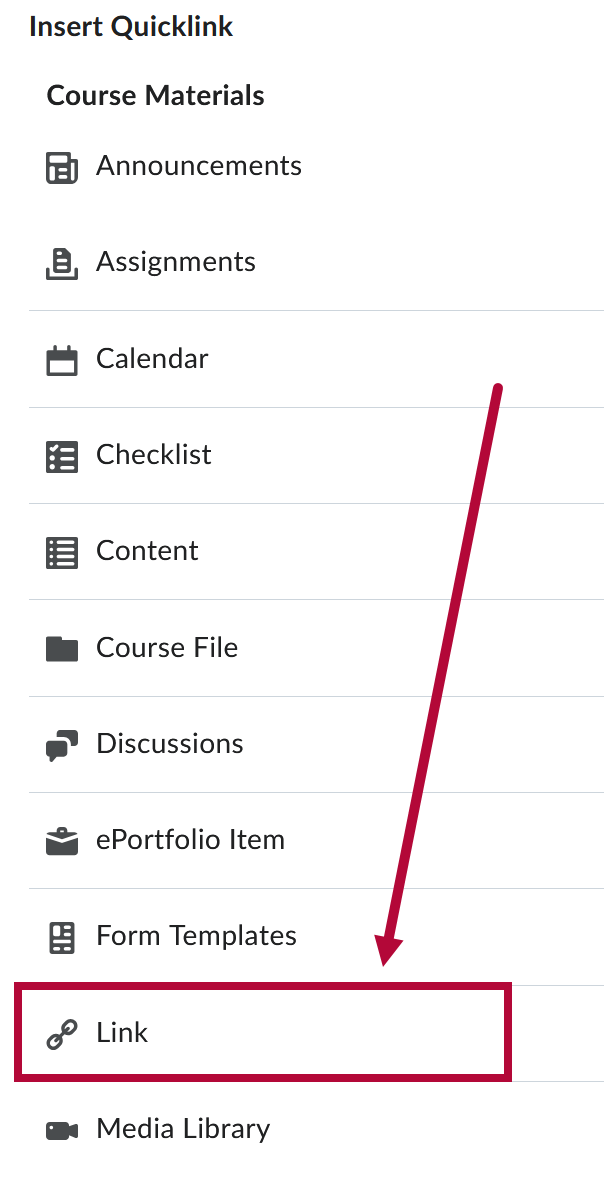
- Scroll down and click on the [Link] option.
- In the Insert Quicklink window:
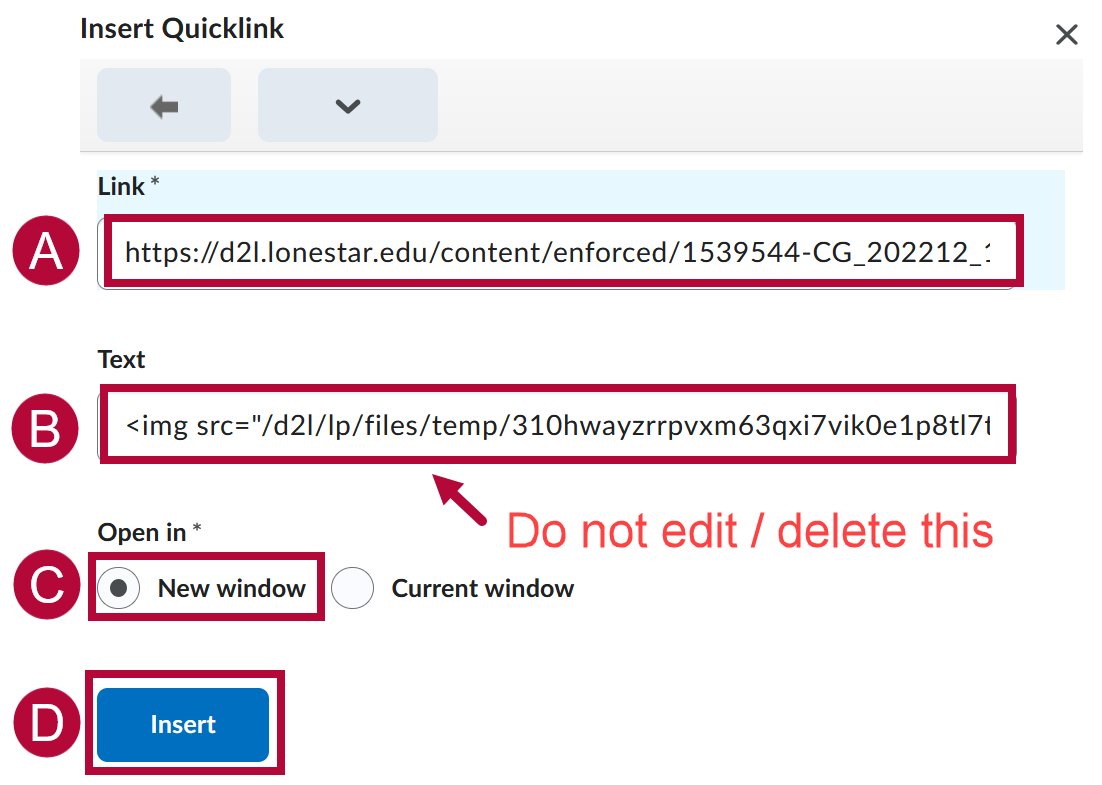
- In the Link field, copy and paste the URL you obtained from Step 8 of the previous section.
- Do not edit or delete any text from the Text field.
- Under Open in, select [New Window].
- When finished, click [Insert].
- In the Link field, copy and paste the URL you obtained from Step 8 of the previous section.
- Once inserted, clicking on the PNG image should open a new tab in your browser with the full PDF loaded. Press [Publish] or [Save Draft] when finished.


Troubleshooting and Support
If you need additional assistance, contact the IT Service Desk at 281.318.HELP (4357).