NOTE:
- Content imported into a course shell will, with one exception, NOT overwrite or delete existing content. For example, if content from a course is copied into a shell multiple times, the content will be duplicated each time instead of replacing the previous content. (However, in one specific instance, you can choose to have specific duplicate course files overwritten.) Tracking data, student records, personal data and grades are not included when copying.
- If you are exporting a file from a test generator such as TestGen or ExamView, you may need to export your file in a BlackBoard format to allow you to import it through this process.
The Import Zipped Content function is used to import properly formatted D2L packages such as e-packs, test banks, or course packages exported from the Export Components tool.
- Enter the course which will be receiving the content. Click on [Course Management] in the Navbar, then click on [Course Admin].
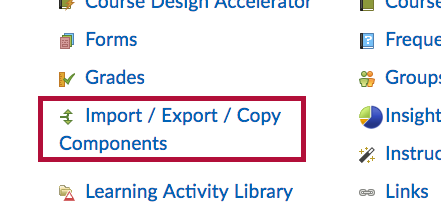
- On the Course Administration screen, click on [Import/Export/Copy Components].
- Select [Import Components] and [from a course package].
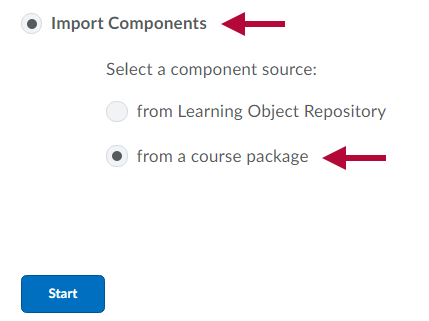
- Click the [Start] button.
- Click [Upload] and select the desired content package or drag the file into the drop zone within the dotted lines.
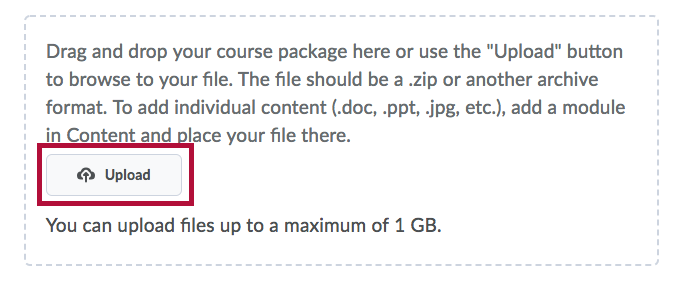
NOTE: The file will be a zipped (compressed) file and have the .zip file extension.
- Click on [Import All Components], or click on [Advanced Options] for additional choices.
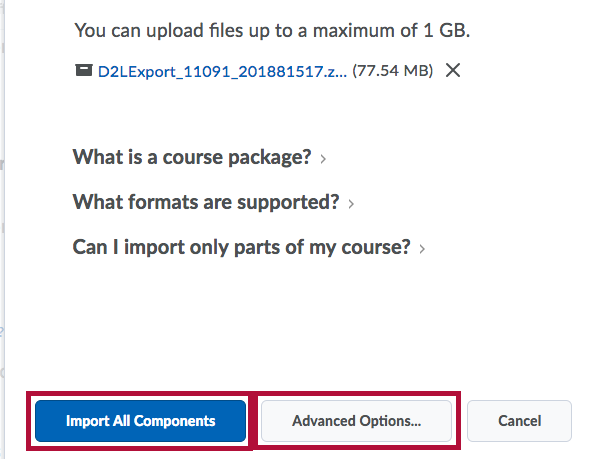
- If you click on [Import All Components], the process will be completed without further input from you. Green check marks will appear when the process has completed successfully.
- Click [Continue].
- If you choose [Advanced Options],
- After you see the checks, click [Continue].
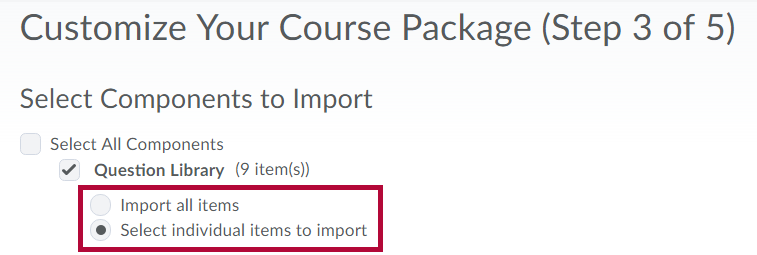
- Click the checkboxes next to the components you want to import.
- You can opt to have D2L import all components within the selected file or only specific items. That option can be useful if only some of the package contents are needed.
- Additional Advanced Options:
- Import file to: This field may be left blank or a new or existing folder location can be specified.
NOTE: This only affects imports which have files that will be placed in the File Manager.
- When an existing file is encountered: This is the only import function which will overwrite data, and it is only able to overwrite duplicate files, not content. The default is ‘Do not overwrite the existing file’, but you can change this setting if you wish. You should only change this setting if you are sure you no longer need any files with the same name as those which are being imported.
- Import metadata: Metadata is used for categorizing LOR (Learning Object Repository) content. It is good practice to select this option.
- Offset all dates of imported components: This option allows you to change any dates in the content package by given parameters.
- Import file to: This field may be left blank or a new or existing folder location can be specified.
- After you see the checks, click [Continue].
- Click [Continue].
- Click [Continue] again to confirm the import options.
- Check marks will appear when the process has completed successfully. Click [Continue] to complete the import process.
- If you would like to change the dates for the components at this point, click on the [Review and Manage Dates] button.
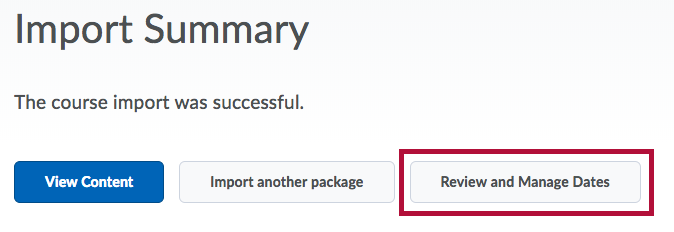
This will take you to the Manage Dates screen, where you can update the dates for the course items.


