NOTE: If you are copying a course that has Qwickly already set up, you must delete the grade item in the new course before you enter settings for that course. If you don't, Qwickly will create a second grade item and you will be unable to distinguish the new (correct) one from the old one.
NOTE: If you are copying a course that has Qwickly already set up, you must delete the grade item in the new course before you enter settings for that course. If you don't, Qwickly will create a second grade item and you will be unable to distinguish the new (correct) one from the old one.
- Log in to your course.
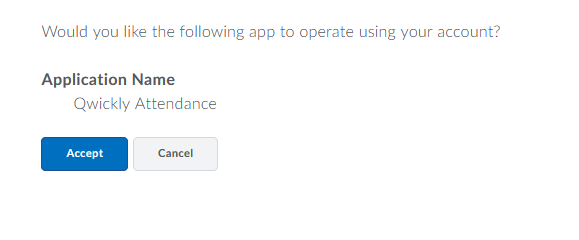
- Click [Course Activities] on the Navbar and choose [Qwickly Attendance]. A new window will open for the Qwickly Attendance tool.
- Click [Accept] to allow your account to use Quickly Attendance (you will only have to do this once).
- Once you Accept, select the [Begin Setup] button.
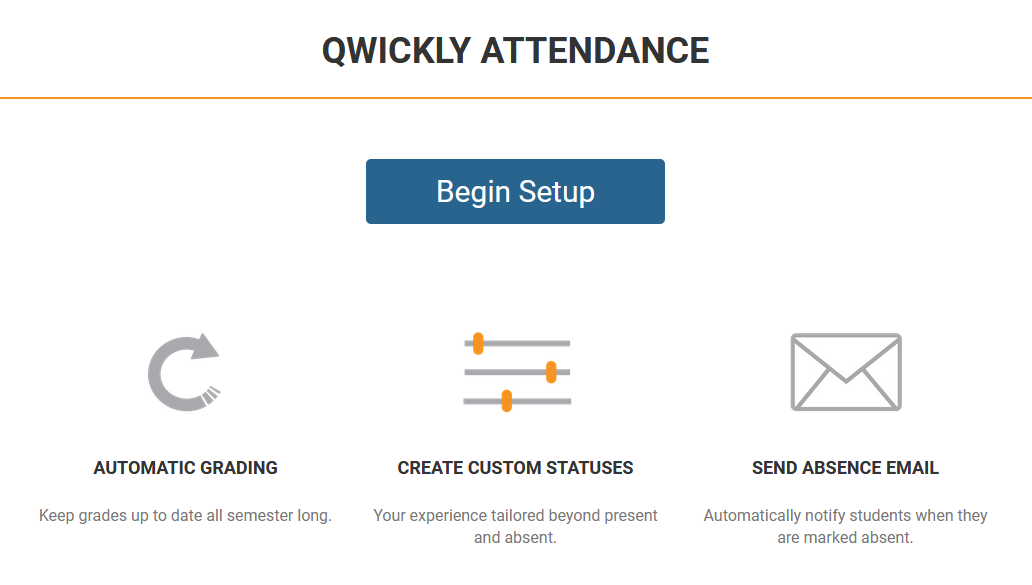
- You will be placed under the [Preferences] section inside Settings.
- Choose the type of User Sorting.
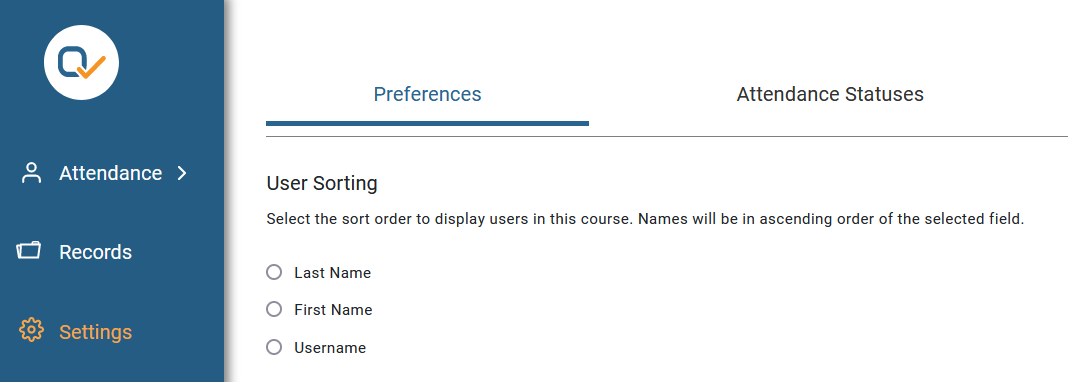
- Last Name - students are sorted by their Last Name
- First Name - students are sorted by their First Name
- Username - students are sorted by their MyLoneStar Username
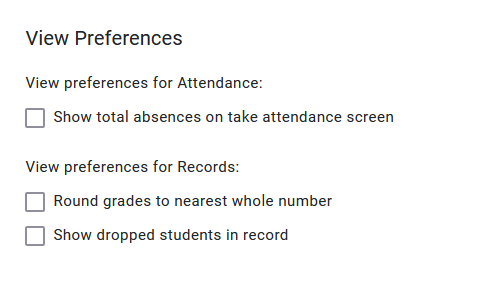
- Choose your View Preferences.
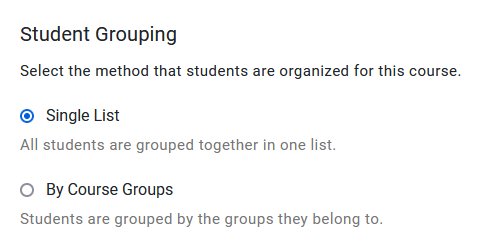
- Choose your Student Grouping.
NOTE: This section will not appear unless you have created groups in D2L or if you have merged rosters, allowing you to sort students by Groups or by Course Sections.
- Choose the settings for Check In.

- You can require students to enter a 4-digit PIN when checking in.
- You can set a check-in period which requires students to check in within "X" number of minutes (if you leave the number set to zero there is no time limit).
- Choose the type of User Sorting.
- The next section inside Settings is [Attendance Statuses].
- Select the System Statuses you wish to use.
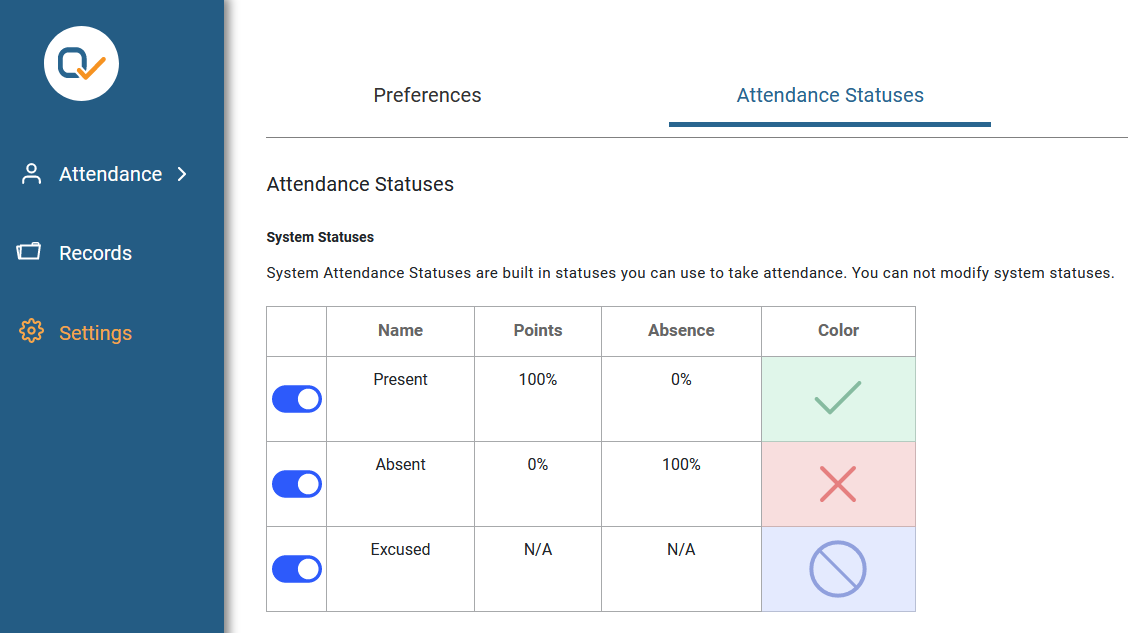
- You can turn off any of the system statuses to prevent them from showing up on your attendance sheet
- Add additional Custom Course Statuses.
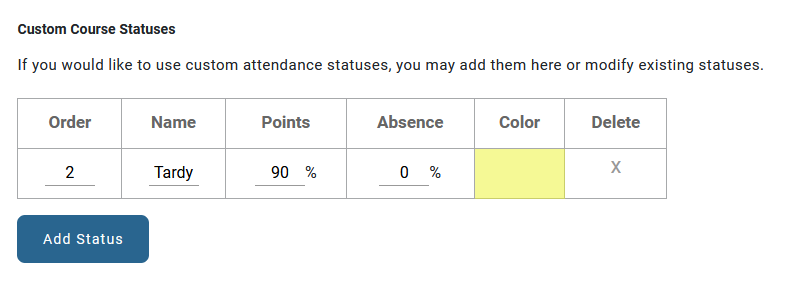
- Select the [Add Status] button to add a custom status.
- Order - the order in which your custom status appears on the Attendance sheet.
- Name - the name which will appear on the Attendance sheet.
- Points - the percentage of grade points students should receive if they receive that status for the day.
- Absence - the percentage of an absence students should receive if they receive that status for the day.
- Color - select the block to set a color to show up in the attendance record.
- Delete - select the X to delete the Custom Status at any time.
- Select the [Add Status] button to add a custom status.
- Select the System Statuses you wish to use.
- The final section inside Settings is [Grading].
- Select the Grading method.
- If you choose [Session Based Grading], you can award points for joining a session.
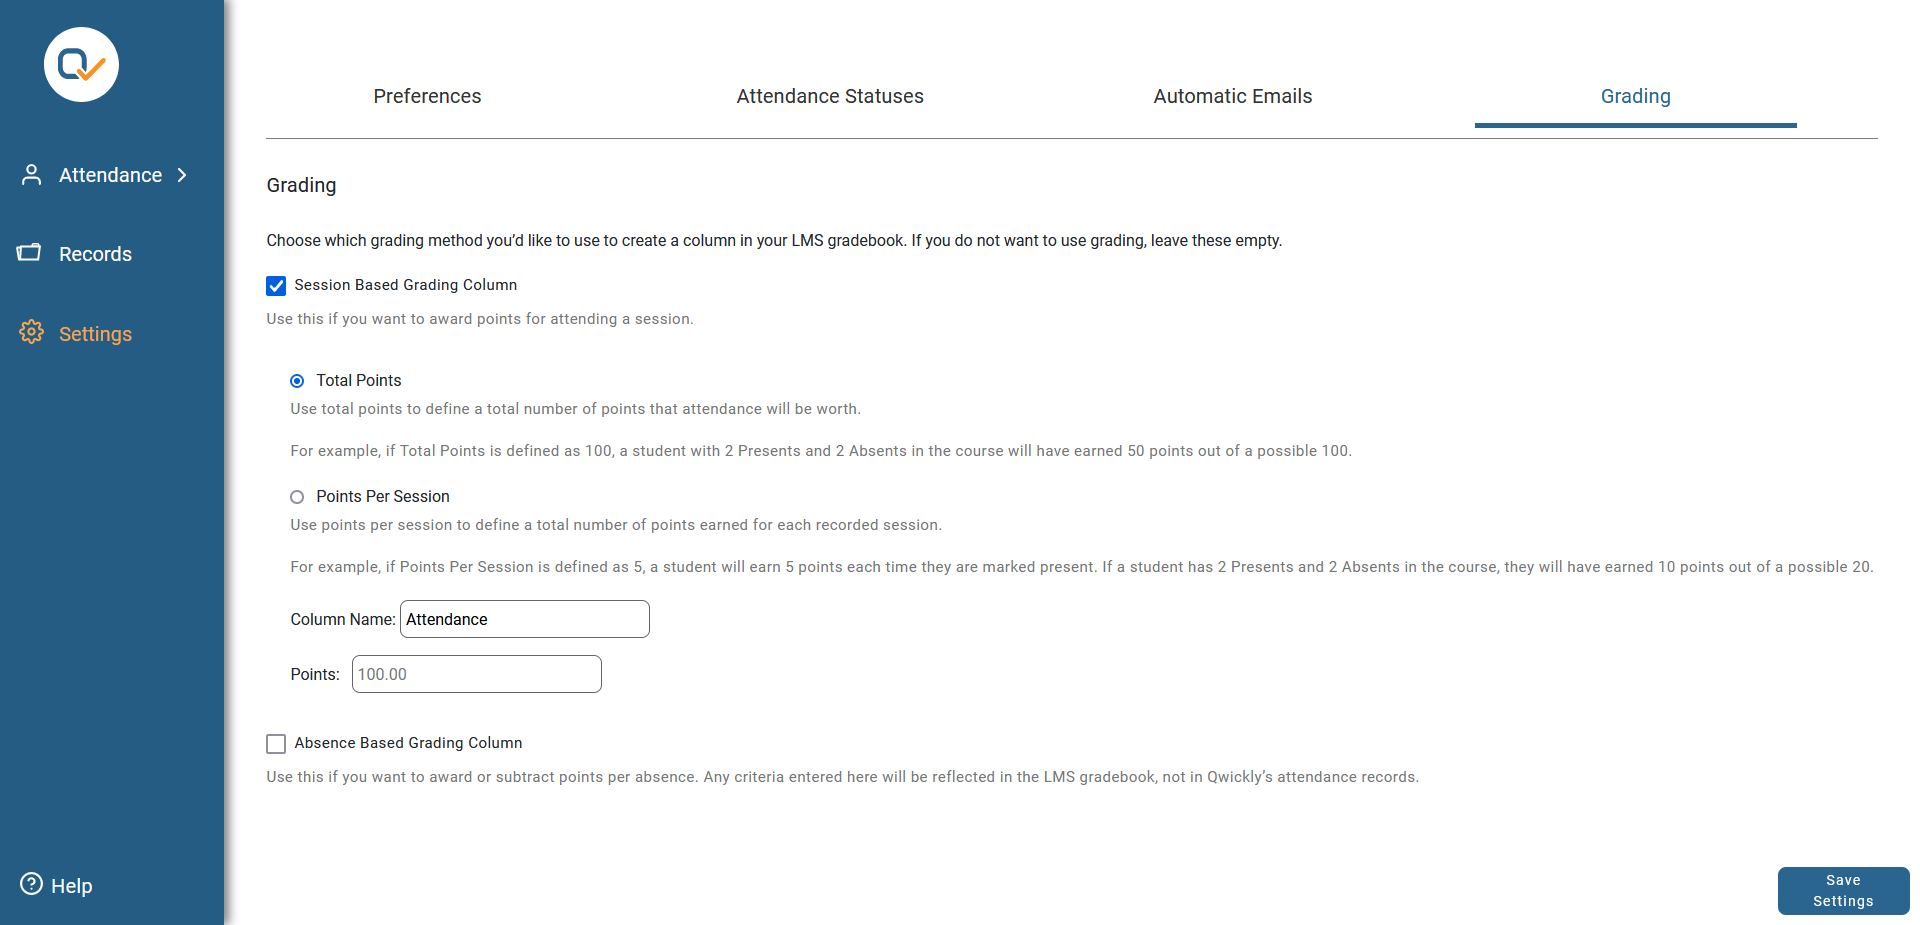
- Choose either Total Points or Points Per Session.
- Give the column a name.
- Enter the number of points for the total points/per session points.
- If you choose [Absence Based Grading], you can award or subtract points for each absence.
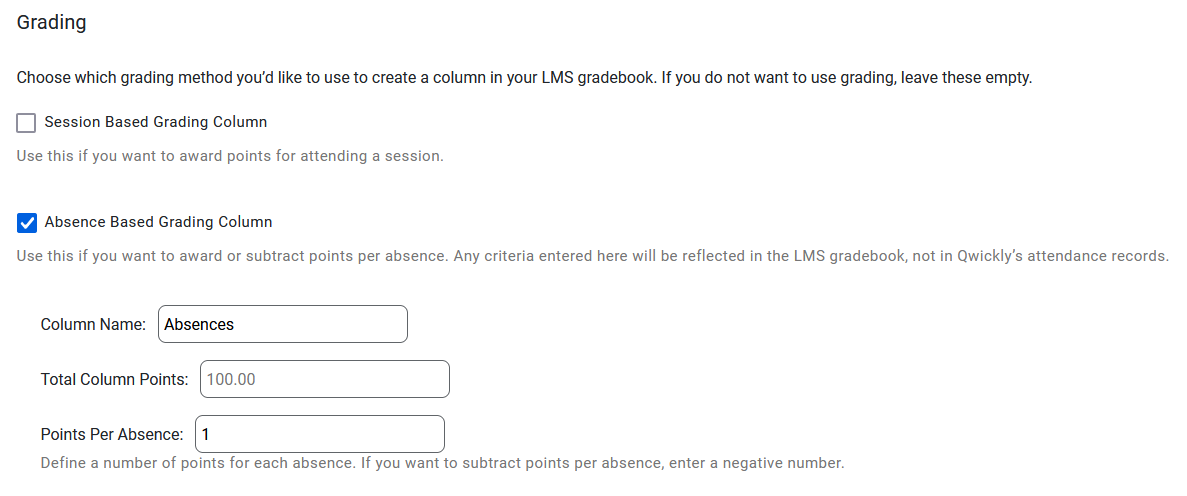
- Give the column a name.
- Enter the number of points for the total points/per session points.
- Determine the number of points to add per absence (to subtract points, use a negative number).
- If you choose [Session Based Grading], you can award points for joining a session.
- Select the Grading method.
- Click on [Save Settings] on the bottom right-hand corner to finish.