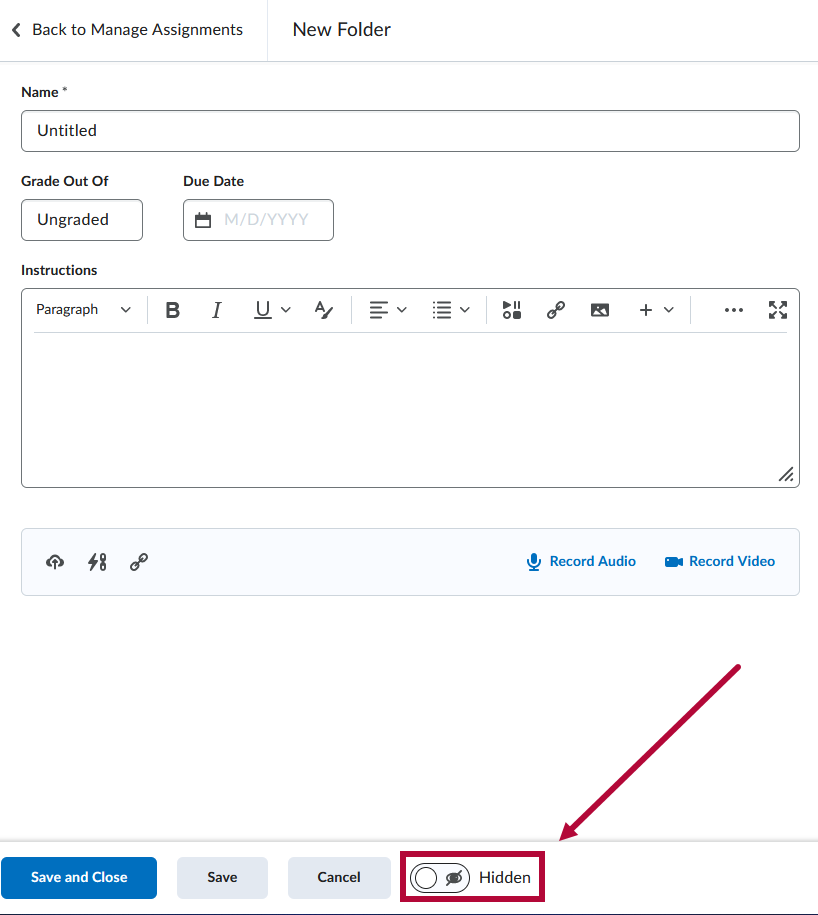
Instructors have the option to hide assignment folders from students. If you select the Hide from Users checkbox, the assignment will not be visible from content pages or on the Assignment folders list page. You can also limit access to an assignment by setting availability dates on the Restrictions tab.
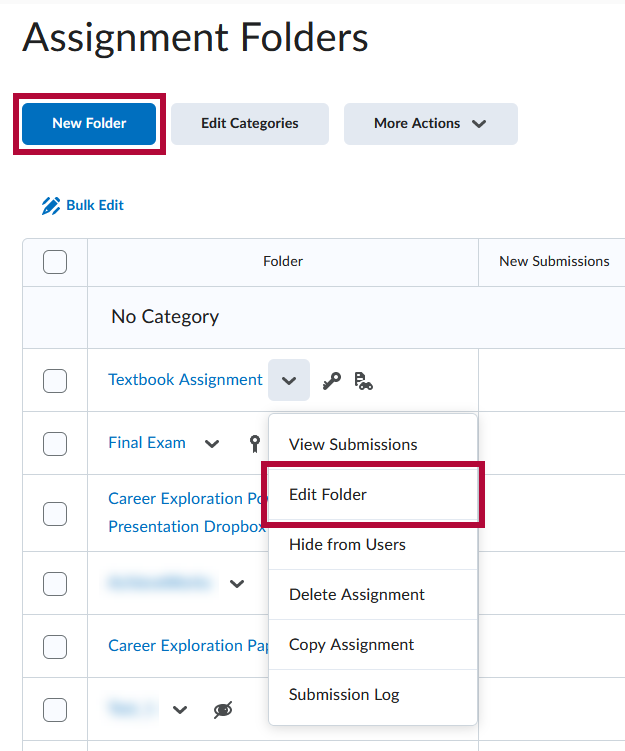
- Click [Course Activities] on the navbar and choose [Assignments].
- Click on [New Folder], or click on the context menu of any assignment and choose [Edit Folder].
- If you want to hide the folder completely, change the [Visible/Hidden] toggle at the bottom of the page to [Hidden].
- Set the Due Date towards the top left of the screen (right under the Name field).
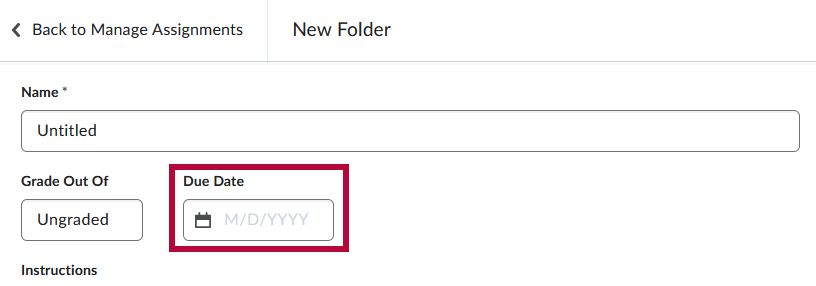
- The Due Date is the date you want the assignment to be due, but the folder will still accept submissions after the due date (these submissions will be flagged as late).
- The Due Date is the date you want the assignment to be due, but the folder will still accept submissions after the due date (these submissions will be flagged as late).
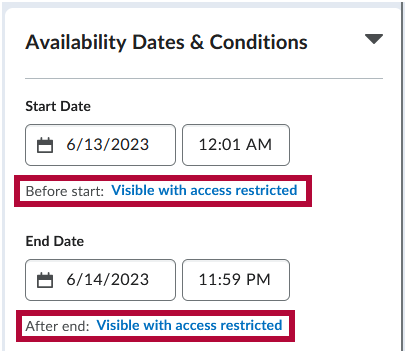
- In the [Availability Dates & Conditions] section, set the assignment folder's Start Date and End Date.
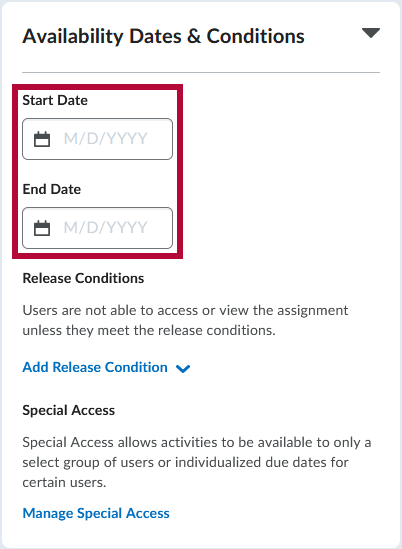
- The Start Date is the date that the assignment opens for students to submit.
- The End Date is the date that the assignment closes and will no longer accept submissions. You can set an End Date without a Due Date if you do not want to receive late submissions.
- The Start Date is the date that the assignment opens for students to submit.
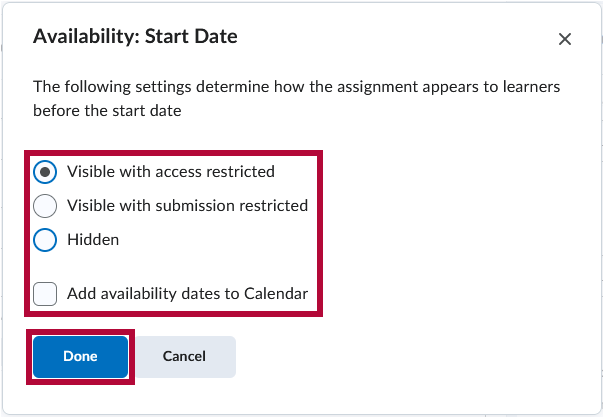
- Upon choosing a Start Date you will see an option titled Before Start and upon choosing an End Date you will see an option titled After End, these allow you to choose how the assignment appears to students before and after the visibility dates.
- For each option you can choose between [Visible with access restricted], [Visible with submission restricted], and [Hidden]. There is also a [Checkbox] to set whether the Start Date and End Date appear in the Course Calendar. When done choosing the desired settings, click Done to return to Availability Dates & Conditions.
- Click [Save and Close].


Set release conditions for an assignment folder
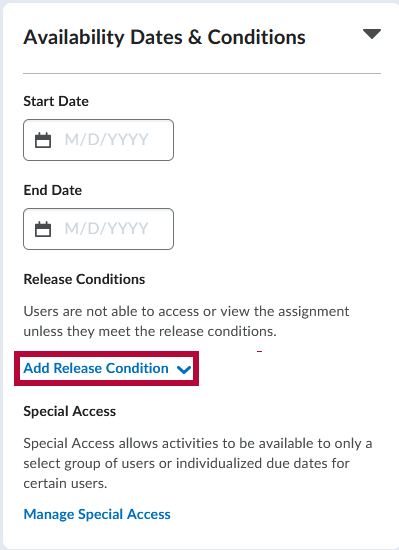
Release conditions allow you to associate an assignment folder with other items in D2L. For example, you can require that students meet some criteria, such as visiting a set of lecture notes in the Content tool, before they can submit their work to an Assignment folder. Alternatively, you can make submitting to the assignment folder criteria for accessing another item, such as a Quiz.
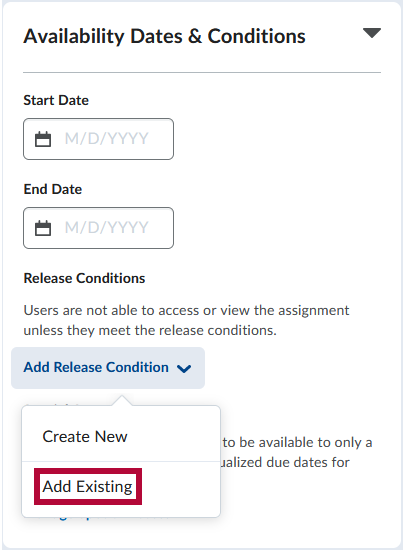
- On the [New Folder] or [Edit Folder] page, click on the [Availability Dates & Conditions] tab.
- In the Release Conditions section, click [Add Release Condition].
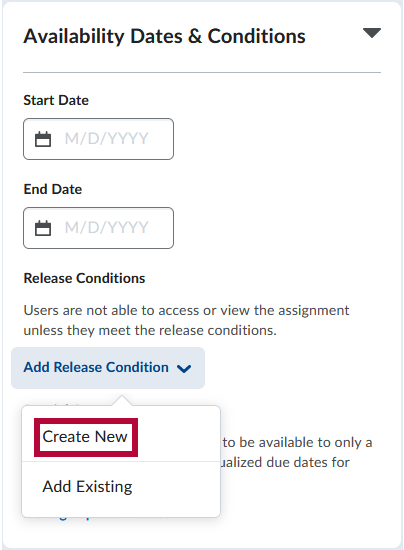
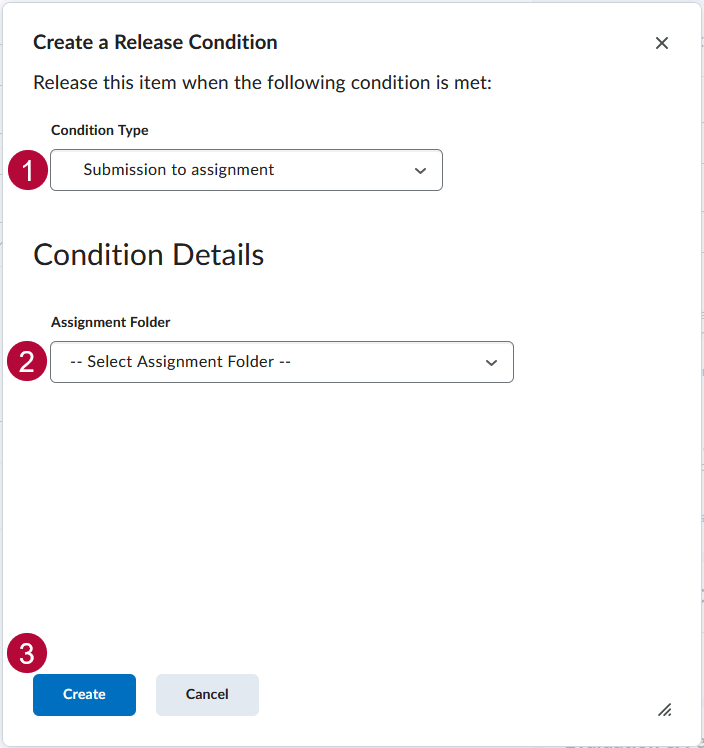
- If creating a new condition, click [Create New].
- Select a Condition Type and specify the Condition Details, then click [Create].
- Select a Condition Type and specify the Condition Details, then click [Create].
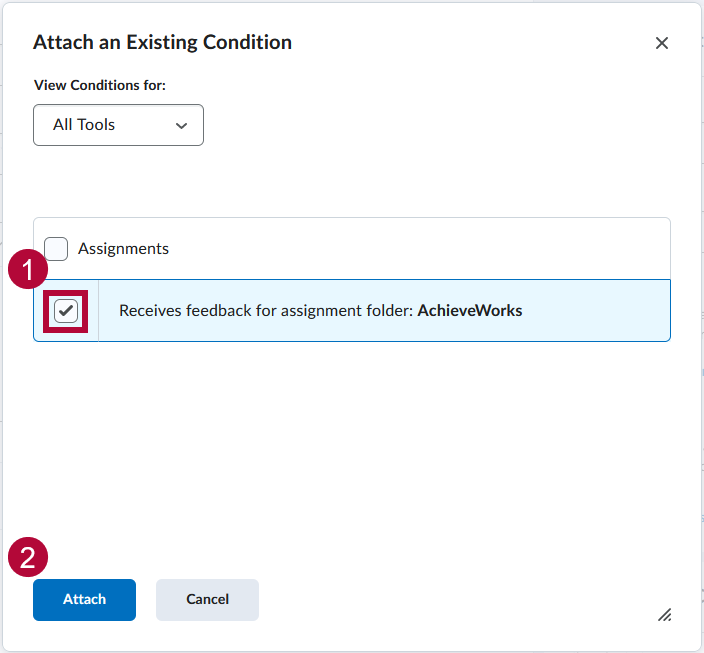
- If you are attaching an existing condition, click [Add Existing].
- Click the [Checkbox] next to the condition that you want to apply. You may attach more than one condition. Click [Attach] when done.
- Click the [Checkbox] next to the condition that you want to apply. You may attach more than one condition. Click [Attach] when done.
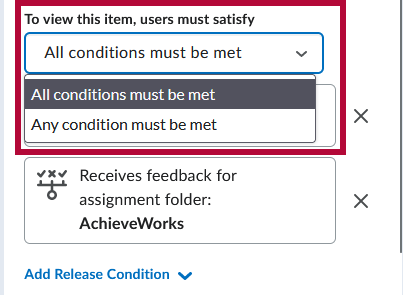
- If you add multiple conditions, you will see a drop-down list. Choose between [All conditions must be met] or [Any condition must be met].
- Click [Save and Close].


Best practices for creating release conditions
- Set up conditions before students access the course
- Avoid unnecessary conditions
- Avoid circular references
- Avoid impossible conditions
- Avoid contradictory conditions
- Release content based on learning ability and course performance
- Release content in stages
- Release content based on enrollment date
- Customize content for groups within a course
- Use a checklist to organize activities
- Use intelligent agents to monitor student activity or non-activity
See Release Conditions for more information.