Availability Dates & Conditions
On the Edit Topic page, the first section of the right panel is the Availability Dates & Conditions section. Expand it by clicking on [Availability Dates & Conditions].

The Availability Dates & Conditions section of the right panel consists of three subsections.
- Start Date / End Date
- Release Conditions
- Group and Section Restrictions

Start Date & End Date
By clicking on the [Start Date] and [End Date] fields, you can specify a date/time on when your topic ends or a date range in which your topic is available to students.

For the Before start or After end options, click on [Visible with access restricted] located below the dates. This will bring up the Availability: Start Date or Availability: End Date window, respectively.

The following options are listed on the popup window:
- [Visible with access restricted] - Displays the title of the discussion topic without the discussion prompt.
- [Visible with submission restricted] - Displays the title of the discussion topic with the discussion prompt.
- [Hidden] - Completely hides the discussion and removes the dates from the calendar.
- [Add availability dates to Calendar] is available to add dates to the D2L calendar.
Release Conditions
By setting up Release Conditions, students will not be able to access or view the quiz unless they meet the Release Conditions.
- Click on [Add Release Condition] to toggle the options to [Create New] or [Add Existing].
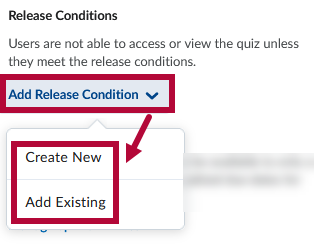
- Clicking on [Create New] will open the Create a Release Condition window.
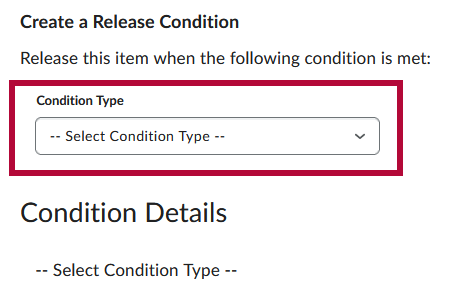


NOTE: Please refer to the list of Release Condition Types and Best Practices for Release Conditions for more details on how to setup and configure Release Conditions.
Group and Section Restrictions
If you have Groups and Sections and Restrictions setup in your course, you will see the [Manage Restrictions] option here.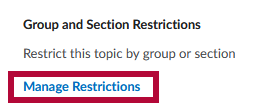
Within [Manage Restrictions], you have two options to choose from:
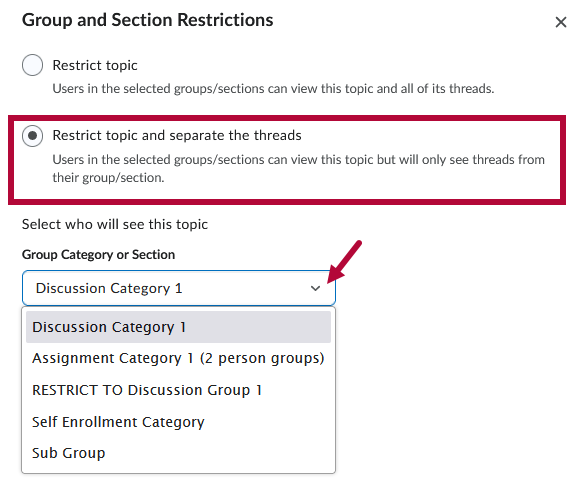
- [Restrict topic]: To limit the topic to specific groups/sections, ensuring that only users within those selected groups can access the topic and its threads. This allows each group to have its own topic with multiple threads. Use the checkboxes to select which groups are to have access to the topic.
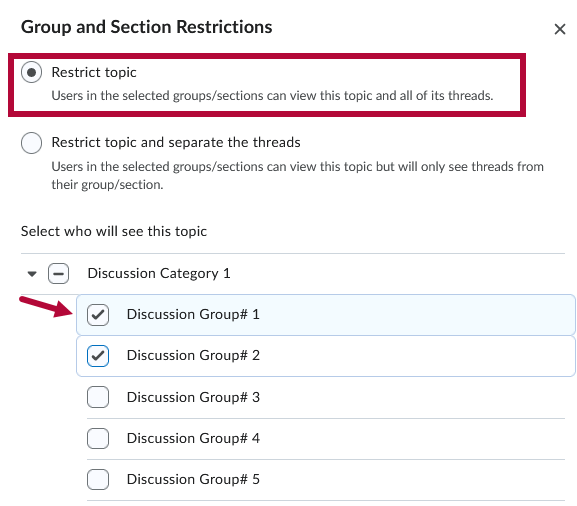
- [Restrict topic and separate the threads]: To create separate threads for each of the selected groups. With this option, each group will only see the thread(s) assigned to them. Toggle the dropdown menu under Group Category or Section to select who will see this topic.


Post & Completion
On the Edit Topic page, the second section of the right panel is the Post & Completion section. Expand it by clicking on [Post & Completion].

The following options are available here:
- [Default Participation]
- This is equivalent to neither Allow anonymous posts nor Users must start a thread being selected in the classic experience.
- This is equivalent to neither Allow anonymous posts nor Users must start a thread being selected in the classic experience.
- [Allow learners to hide their name from other learners]
- This is equivalent to Allow anonymous posts being selected in classic.
- This is equivalent to Allow anonymous posts being selected in classic.
- [Learners must start a thread before they can view or reply to other threads]
- This is equivalent to Users must start a thread before they can read and reply to other threads being selected in classic.
- This is equivalent to Users must start a thread before they can read and reply to other threads being selected in classic.
The [Posts must be approved before they display in the topic] checkbox, if checked, all posts would require manual approval before being published.
Evaluation & Feedback
On the Edit Topic page, the last section of the right panel is the Evaluation & Feedback section. Expand it by clicking on [Evaluation & Feedback].
You can setup Rubrics through the [Add Rubric] option. Please refer to the instructions on Setting Up a Rubric.

- [Allow evaluation of individual posts]
- This option requires the topic to have assigned points. When selected, instructors can assign scores to each post on this topic.
There are five possible calculation methods that you can select when configuring a topic for assessment.

- Average post score: This calculation method averages all of the post scores included per student.
- Maximum post score: This calculation method identifies the highest score of all the post scores included per student.
- Minimum post score: This calculation method identifies the lowest score of all the post scores included per student.
- Mode post score - Highest on multiple: This calculation method looks at the frequency of scores on posts, then selects the highest occurrence of a score per student. Once it picks the frequency, the system looks to see if multiple scores occur at that frequency. If not, it assigns that score to the student. If there are multiple scores with the same frequency, it will choose the highest of those scores. For example, if a score of 7 occurs 2 times, a score of 8 occurs 3 times, and a score of 9 occurs 3 times, the system will choose the frequency 3 and the score of 9.
- Mode post score - Lowest on multiple: This calculation method looks at the frequency of scores on posts, then selects the highest occurrence of a score per student. Once it picks the frequency, the system looks to see if multiple scores occur at that frequency. If not, it assigns that score to the student. If there are multiple scores with the same frequency, it will choose the lowest of those scores. For example, if a score of 7 occurs 2 times, a score of 8 occurs 3 times, and a score of 9 occurs 3 times, the system will choose the frequency 3 and the score of 8.
- Sum of post scores - This includes the total of all scores.
- [Allow learners to rate posts]
- This allows students to rate each other's posts through [Five-star Rating], [Up Vote/Down Vote Rating] , or [Up Vote Only Rating].

