You can add a virtual meeting to your course using the Webex integration in D2L. You can do this in the content area. This will allow you to meet with your students in a synchronous setting where you can use webcams or microphones to speak to each other. Or you can simply add a link to your Easy WebEx Personal Room.
NOTE: Before you attempt to set up Webex in your course, make sure you go to lonestar.webex.com and log in there first to ensure your WebEx profile is set up properly. You can sign in on that page by clicking the blue sign-in button on the right side of the page and using the same username and password that you use for myLoneStar.

To Insert the Webex Meeting Tool in Your Content Using the Webex Integration
- Click on the module where you would like to insert the Webex tool.
- Click on [Add Existing Activities] and choose [Third-party Integrations].
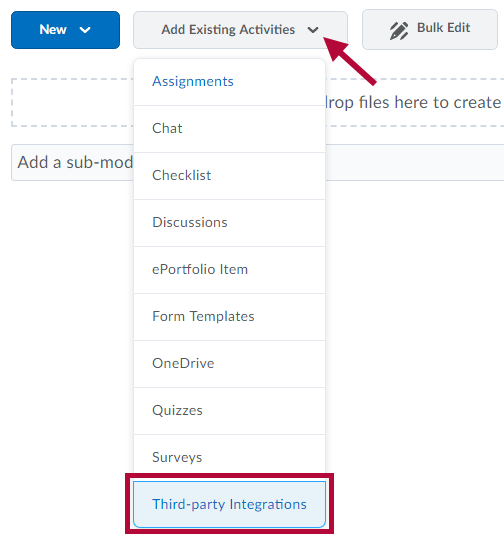
- Choose [Webex] from the menu.
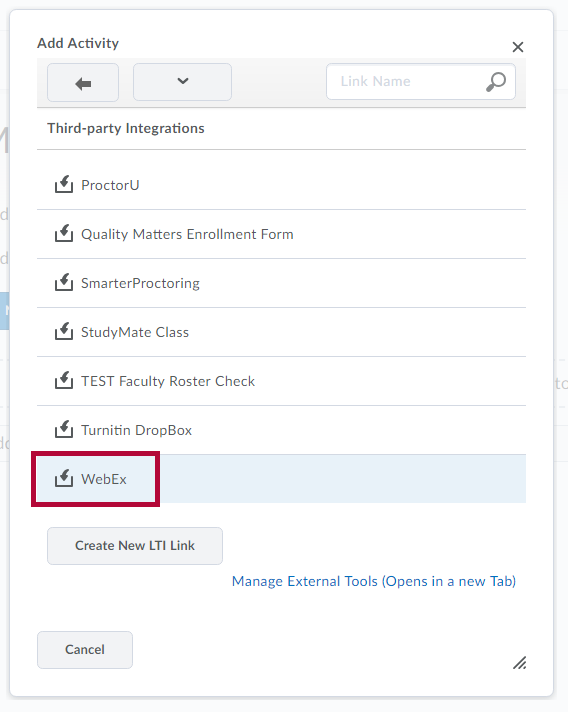
- A Webex topic will be added to your module.
- Click on the topic to enter the Webex tool. The software may spend a few moments setting up your account with Webex and you may be asked to set your time zone. This will only happen during account setup.
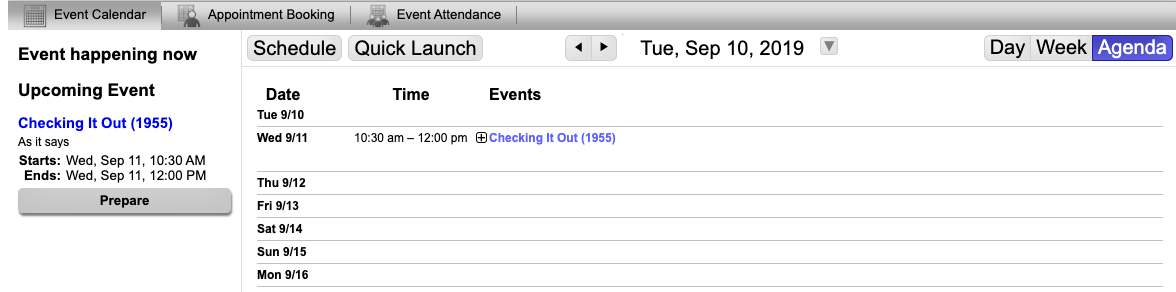
- You will see the Upcoming Events screen and the options for creating new events.
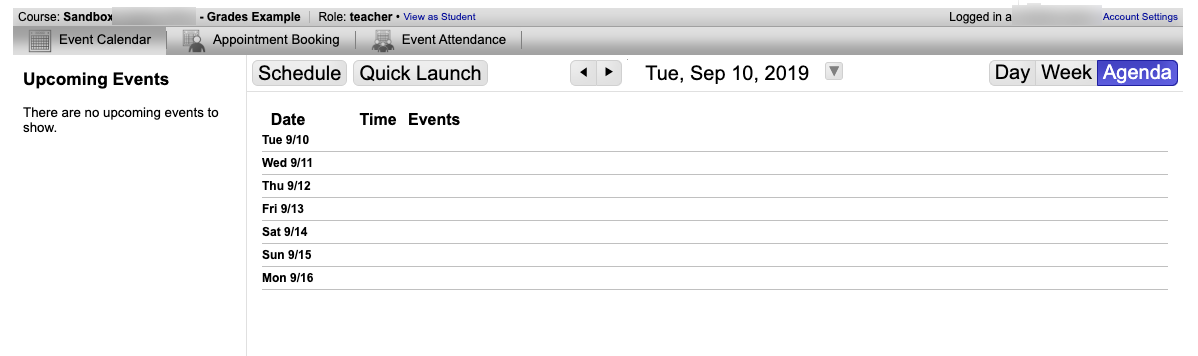
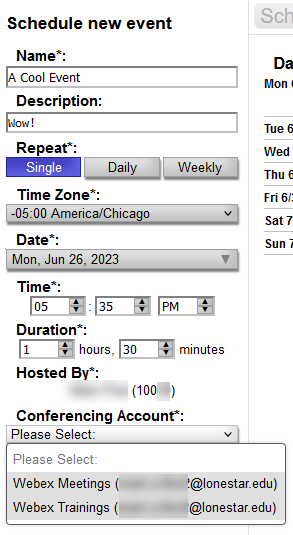
- To create a new meeting, click on [Schedule].
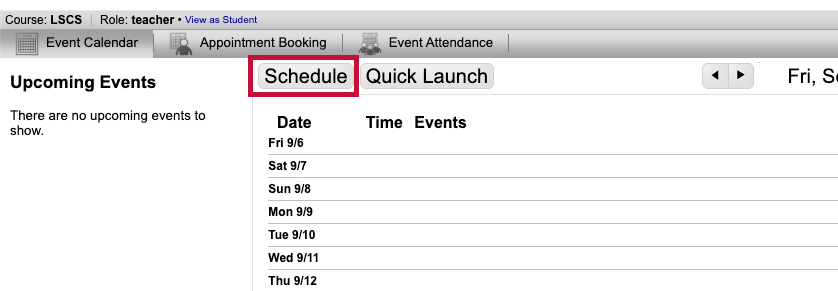
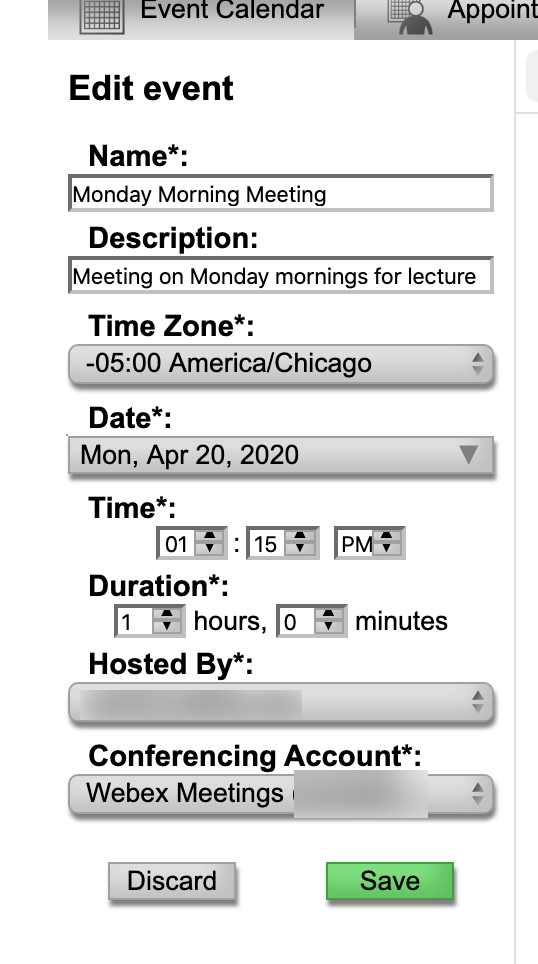
- Fill in all appropriate fields. Under Conference Account, select [Webex Meetings]. When finished, click on [Save].
- Once you have scheduled an event, it will show up on your Webex calendar within the integration.
TIP: The meeting will not be listed in the WebEx Portal, lonestar.webex.com, unless you click the Prepare button and open and close the session. This will force it to show up there immediately. You can also add a cohost, send a link outside of LSC, and other advanced options in the Webex Portal.
- At 15 minutes prior to the start time, the Prepare button will turn into a Host button. Click [Host] to start your meeting. Students will see a [Join] button.

NOTE: We do not recommend using Mozilla Firefox recommend when hosting or joining Webex Meetings through D2L. Google Chrome is recommended when using the Webex Integration in D2L, both for Faculty and Students.
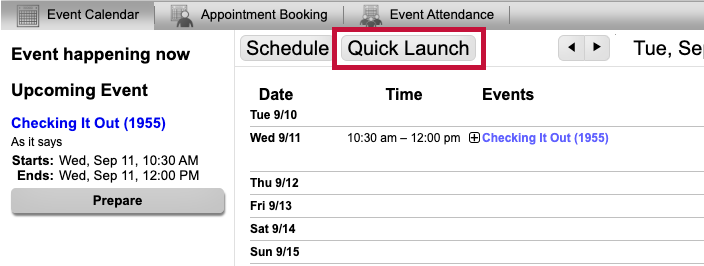
- You can also set up a quick launch event by clicking on [Quick Launch]. This is useful if you want to start a meeting that begins immediately.
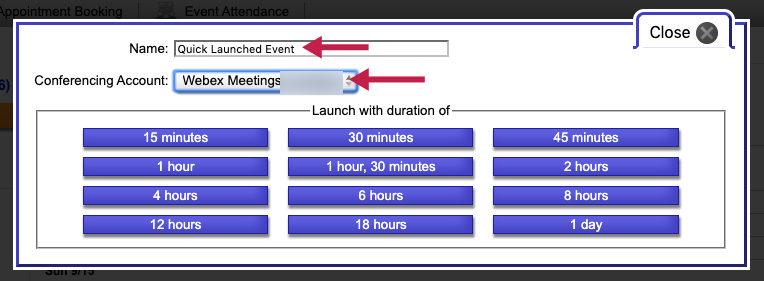
- Name your event and choose [Webex Meetings]. Select a duration time for the event by clicking on it. As soon as you click on your chosen duration, the meeting with launch.


NOTE: The Webex integration goes through a third-party called CirQLive. If you or your students see the meeting being set up in CirQLive before being directed to the Webex site, that is normal.
Edit a Webex Meeting
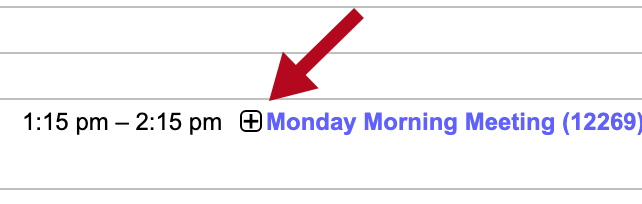
- Click on the Webex link in your course, or go to [Collaboration] → [Webex]. You will see a list of your meetings.
- Next to the name of the meeting you'd like to edit, click on the small [+] sign.
- You will see three icons below the details of your meeting.
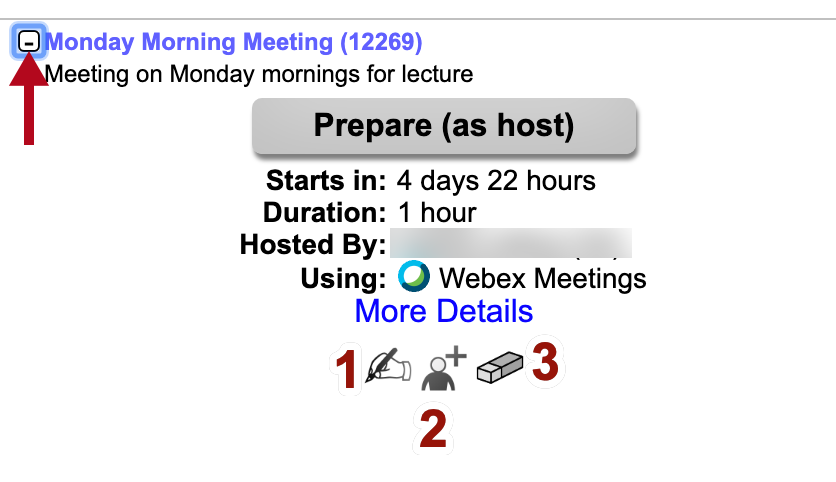
- The first icon will allow you to edit your meeting. The meeting details will show up in the left-hand column for you to edit.
- The second icon will allow you to share your meeting. You can either copy a link to send to others, or you can send an email invite directly from this screen.

- The third icon will delete your meeting.
- The first icon will allow you to edit your meeting. The meeting details will show up in the left-hand column for you to edit.


Use the Collaboration Link to Create Webex Meetings
- Click the [Collaboration] link in the navbar and choose [Webex].

- You will see the Webex meeting calendar for the entire course. You can schedule meetings from here, and students can access them from here. You can choose to use the tool from this location instead of adding it to your content.

NOTE: Meetings that you schedule in a course are only visible to students in that course. If you would like to have a meeting that is available to all students across courses, you should create your meeting at lonestar.webex.com, then share the link to the meeting in your courses. See Easy WebEx Personal Room.