When sending a mass email through the Compose New Message window in D2L, there are no changes to the navigation. Emails are delivered to your students’ LSC Outlook accounts instead of their D2L Email accounts
The Compose-New-Message window can be accessed through the following D2L pages: Classlist, Gradebook, Grade Item, Insights Portal, and Intelligent Agents.
NOTE: With this change, the Sent folder in D2L Email will no longer be available, meaning sent emails will NOT be automatically saved. You will not receive a confirmation when emails are sent in Outlook. To set this up, please refer to the Add and request read receipts and delivery notifications in Outlook article from Microsoft. To keep a record of sent emails in Outlook, please refer to the instructions in the article, Post-December 2024: Send a Copy of Outgoing D2L Emails to Your Outlook Inbox.
Keeping a record of your sent emails is important for documentation and accountability. This can be especially helpful if a student files a grade dispute.
Send Emails to the Classlist in Bulk
Whenever you want to send a bulk email to multiple students, you may recognize the small blue envelope icon  which appears in several locations throughout D2L, such as the Classlist, Gradebook, Insights Portal, and other areas. This envelope icon opens the Compose-New-Message window. After selecting the desired students using the [Checkboxes] on the left of their respective rows, the same email can be sent to all of them at once. Currently, these emails are sent to their D2L Email. Post-December 2024, they will be sent to their LSC email in Outlook.
NOTE: It is strongly recommended to regularly review your Outlook Spam folder to ensure important emails have not been mistakenly filtered.
You will notice that the email listed in the [Bcc] field has changed from the old D2L email to the current LSC email. Additionally, the Subject field will automatically default to the name of your D2L course.
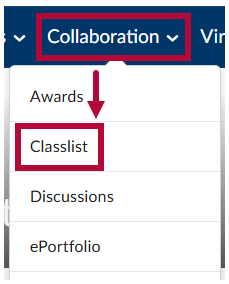
- Navigate to [Collaboration] → [Classlist].
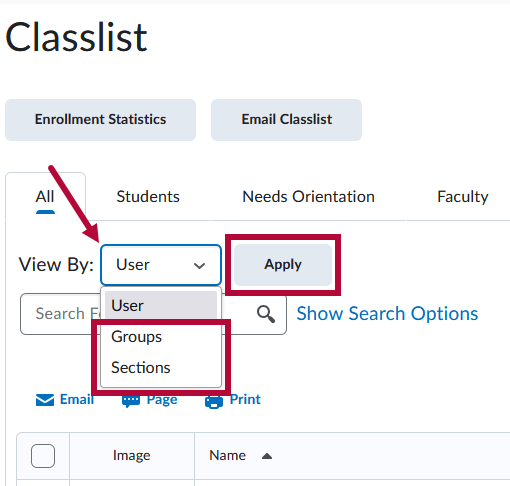
- In the Classlist, if you would like to email a specific class section or group, click in the View By dropdown list, select [Sections] or [Groups], and click the [Apply] button.
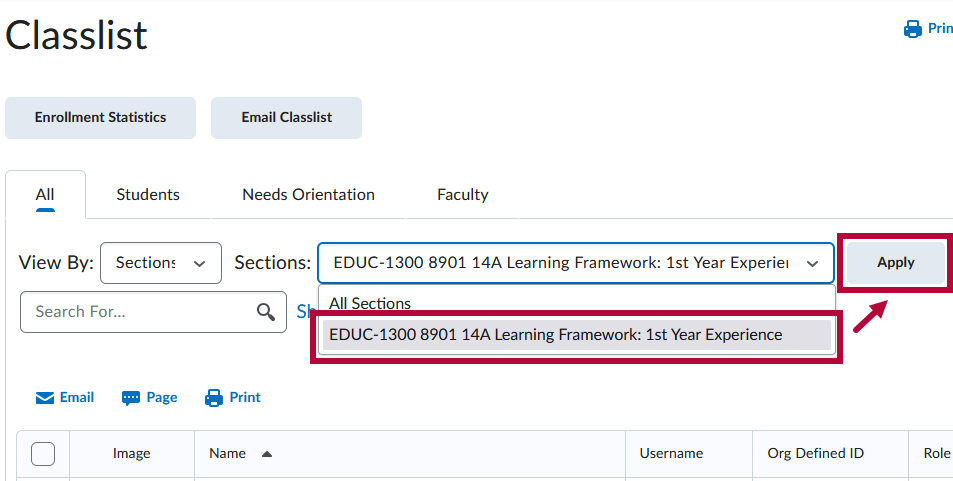
- Then in the Sections or Groups dropdown list, select the [Section Name] or [Group Name] of the section/group which you would like to view, then click [Apply] again.
- In the Classlist, if you would like to email a specific class section or group, click in the View By dropdown list, select [Sections] or [Groups], and click the [Apply] button.
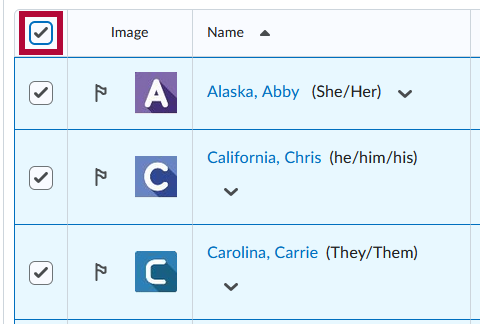
- Select the [Checkboxes] for the students you want to send an email to, then click [Email].
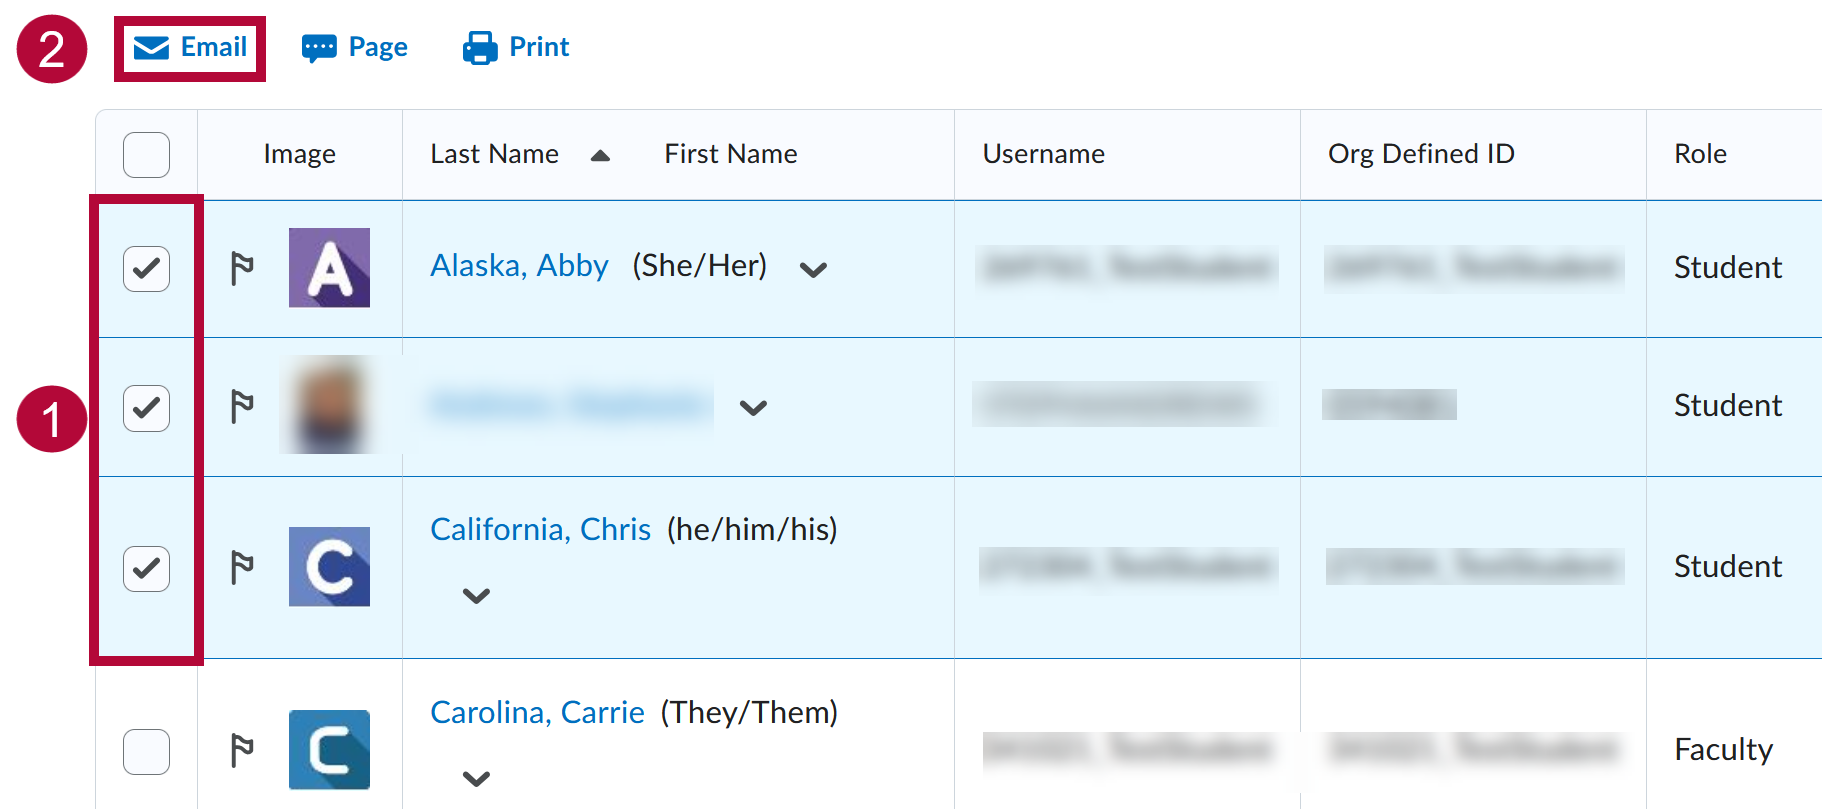
NOTE: You can click the [Checkbox] in the upper-left corner to select all students. This can be used in combination with steps 1A and 1B above to email all students in a particular Section or Group.
- The selected recipients will be inserted into the [Bcc] field.
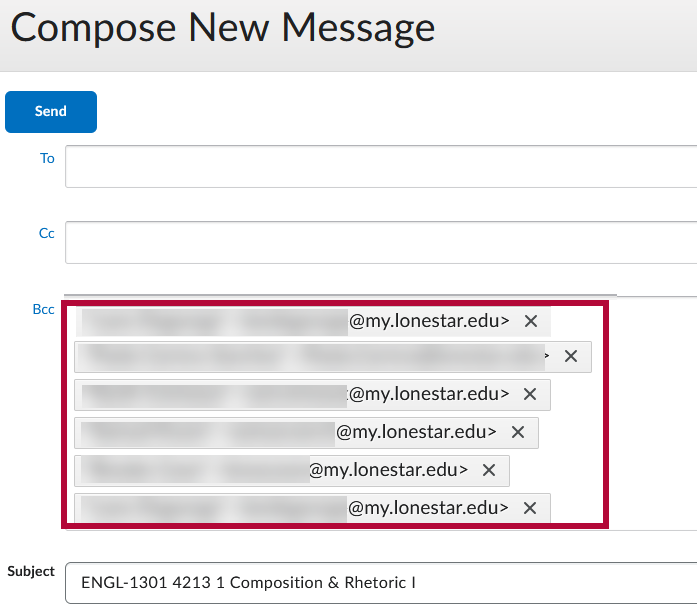
- You can also manually type out email address(s) within the field by clicking at the end of the last email entered in the field.
ALERT: To keep a record of sent emails in Outlook, please refer to the instructions in the article, Post-December 2024: Send a Copy of Outgoing D2L Emails to Your Outlook Inbox.
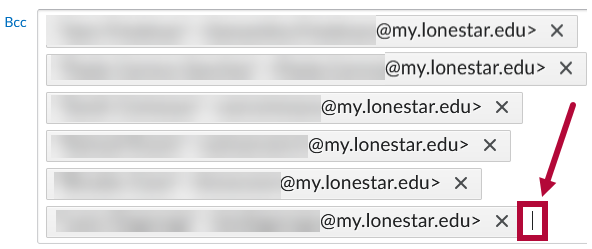
- Manually type out the email you wish to add to the recipient list.


Send Emails from Gradebook to Students
To access the Compose-New-Message window from the gradebook, enable the [Checkboxes] to the left of the gradebook for the students you wish to email. Then click on the blue [Email] icon. As an example, you can use this method to send a notification email directly from the Gradebook to students who haven't completed a specific quiz.

Receive Emails from D2L-Classlist
When an email is sent from the Classlist, Gradebook, or Insights Portal using the Compose-New-Message window, the sender's D2L email will automatically populate in the [From] field. When a recipient replies to this email, the sender's LSC email address instead will be placed in the [To] field. Even though the email exchange started in D2L, the rest of your communication continues in Outlook.
NOTE: If you try to send a new message in Outlook by manually typing a D2L email address (e.g., username@d2l.lonestar.edu), the email will fail to deliver. To ensure your reply goes through, you must click the [Reply] button on the original message from Outlook. Avoid clicking the D2L email address directly, especially when using Outlook Mobile, as this may also result in a failed delivery.
