The Manage Files tool is a file management system for your course. You can use this tool to organize and upload files associated with your course offering. We recommend that you organize your files into folders, creating a folder for each module of content or each category or file type. The functions you can perform in Manage Files can be divided into the following three categories:
- Organizing and managing files and folders.
- Performing basic tasks such as creating, editing, deleting, uploading, and moving files and folders, and zipping and unzipping files.
- Creating topics using files from your course content structure.
Accessing Manage Files
Click [Course Management] on the Navbar then click [Manage Files].
Creating a New Folder
- On the Manage Files page, click on the folder in the tree on the left where you want to add a new folder.
- Click [New Folder].

- Enter a name for the new folder and click [Save].

Copying a File or Folder
- On the Manage Files page, select the check box beside the folder or file you want to copy. You can copy multiple files and folders to the same location by selecting the check boxes beside those files and folders.
- Click the [Copy] icon in the action bar.

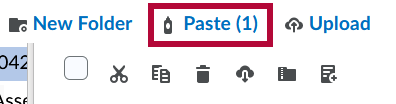
- Navigate to the folder where you want to place the copied content.
- Click [Paste].


Moving a File or Folder
- On the Manage Files page, select the check box beside the folder or file you want to move. You can move multiple files and folders to the same location by selecting the check boxes beside those files and folders.
- Click the [Cut] icon in the action bar.

- Navigate to the folder where you want to place the content you want to move.
- Click [Paste].


Renaming a File or Folder
- On the Manage Files page, click context menu of the file or folder you want to rename and select [Rename].
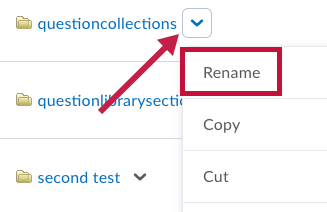
- Enter in a new name for the file or folder.
- Click [Save].

Sorting Files and Folders
Click on the corresponding column header to sort files and folders ascending or descending by name, size, type, or last modified date.
Deleting a File or Folder
- On the Manage Files page, select the check box beside the file or folder that you want to delete. You can delete multiple files or folders all at once by selecting the check boxes beside those files or folders.
- Click the [Delete] icon on the action bar.


Uploading and Downloading Files
Manage Files enables you to select and upload files from your computer to D2L. You can upload most file types, but you should ensure that students have the appropriate software to view these files.
Though you can upload most file types to a content directory in Manage Files, only files with specific extensions can be used as content topics. For a list of unsupported file types and extensions, see below:
| ASP | ASHX | JSL | VB |
| ASPX | ASMX | LICX | VBPROJ |
| EXE | AXD | REM | VJSPROJ |
| BAT | CDX | RESOURCES | VSDISCO |
| DLL | CER | RESX | WEBINFO |
| COM | CONFIG | SHTM | INI |
| ASA | IDC | SHTML |
|
| ASAX | CS | SOAP |
|
| ASCX | CSPROJ | STM |
|
NOTE: If one of these file types must be submitted, have the student create a compressed folder, ZIP. This will hide it from the system.
Upload Files
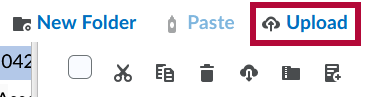
- On the Manage Files page, navigate to the folder that you want to upload files to.
- Click [Upload].
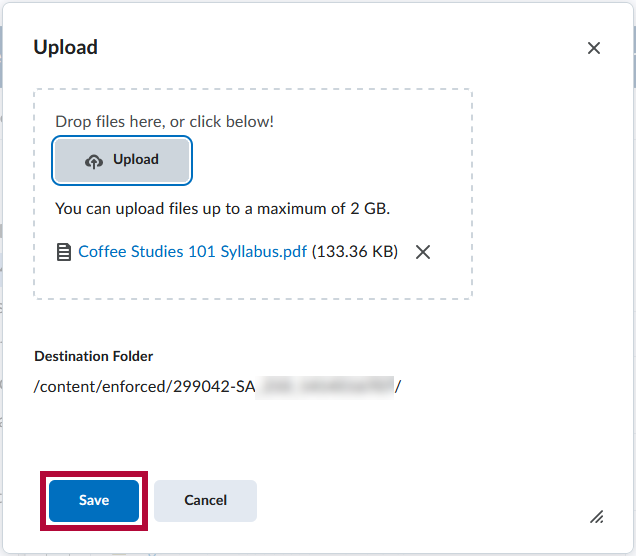
- Click [Upload] to locate the file you want to upload.

- Click the [Upload] button again to add another file.
- When finished adding files, click [Save].


NOTE: File names cannot end with a '.' character, and cannot contain: \ / : * ? " < > |
Download Files or Folders
- On the Manage Files page, navigate to the folder you want to download files from.
- Select the check boxes beside the files or folders you want to download.
- Click the [Download] icon from the action bar.

- From the pop-up window, click on the ZIP file that is created.
- Use your browser’s save dialog to save the file to your desired location.

Zipping and Unzipping Files and Folders in Manage Files
Zip a File in Manage Files
- On the Manage Files page, select the check boxes beside the files or folders you want to compress.
- Click the [Zip] icon on the action bar.

- The files are compressed into the current folder and a new .zip file will be created.

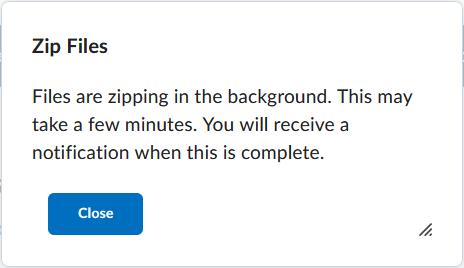
When you zip a file on the Manage Files page in a course, a message notifies you that the operation is happening in the background and that you will be notified when it is complete. This allows you to perform other tasks while waiting for the operation to complete.
When the file successfully unzips, a notification appears in the minibar. Clicking the notification takes you back to the Manage Files page in the course.

Unzip a File in Manage Files
- On the Manage Files page, go to the folder where you want to extract files.
- Upload your .zip file.
- On the zipped file's context menu, click [Unzip] to extract the files into the current folder.


When you unzip a file on the Manage Files page in a course, a message notifies you that the operation is happening in the background and that you will be notified when it is complete. This allows you to perform other tasks while waiting for the operation to complete.

When the file successfully unzips, a notification appears in the minibar. Clicking the notification takes you back to the Manage Files page in the course.
