The Announcements tool enables you to create announcements that help communicate course updates, changes, and new information to your students quickly and efficiently. Since My Home or Course Home is the first page that students see when they log into D2L, the Announcements widget is a good area for displaying important information.
View the AnnouncementsTool
Click the [Announcements] widget's header on the course home page.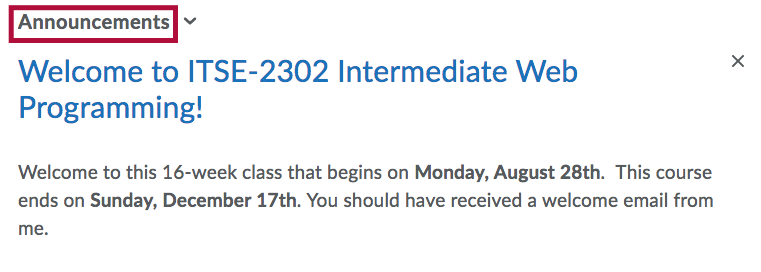
Create an Announcement
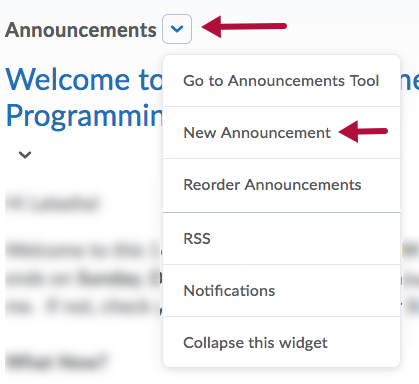
- Click the dropdown arrow for the Announcements header, then select [New Announcement].
- Enter the subject of your announcement in the Headline field.
- Enter the body of your announcement in the Content field.
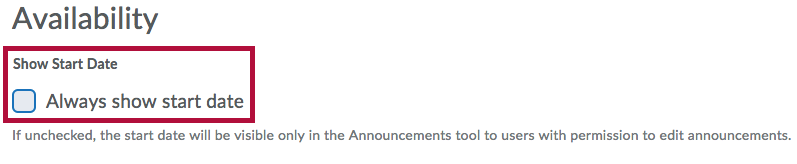
- If you want to hide your announcement's date and time, clear the box for [Always show start date]. By default, an announcement's start date and time appear below the headline when displayed in the Announcements widget.
- To make your announcement available starting at a specific date and time, select the date and time under Start Date. Announcements will display on the course homepage immediately when published, unless a start date and time is specified.
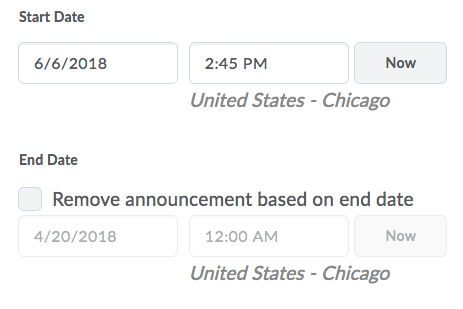
- To remove your announcement from student view, select the check box for [Remove announcement based on end date] and select the date and time you want the announcement to no longer be visible. You and administrators will still be able to see the announcement after the end date, but students will no longer be able to see it.
- Under the Attachments section, you can include files, audio recordings, and video recording as part of your announcement:
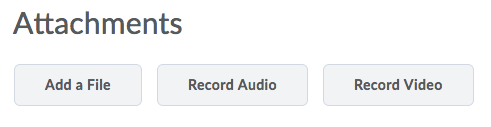
- Click [Add a File] to attach a file to the announcement.
- To record audio, click [Record Audio]. Click [Flash Settings] to make adjustments to your microphone selection and volume. Click [Play] to listen to your recording. Click [Clear] to erase your recording.
- To record a video, click [Record Video].
- Click [Add a File] to attach a file to the announcement.
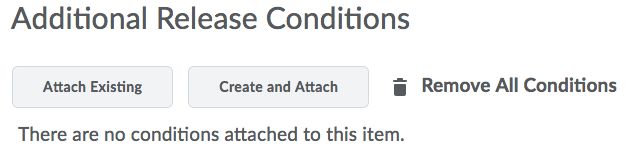
- To include additional release conditions, click [Attach Existing] or [Create and Attach].
- Click [Save as Draft] to continue editing the announcement (students cannot see draft announcements), or click [Publish] to release the announcement to users.


Copy an Announcement
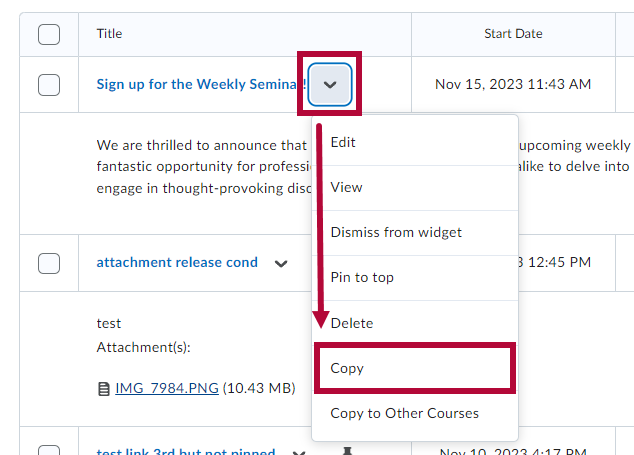
- Users click [Copy], which opens a new edit announcement page in draft mode with the details of the original announcement copied over.
 The following details are copied:
- Headline, with "Copy of " appended to the front
- Content
- Display Author checkbox setting
- Show Start Date setting
- Attachments
- Release conditions
- Start dates and/or end dates are not copied over. No notifications are triggered by this action until the edit page is saved.
- You can use the [Copy to Other Courses] tool here to copy your announcement to another D2L course. Please note that Release conditions are not copied.
NOTE: You must be enrolled in both the source and destination courses as a Faculty to use this option.
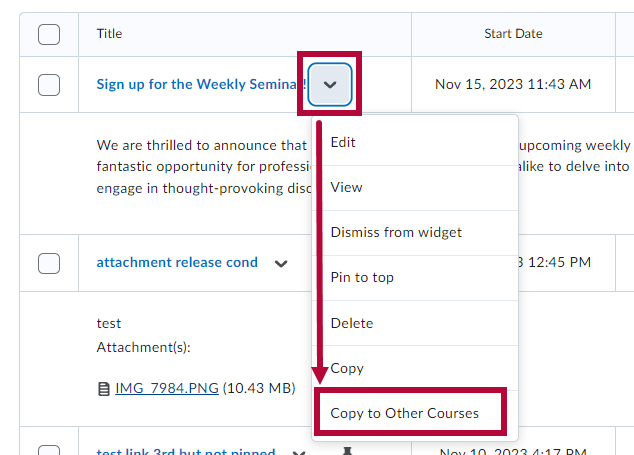
- When copying an announcement to another course, it will be copied in Draft mode by default. To instantly publish the announcement when copied, click the [Publish Announcement on Copy] checkbox.

 The following details are copied:

Edit an Announcement
- Click on the [Announcements] header to go to the Announcements tool page.
- Click on the title of the announcement you want to edit or click the context menu and choose [Edit].
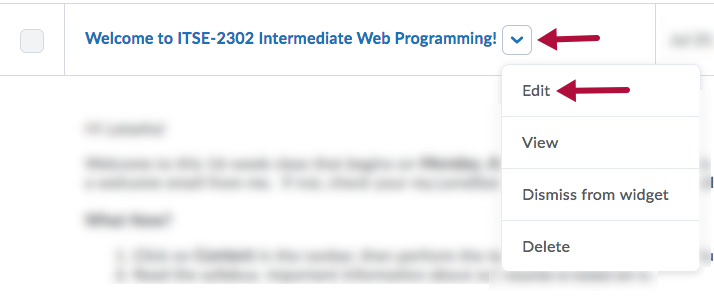
- [Edit] your announcement.
- You can select the check box for [Major edit - send a notification and restore it for those who dismissed it] to inform users of significant changes and updates to the announcement, while making the announcement reappear with current information for those who may have dismissed it.

- Click [Update].


Reorder Announcements
- Click on the [Announcements] header to go to the Announcements tool page.
- Click the [More Actions] button, then select [Reorder].
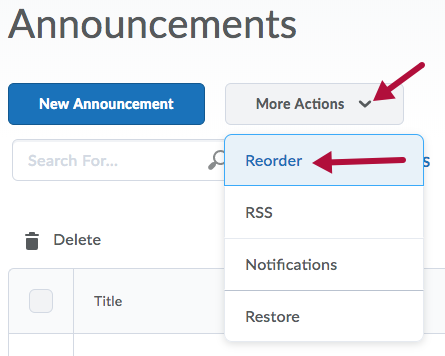
- Use the drop-down lists in the Sort Order column to select an announcement's order. Other announcements automatically reposition themselves according to the new order.
- Click [Save].

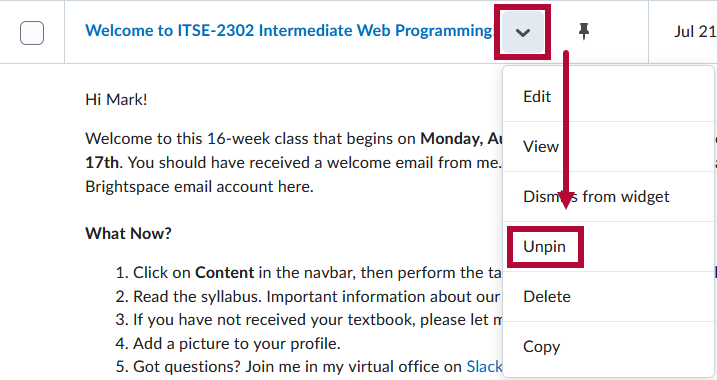
Pin or Un-Pin an Announcement
- Click on the [Announcements] header to go to the Announcements tool page.
- Click the dropdown arrow next to the announcement you want to pin and click [Pin to top]. Pinned Announcements will always appear first in the Announcements widget for students, regardless of the age of the announcement.
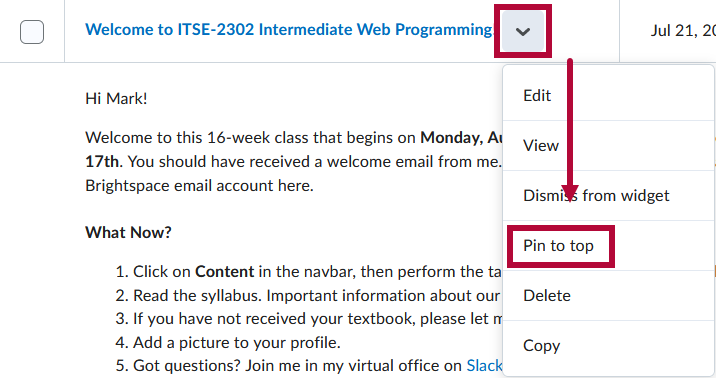
NOTE: Pinning an Announcement will not impact whether an Announcement is Expired or whether a user Dismisses the Announcement. Pinned Announcements which are expired or dismissed still will not show in the Announcements widget.
- If you wish to Un-pin an announcement, click the dropdown arrow next to any pinned announcement, and click [Unpin].


Dismiss an Announcement
Dismissing an item hides it from your view, not the student view. Dismissing is NOT deleting.
- Click the [Dismiss (X)] icon for the announcement you want to hide (from yourself only) in the Announcements widget.
- To hide from students, change the start or end date.
Restore a Dismissed Announcement
- Click on the [Announcements] header to go to the Announcements tool page.
- Click [Restore] from the context menu of the announcement you want to restore.
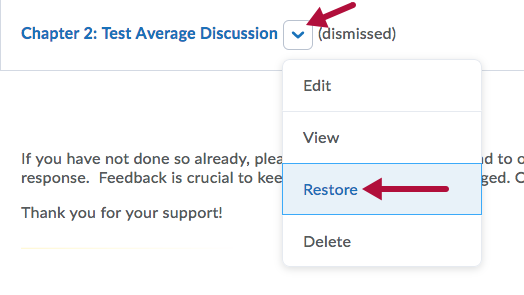
- To restore an announcement dismissed by students, select [Edit] from the context menu, select the [Major edit] checkbox, and click Update.

Delete an Announcement
- Click on the [Announcements] header to go to the Announcements tool page.
- Click on the context menu next to the announcement and choose [Delete].
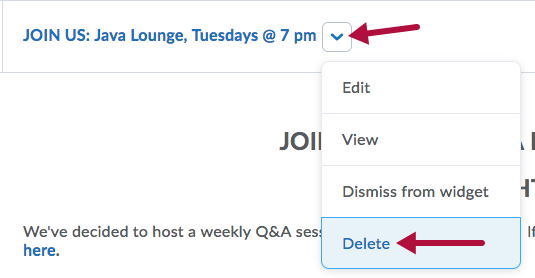

NOTE: You can only delete Announcements that you have created.
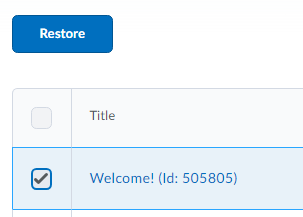
Restore a Deleted Announcement
- Click the [More Actions] button at the top of the page and choose [Restore].
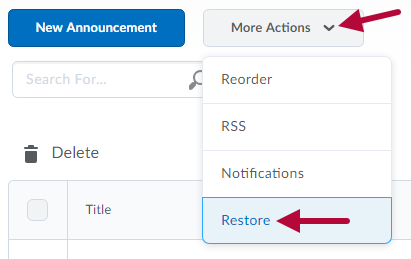
- Check the box next to the announcement you’d like to restore, then click the [Restore] button.