Students submit their work to an Assignment Folder. Instructions you provide in the assignment folder appear to students in the Folder Information area on the Submit Files page.
Instructions may include:
- Information about evaluation methodology
- Details about rubric assessments
- Associations with learning objectives
- Clarifications on work expectations
Create an Assignment
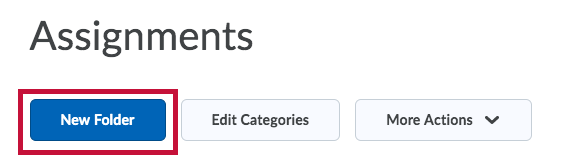
- Click the [Course Activities] menu in the Navbar, then choose [Assignments].
- On the Assignments page, click the [New Folder] button.
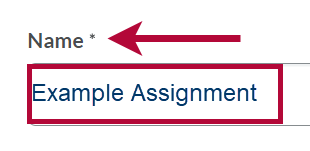
- Enter a Name.
- Enter the Score Out Of value for your assignment (for example, 100pts) and the Due Date.
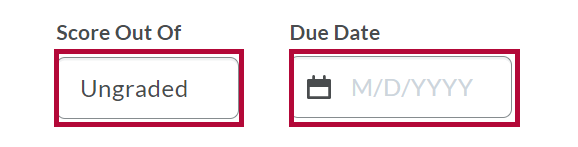
- Once you enter a Score Out Of and a date, the ability to choose a grade option and the ability to choose a Due Date will appear.
- Once you enter a Score Out Of and a date, the ability to choose a grade option and the ability to choose a Due Date will appear.
- Add Instructions for students.
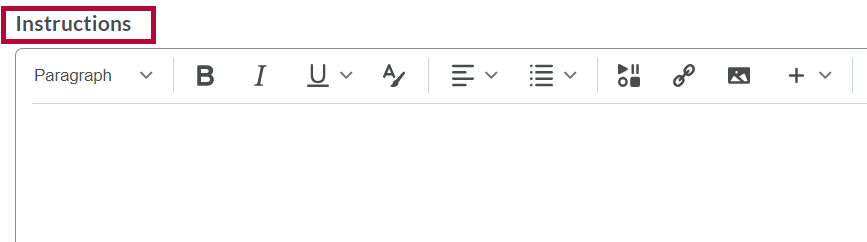
- To include attachments such as a file, link, or existing activity, choose the appropriate icon below the instructions HTML box. For more details on adding Attachments, see Add an Attachment to an Assignment.

- Toggle the [Visibility] of the assignment off and on by clicking the [Eyeball Icon] along the save bar. (The assignment is not visible by default.)


Availability Dates & Conditions
- To set restrictions, click on [Availability Dates & Conditions] in the right-hand column. Enter a Start Date and/or an End Date according to your preferences.
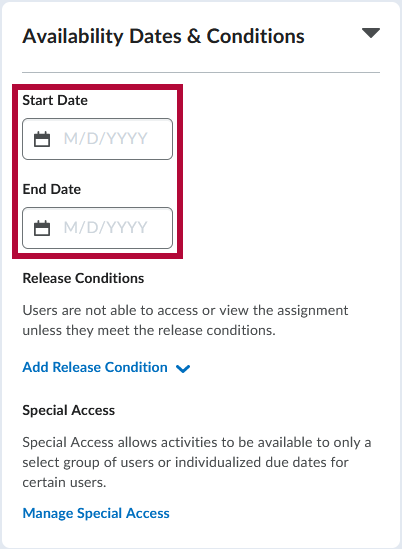
- Upon choosing a Start Date you will see an option titled Before Start, and upon choosing an End Date you will see an option titled After End. These allow you to choose how the assignment appears to students before and after the visibility dates.
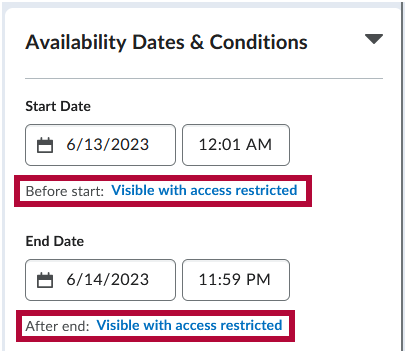
- There is also a [Checkbox] to set whether the Start Date and End Date appear in the Course Calendar. When done choosing the desired settings, click [Done] to return to Availability Dates & Conditions.
You can choose one of the following availability date settings:
- [Visible with access-restricted]: The assignment will be visible to learners before the Start Date or after the End Date, but they cannot click or open it. Learners can see the name, dates, and restrictions but cannot see the assignment description or attachments.
- [Visible with submission-restricted]: The assignment will be visible to learners before the Start Date or after the End Date, and they can click or open it, but they cannot submit or mark it as complete. Learners can see all details about the assignment, including description, attachments, and rubrics, but they cannot upload files, enter comments, or mark the assignment as complete.
- [Hidden]: The assignment is hidden to learners until the start date is reached or after the end date passes. Learners cannot see the assignment anywhere, including corresponding Calendar events and Notifications.
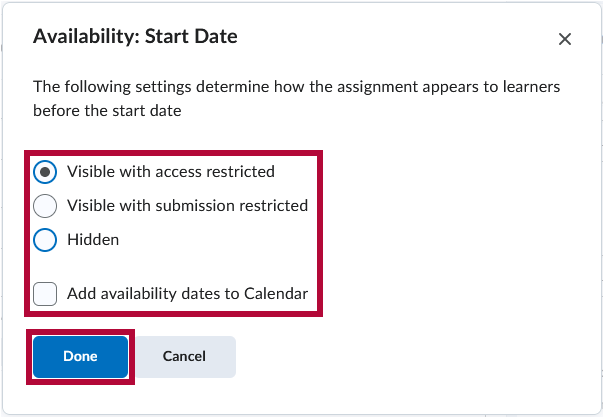
- [Visible with access-restricted]: The assignment will be visible to learners before the Start Date or after the End Date, but they cannot click or open it. Learners can see the name, dates, and restrictions but cannot see the assignment description or attachments.


Submission & Completion
To input the submission settings, click on [Submission & Completion] in the right-hand column.
- Choose the assignment type:
- Individual or Group Assignment.
- Individual or Group Assignment.
- Select a Submission Type.
- Choose from the following submission types:
- File submission: Select this type if you want students to submit a file to the assignment folder.
- Text submission: Select this type if you want students to type their submission into the assignment text box and not submit a file.
- On paper submission: Select this type for papers that will be submitted in person. (You must indicate whether it will be manually marked complete by students, upon evaluation, or by due date.)
- Observed in Person: Select this type if you are observing an assignment in person. (You must indicate whether it will be manually marked complete by students, upon evaluation, or by due date.)
- Select Submission options:
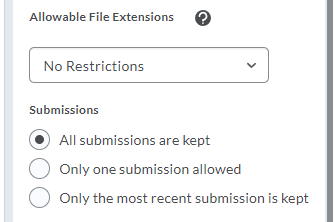
- Choose how many files you will allow per submission and whether those files are kept or discarded.

- Choose how many files you will allow per submission and whether those files are kept or discarded.
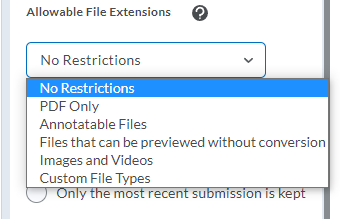
- You may restrict the file type that can be submitted. Choices include:
- PDF Only
- Annotatable files, which include all file types supported by the Annotation tool in Assignments.
File types supported by Annotations - Files that can be previewed without conversion
- Images and Videos
- Custom File Types
If an instructor chooses Custom File Extensions, they can enter file extensions that are allowed for file submissions. When this restriction is set, students are presented with a list of acceptable file extensions for their assignments. When a student attempts to upload a file other than the allowed type, an error message appears.
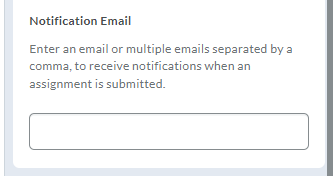
- Under Notification Email, you may also enter an email address to be notified whenever a new submission is uploaded to this folder.


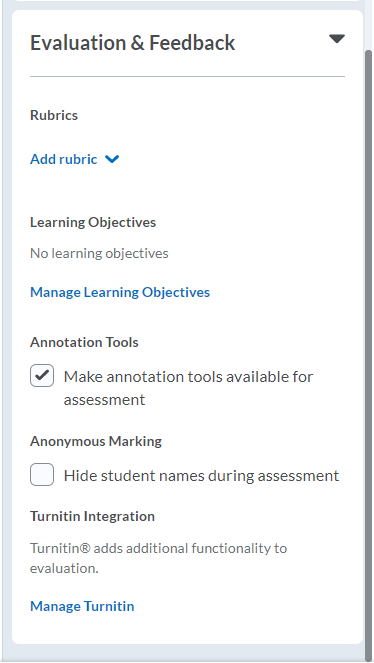
Evaluation & Feedback
To input feedback settings, click on [Evaluation & Feedback] in the right-hand column.
- For instructions on the Restrictions tab, see Setting Availability and Due Dates for an Assignment.
- For instructions on the Turnitin tab, see Using Turnitin with Assignments.
NOTE: If you associate the folder with a grade item, maintain consistency and avoid confusion for your students by matching the value of the Out Of field to the grade item's Maximum Points value and naming the grade item the same as the activity.

Add the Assignment to Your Content
- Go to a module in [Content].
- Click the [Add Existing Activities] button.
- Choose [Assignments].

- Choose the specific assignment to add.
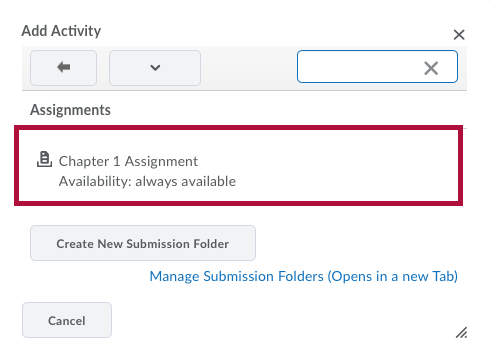
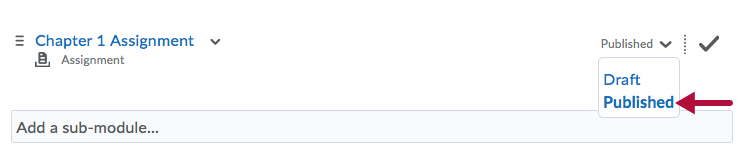
- The link to the assignment will be added to the module. Change the status of the link to Published to make it available to students.


Troubleshooting and Support
If you need additional assistance, contact the IT Service Desk at 281.318.HELP (4357).