Creating a Presentation
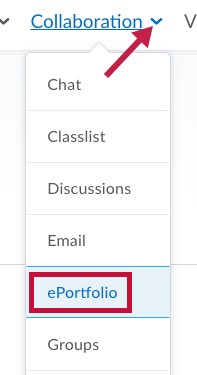
- Click on [Collaboration] on the NavBar and then choose [ePortfolio].
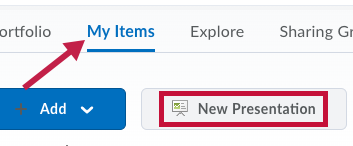
- Choose [My Items] and click on [New Presentation].
- Under Properties, enter a Name (required).
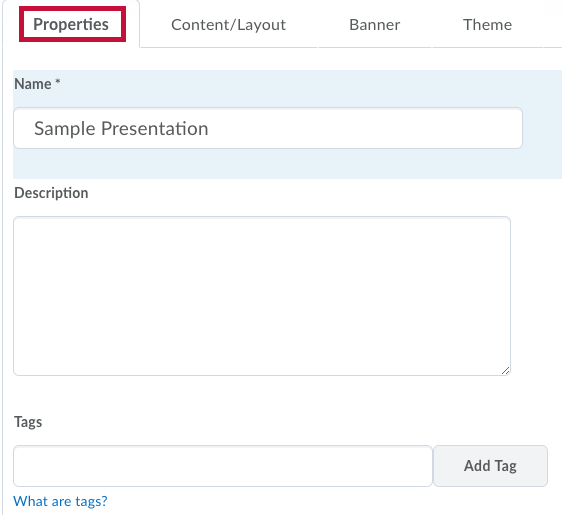
- Enter a Description (optional).
- Enter Tags (optional).
- Suggested entries: Presentation, Subject, Last Name
- Suggested entries: Presentation, Subject, Last Name
- Click the [Content/Layout] tab (the presentation is auto-saved when switching tabs). The [Edit Presentation Navigation] and [Edit Page Layout] links are both optional and most often left as default.
- Pages pane: This will contain each of the sections of the presentation.
- Content Area 1 pane: Contains the main body of content of the selected Page.
- Content Area 2 pane: Contains the minor body of content of the selected Page.

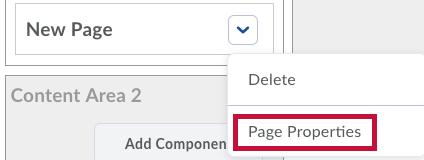
- Click the [down arrow] next to the default New Page, then click [Page Properties].
- Change the Title as needed then click [Save].
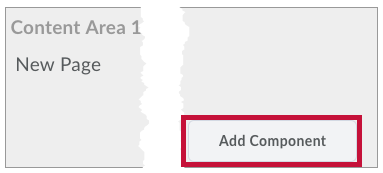
- Click [Add Component] under Content Area 1.
- Add the desired type of content.
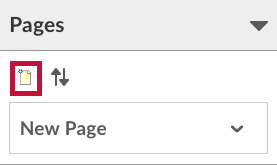
- To add a new page, click the [New Page] icon under the Pages pane.
- Change the title as needed and click [Save].
- The Content Area 1 and 2 panes will update to show the newly created page’s content.
- Repeat steps above to add content for this new content page.
- Content examples include:
- Artifacts
- Text Areas (HTML Editor)
- Form entry fields
- Reflections
- Content examples include:
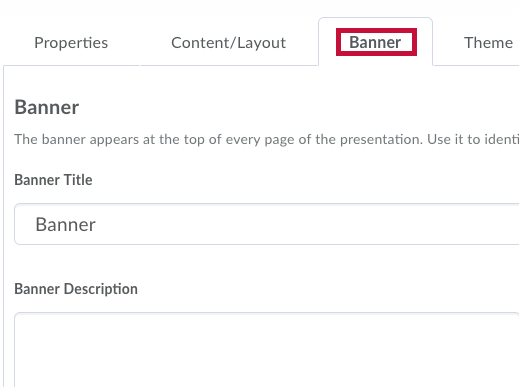
- Click the [Banner] tab, then enter a banner title and description. Both are optional but suggested.
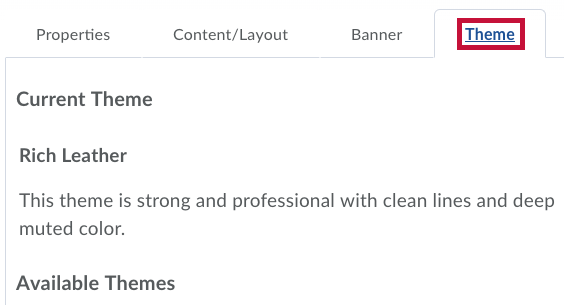
- Theme selection is optional.
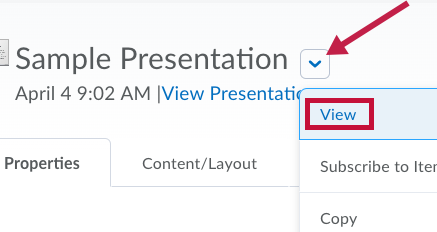
- To preview the presentation at any time, either:
- Click the [View Presentation] link near the title;

OR - Click the [down arrow] next to the title and choose [View].
- Click the [View Presentation] link near the title;
- Click [Close] to exit the presentation once you are finished editing it.


