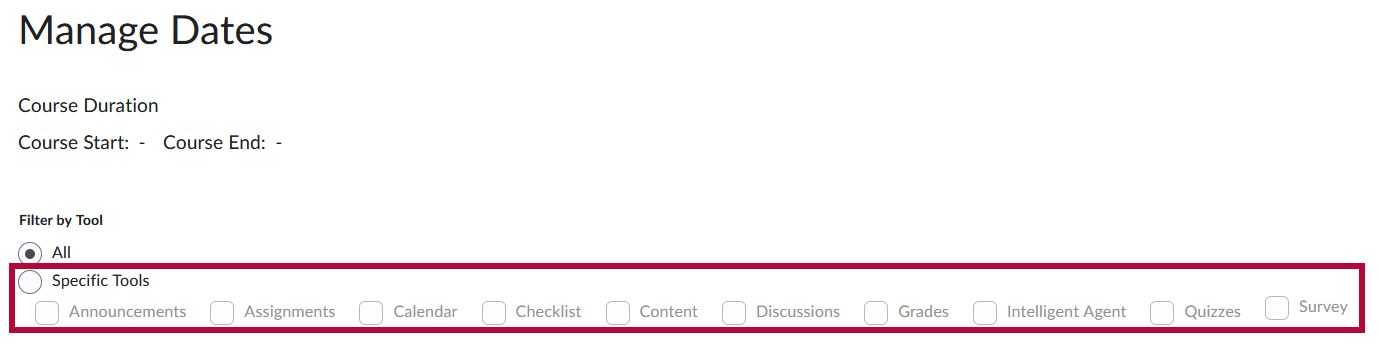
The Manage Dates tool can be used to edit dates for all of the following:
- Announcements
- Assignments
- Calendar
- Checklist
- Content
- Discussions
- Grades
- Quizzes
- Survey
- Intelligent Agents
NOTE: Intelligent agents that have a one-time run schedule, or repeat but have neither a Start Date nor an End Date, do not appear in Manage Dates and must be updated in the Intelligent Agents tool.
These course objects display in a grid that you can sort by any of the column headings or filter by a specific tool or by more advanced criteria. This enables you to update multiple availability dates based on specific criteria. (If you filter your course objects, any bulk changes you make apply only to the filtered results.)
Editing Dates in Manage Dates
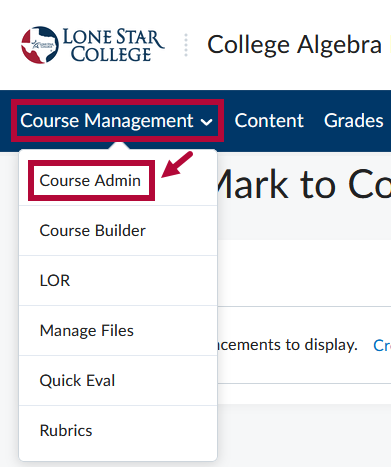
- In the D2L course, click [Course Management] in the Navbar, then choose [Course Admin].
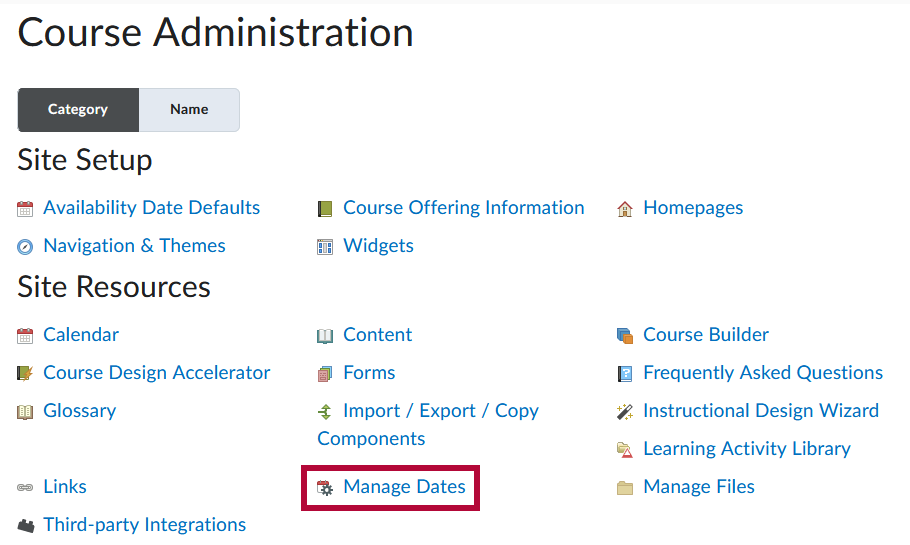
- Click [Manage Dates].
- The default selection is [All], but you may click the [Specific Tools] radio button to narrow your results based on tool.
NOTE: The course Start Date and End Date appear at the top under Course Duration.
- You may also click the [Show Advanced Filter Options] link to further narrow your results based on an object’s name, dates, duration, or Calendar status.

- Edit dates for the objects you wish to change:


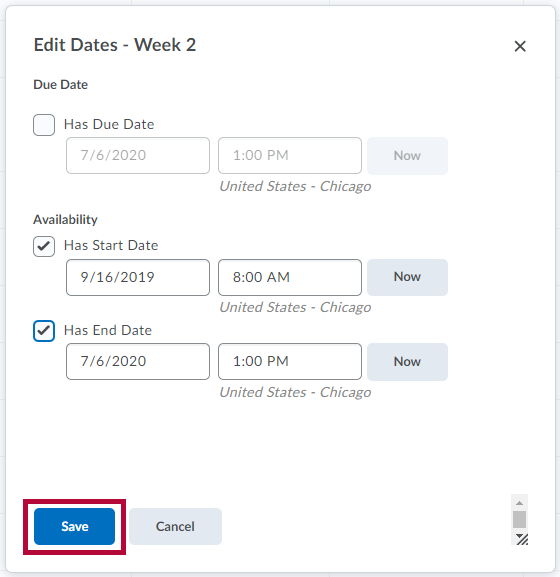
Option 1 (to edit a single item at a time)
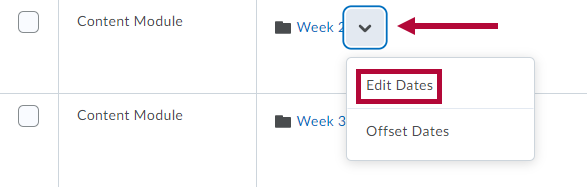
- In the context menu of the object you want to change, click [Edit Dates].
- Set or clear the Start Date, End Date, and/or Due Date (if available).
- Click [Save].

Option 2 (To edit more than one item at a time)
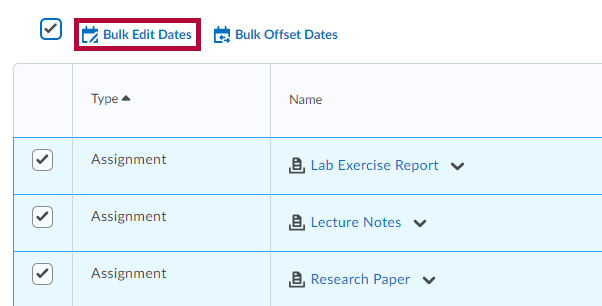
- Select one or more [✔] next to the object(s) you want to edit.
- Click [Bulk Edit Dates] from the top of the grid.
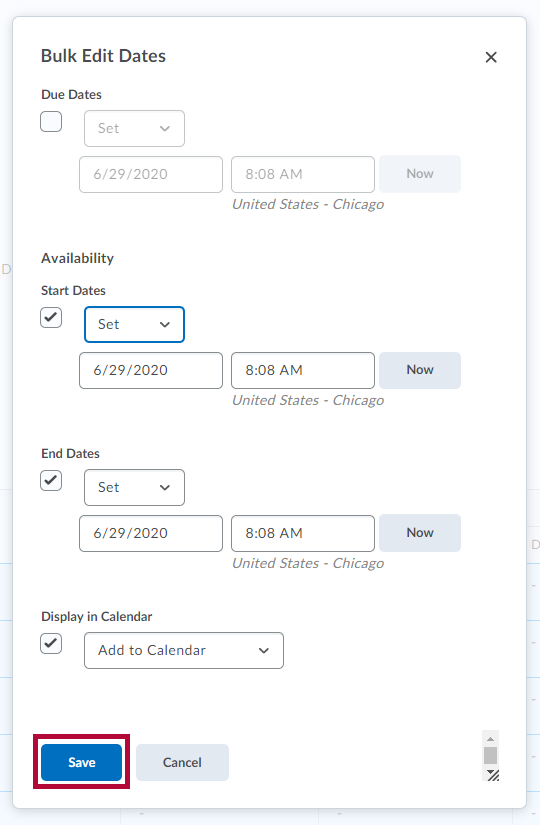
- Set or clear the Start Date, End Date, and/or Due Date (if available).
- Choose whether to add the object(s) to the Calendar tool.
- Click [Save].

See also Offsetting Course Dates using the Manage Dates Tool.