A checklist can contain important or required assignments, readings, or other items to complete. These items can guide students through each task they should complete for any given week, module, or unit. Each checklist contains one or more categories into which checklist items are organized. You must have checklist items for the checklist to show as completed on the content page.
Making a Checklist
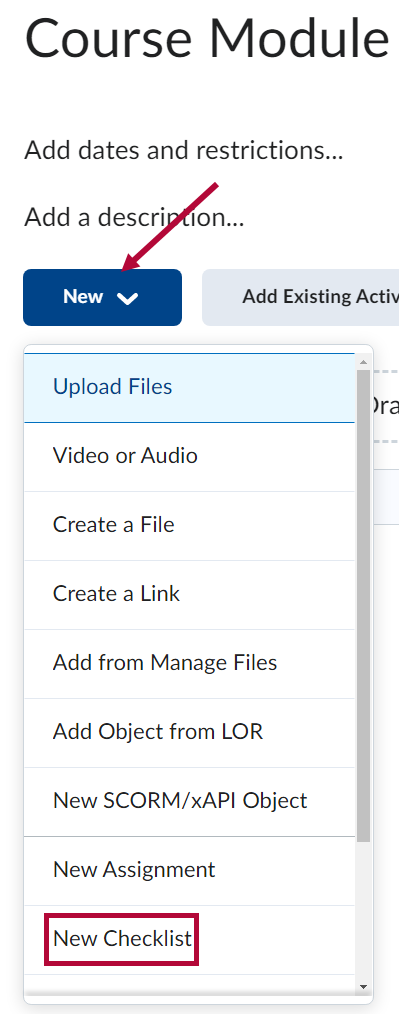
Checklists are part of a module in the Content area, so first either select or create a module.
- Click the [New] button and select [New Checklist].
- On the New Checklist page, enter the name of the new checklist in the [Name] field.
- You can enter an optional description in the [Instructions] box.
- Click [Save] to save the new checklist.

Adding a New List
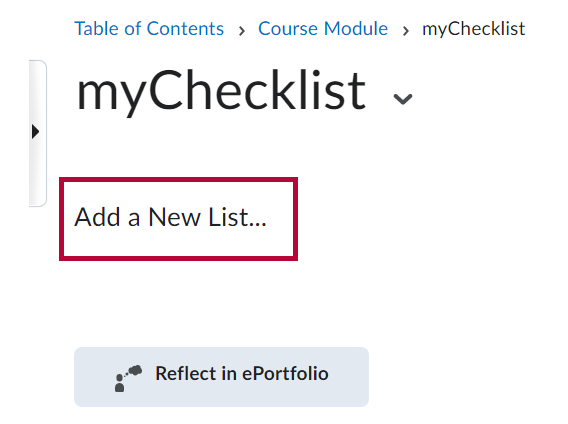
Every checklist must have a list, which serves as a category — a container for the actual checklist items.
- Open the new checklist and click [Add a New List].
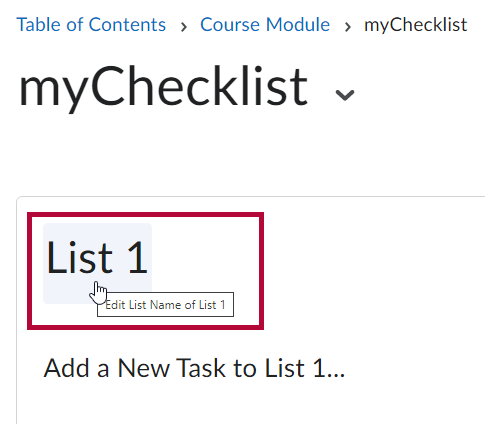
- Click on [List 1] to rename it.


Creating a Checklist Item
Click [Add a New Task to List 1].

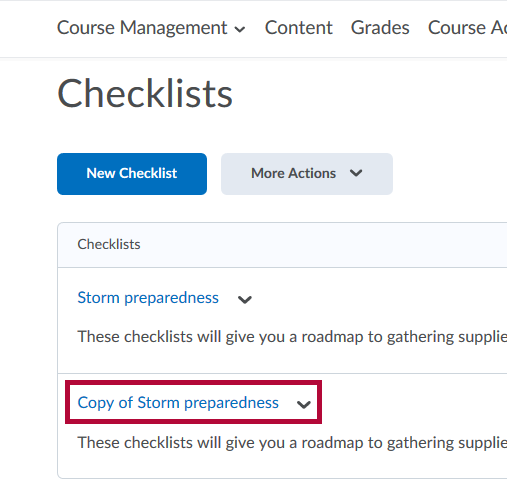
Editing or Copying an Existing Checklist
- On the Checklists page, use the dropdown menu on the checklist you want to edit or copy.
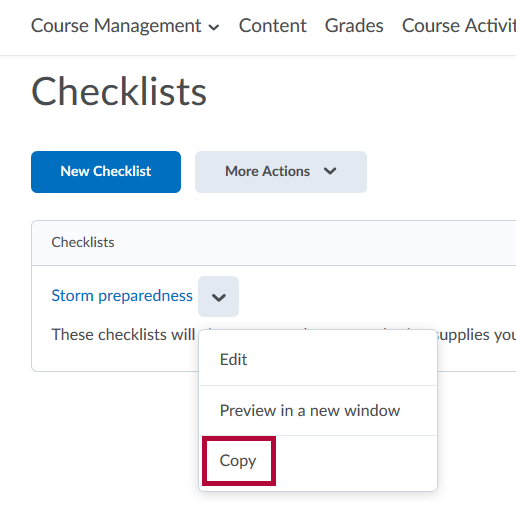
- Once you click [Copy], the checklist is duplicated and given a name indicating it is a copy. To make changes, click its name and edit the fields as you would any other checklist.
- You can also copy categories and items within an existing checklist. Click the title of the checklist you want to work in.
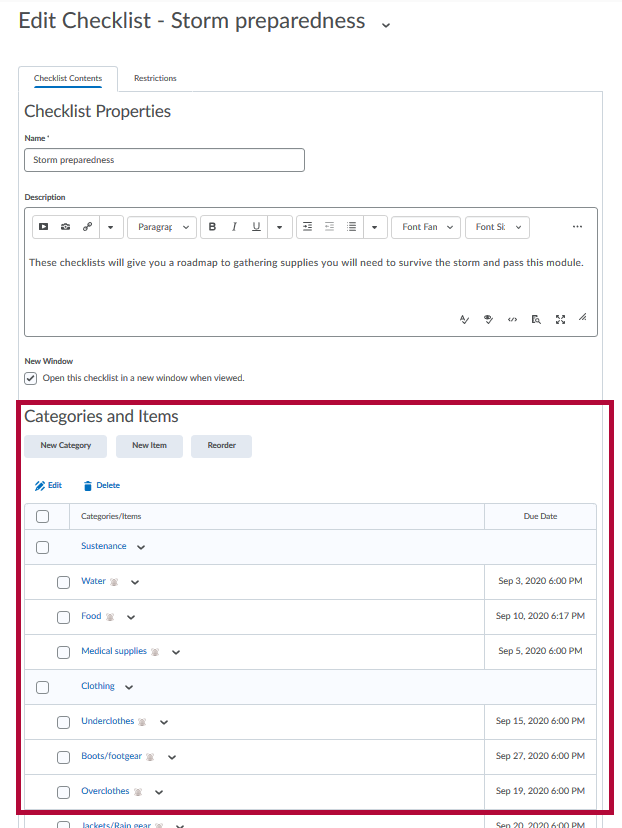
- Scroll down to Categories and Items and check the category or individual items you want to copy. Click [Copy] from the dropdown menu of the selected category or item.
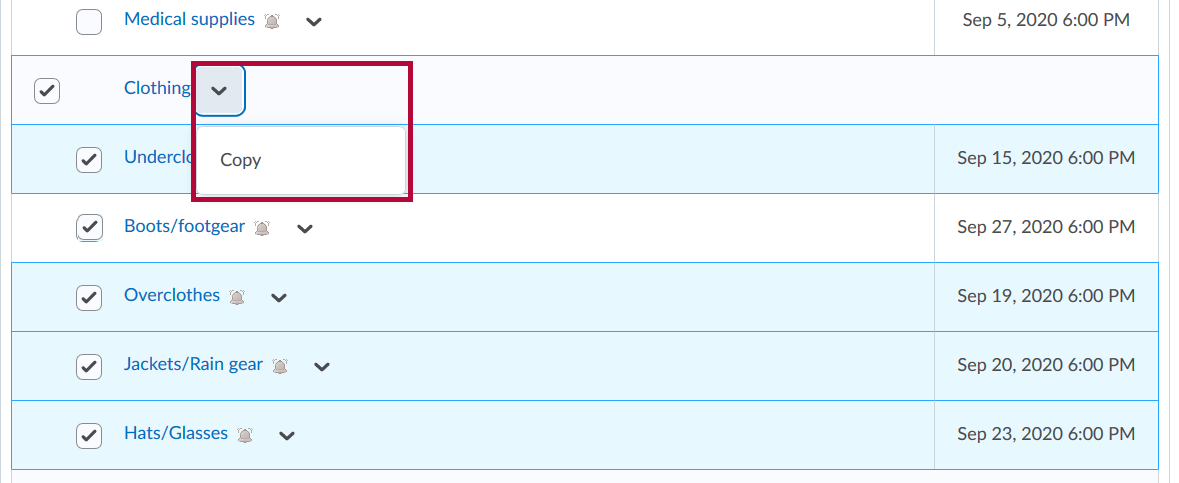
- The copied portion of the checklist appears at the bottom. Edit and customize it as needed, then click [Save and Close].


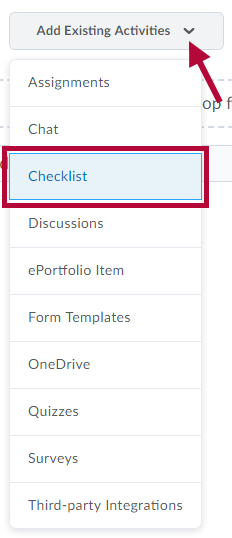
Adding a Checklist to a Module
For students to view a checklist, it must be added to a module or submodule.
- Within the course, navigate to the module where the checklist is to be located.
- Click [Add Existing Activities] and choose [Checklist].
- In the menu, select an already created checklist, or click [Create New Checklist].
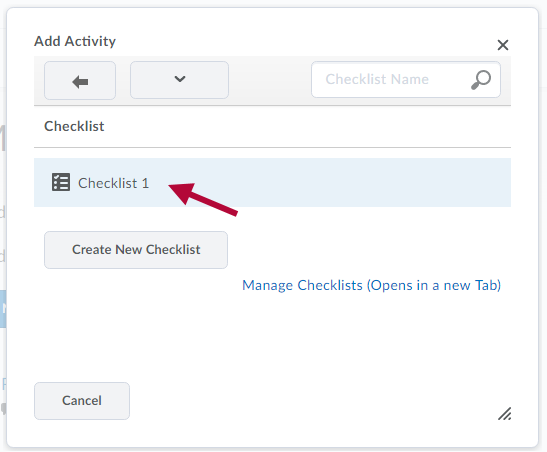
- If choosing [Create New Checklist], enter the name for the new checklist then click [Create and Insert].
- You will need to follow the steps in the Adding a New List and Creating a Checklist Item sections above to finish building the checklist.
- The checklist will be added to the module at the bottom.


Troubleshooting and Support
If you need additional assistance, contact the IT Service Desk at 281.318.HELP (4357).