
A rubric is a grading tool than contains criteria where students will be graded by particular levels of achievement.
Create a Rubric
- In the Navbar, click [Course Management] and select [Rubrics].
- Click the [New Rubric] button.
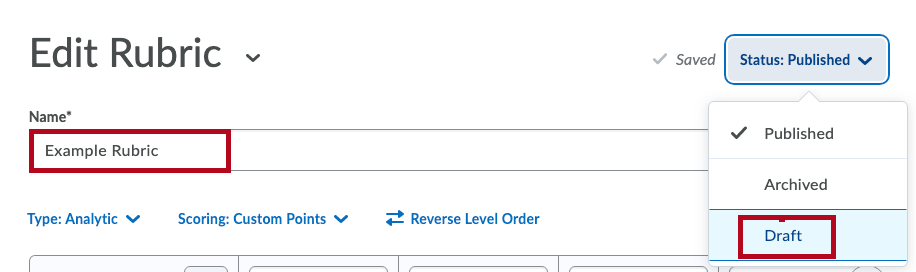
- Type your rubric's title into the Name box, then click [Published] to set the status of the rubric to [Draft]. (You will set the status to published when you have finished editing the rubric.) The rubric is auto-saved as you are working on it.TIP:Be as descriptive as possible with your name so you can identify the rubric later.
- Click the [Type] link and choose a rubric type
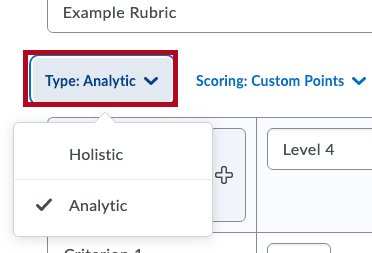
- Analytic - This rubric type breaks performance into multiple criteria. Each criterion is assessed separately, resulting in an overall assessment score. This is the most common rubric type.
- Holistic - These rubrics are less common. Performance is assessed holistically so several criteria would be considered, but only one overall assessment would be made.
- Click the [Scoring] link and choose a scoring type.
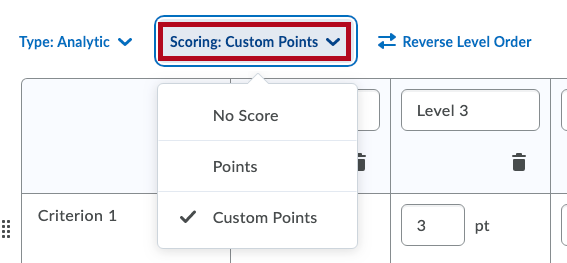
- No score – Use this option if you want to use the rubric just to give feedback, but want to assign a holistic grade to the assignment. You won’t be able to assign points to each category.
- Points – Use this option if you want all of your criteria to be weighted the same (i.e. if you had 4 criteria, they would all be worth 25% of the grade). This option will calculate a grade for your assignment.
- Custom Points – Use this option if your criteria have different weights (i.e. if your grammar is worth 15%, quality of thought is worth 50%, and formatting is worth 35%). This option will also calculate a grade for your assignment.
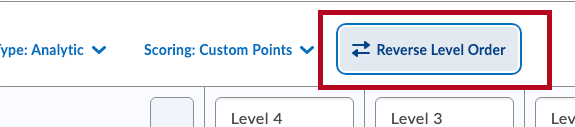
- Click the [Reverse Level Order] if you would like to reverse the direction in which points are awarded (i.e., Level 4 earns the highest points vs. earns the least points).
- You can enter your criteria and levels into the appropriate fields, as well as the number of points you want associated with each level. You can also optionally enter Initial Feedback, which will be added when you use the rubric for grading.
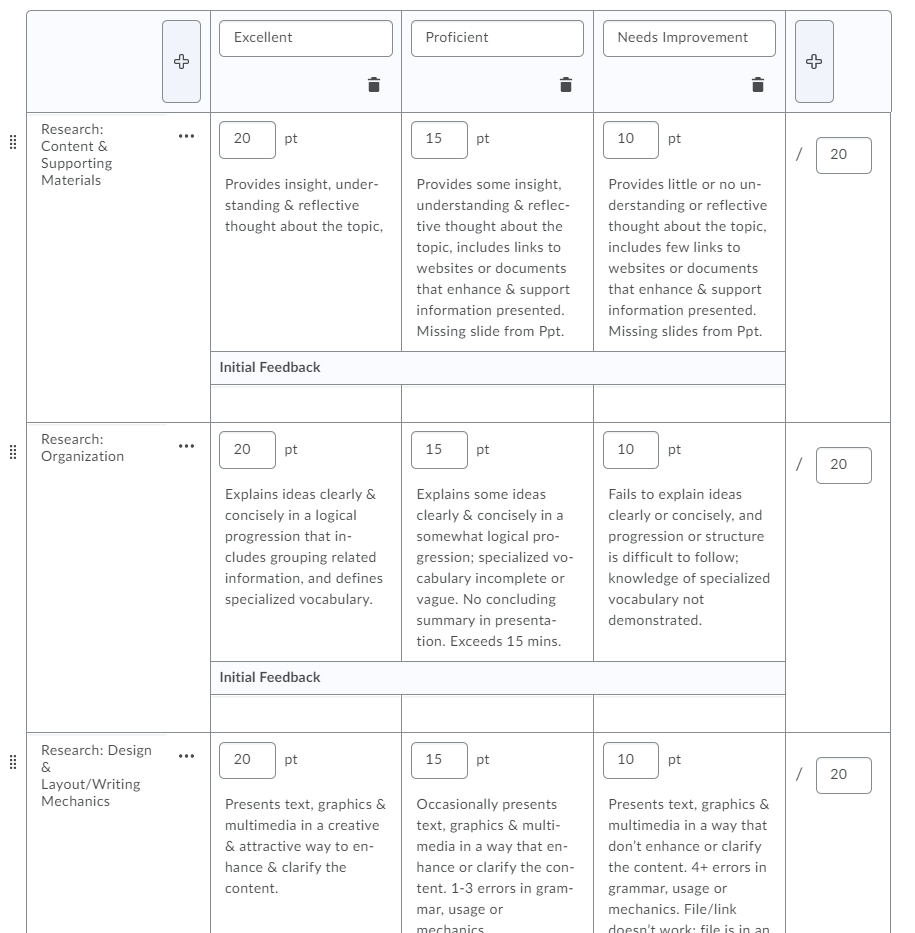
- Individual rows can be copied or deleted by using the dot menu in each criteria title field.
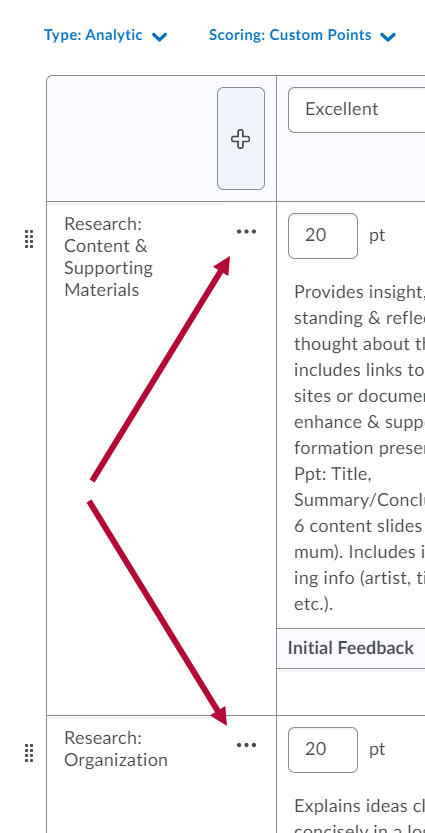
- Click the [Dot menu]
 to copy or delete the specific row.
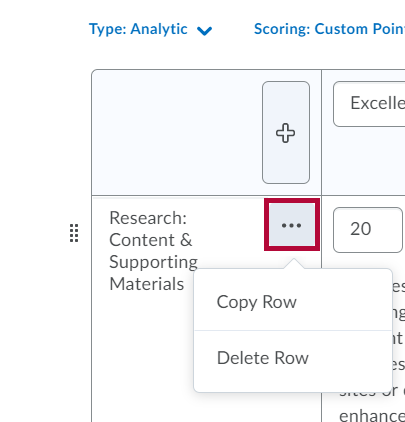 NOTE: If you copy a row, D2L creates the copied row with a default name that begins with "Copy of". You can change the name at the time of copying or later by clicking the row name.
 - Click the [+] button to add levels.
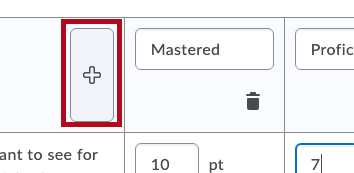
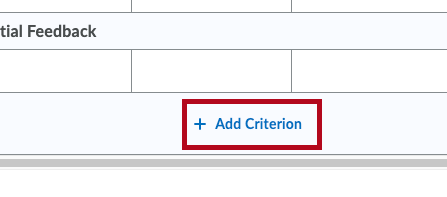
- Click the [+ Add Criterion] link at the bottom of the rubric template to add a criterion.
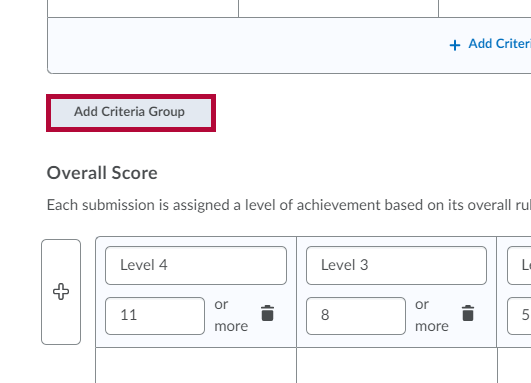
- To have multiple groups of criteria, click [Add Criteria Group] and type in the name of the group.
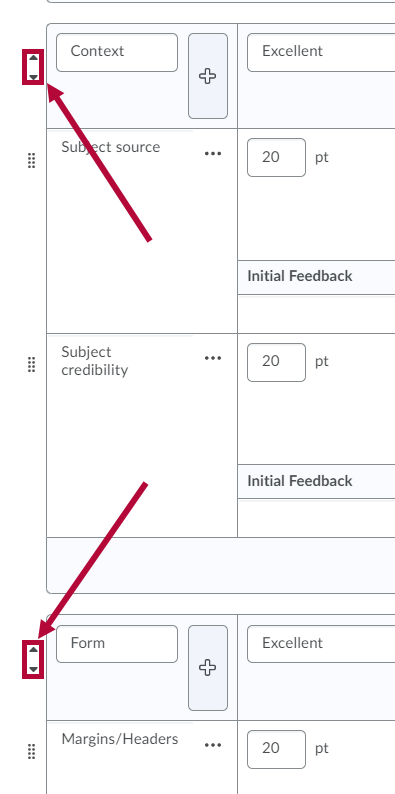
- If you create multiple groups you can easily reorder them via the movement arrows that appear beside each group name. If you only have one Criteria group you will not see the movement arrows.
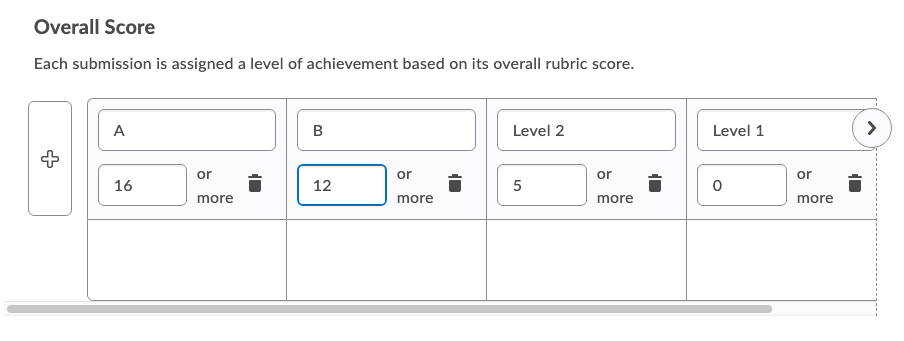
- In the overall score area, enter the level of achievement you would like to allocate for each score.
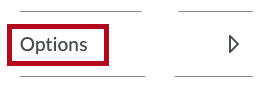
- Underneath the Overall Score area, you can click on [Options] for advanced options.
- You have several options for Rubric Visibility.
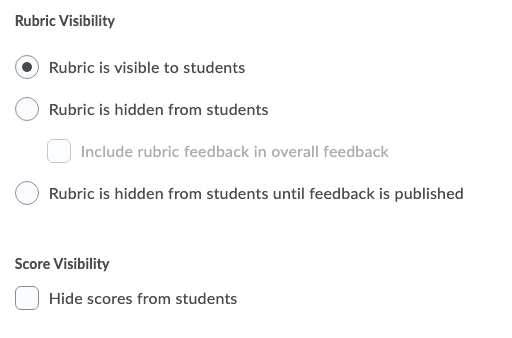 NOTE: You have the option to [Hide scores from students] – this means that students won’t be able to see how you graded them. The most effective practice is to leave this box unchecked so students can see how the grade was calculated.
 You can type in an optional description, which is for your use only and will not be seen by students.
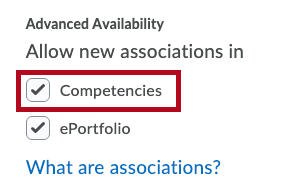
In the Advanced Availability area, there is an option called [Competencies]. This box must remain checked in order for your rubrics to work. Do not uncheck this box!
- When you are done, click the [Close] button.


 to copy or delete the specific row.


You can also copy a Criteria Group within a rubric. The new copy will be listed copied and display at the bottom of your Rubric as "Copy of XXX." You can then edit its properties, criteria, levels, and options. However, aligned learning outcomes are not copied when you copy a criteria group, so any learning outcomes must be reconnected if necessary.
Edit an Assessed Rubric
You can correct spelling errors, clarify wording, and make other minor changes that shouldn't impact the academic integrity of the rubric.
To edit an assessed rubric:
- On the Navbar, click [Rubrics].
- On the Rubrics page, click the rubric you want to edit.
- On the Edit Rubric page, click [Edit Text] in the alert banner at the top of the page.
- In the Edit this assessed rubric? dialog box, click [Edit Text].
- Make your changes.
- Click [Close]. Your edits save automatically.
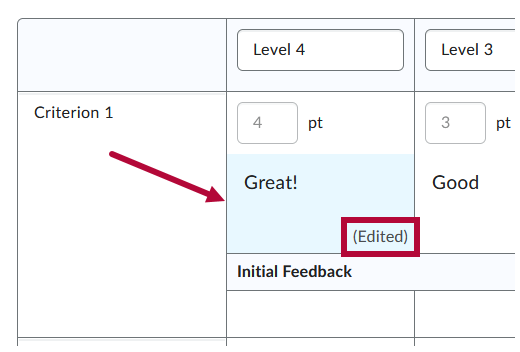
The red boxes in the following image indicate which fields you can edit:

When editing an assessed rubric, edited fields will be highlighted in blue and the text (Edited) will appear in the lower right corner. When you save and close the rubric, these edit indications will no longer appear.
NOTE: You can't make structural changes (such as adding evaluation levels or criteria), edit points, or add outcome alignments to assessed rubrics.
Copy a Criteria Group within a Rubric
- On any screen that allows editing the rubric, click the three dots under the name of the Criteria Group.
- Choose [Copy Criteria Group].
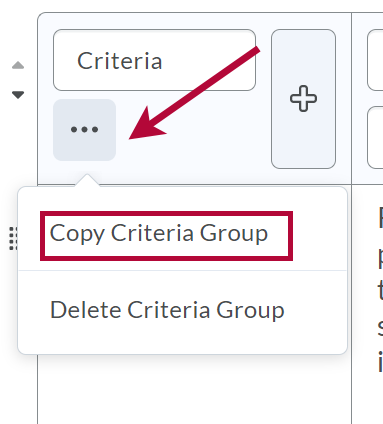
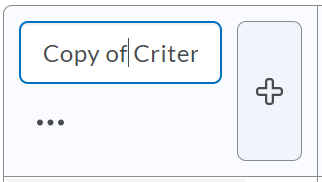
- The Criteria Group will be copied to the bottom of the rubric, titled "Copy of [Rubric Title]."


Finally, you can also delete a Criteria Group. (You cannot do this if you only have one Criteria Group, which would leave you with none.)
Delete a Criteria Group Within a Rubric
- On any screen that allows editing the rubric, click the three dots under the name of the Criteria Group.
- Choose [Delete Criteria Group].
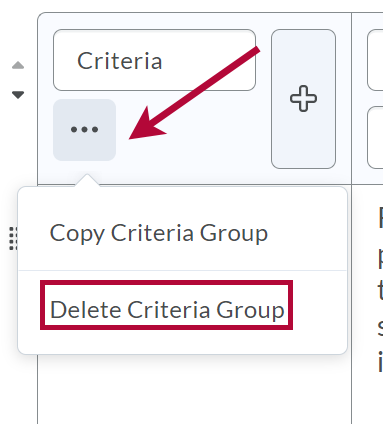
- A Criteria Group can not be restored once it has been deleted.

Publish Rubric for Use
Once complete, click the status link at the top right of the screen and choose [Published].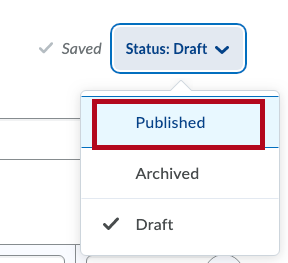
Print the Rubric
While in Preview mode, click [Print Rubric] at the top right of the rubric to print a copy.
![]()